

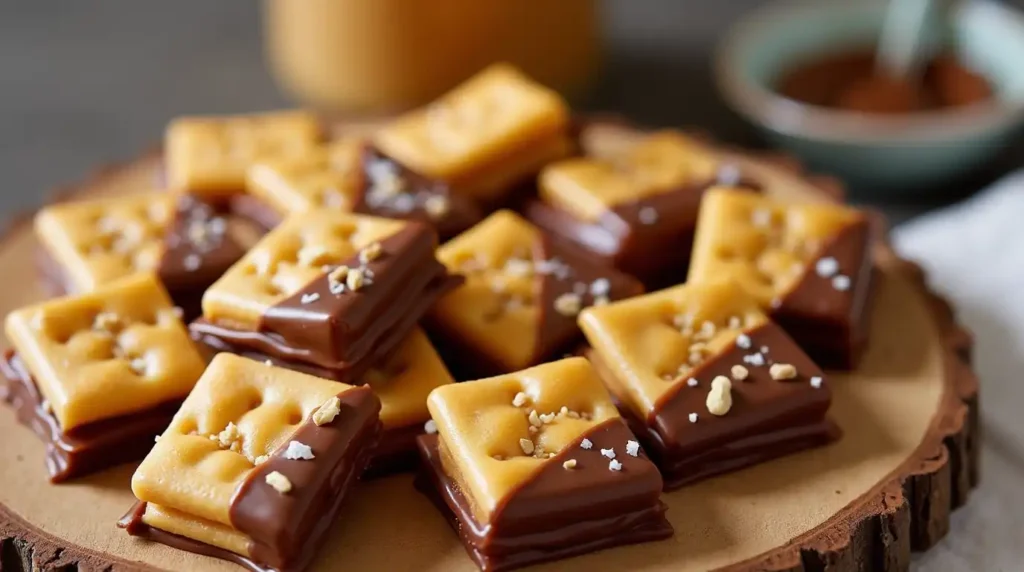
Sweet meets salty in the best way—if that’s your thing, you’re going to love these Cheez-It Peanut Butter Snacks. Crunch meets creaminess in this no-bake delight! With crispy Cheez-Its, velvety peanut butter, and a layer of luscious chocolate, it’s a snack you won’t want to share.
You don’t need much to make these—just a few simple ingredients and a couple of minutes!They are great for quick snacks, party desserts, or a creative way to enjoy Cheez-Its. Follow this simple guide to make the best Cheez-It Peanut Butter Snacks with step-by-step instructions and tasty variations.
Why This Cheez-It Chocolate Peanut Butter Combo Works Every Time
Sweet and Salty Perfection Cheez-It Peanut Butter Snacks
One of the best things about these Cheez-It Peanut Butter Snacks is the incredible contrast of flavors. The sharp, cheesy crunch of Cheez-It crackers pairs perfectly with the smooth, nutty richness of peanut butter. When coated in sweet, velvety chocolate, the combination creates an irresistible balance of flavors that keeps you coming back for more.
Sweet and salty snacks have a unique appeal because they stimulate multiple taste receptors at once. The saltiness from the Cheez-Its enhances the sweetness of the chocolate, making both flavors more pronounced. The peanut butter adds a creamy, slightly savory element that ties everything together. This contrast is why snacks like chocolate-covered pretzels or peanut butter cups are so popular—our taste buds crave balance.
Beyond taste, the texture also plays a big role in making these snacks satisfying. The crispiness of the crackers contrasts with the smooth peanut butter and the firm chocolate coating. Each bite delivers a crunch followed by a creamy, melt-in-your-mouth sensation, creating a delightful eating experience.
Whether you need a quick energy boost, a fun party treat, or a unique dessert, these Cheez-It Peanut Butter Snacks hit all the right notes. They’re the perfect blend of savory, sweet, crunchy, and creamy, making them impossible to resist.
Whip Up These Cheez-It Peanut Butter Bites in No Time!
One of the best things about these Cheez-It Peanut Butter Snacks is how simple they are to prepare. With just a few basic ingredients and no baking required, this recipe is perfect for anyone looking for a quick and hassle-free treat. Whether you’re making a last-minute dessert, a fun snack for the kids, or a party-friendly appetizer, you can whip these up in no time.
The process is straightforward and requires minimal kitchen tools. All you need to do is sandwich creamy peanut butter between two Cheez-It crackers, then dip or drizzle them with melted chocolate. Just let them set for a bit—and then dig in! No complicated steps, no fancy equipment, and no long prep times—just a simple, foolproof way to make a delicious snack.
Another great advantage of this recipe is its convenience. The best part? You probably have all the ingredients on hand already. Since Cheez-Its, peanut butter, and chocolate are common pantry staples, you can satisfy your snack craving without a special trip to the store. Plus, the whole process takes less than 20 minutes, including preparation and cooling time.
This makes it a perfect recipe for busy schedules. Whether you’re a parent looking for a quick after-school snack, a college student wanting a simple homemade treat, or someone who enjoys sweet and salty flavors, this snack fits the bill. Minimal effort, maximum flavor—what’s not to love?
Perfect for Any Occasion
These Cheez-It Peanut Butter Snacks are not only delicious but also incredibly versatile. Whether you need a quick treat, a party appetizer, or a homemade gift, this recipe fits any occasion. Their sweet and salty flavor, crunchy texture, and easy preparation make them a go-to snack for different events and gatherings.
Great for Parties and Gatherings
If you’re hosting a party or attending a potluck, these bite-sized snacks are an easy crowd-pleaser. The combination of cheesy, crunchy Cheez-Its, creamy peanut butter, and smooth chocolate creates a unique treat that stands out among traditional desserts. You can even customize them with different toppings like crushed nuts, sea salt, or a caramel drizzle to make them extra special.
A Quick and Satisfying Snack
When snack time calls, simple and satisfying is the winning combo. Whether it’s an afternoon pick-me-up, a study snack, or a post-workout bite, these Cheez-It Peanut Butter Snacks hit the spot. They provide a balance of protein, carbs, and healthy fats, giving you an energy boost without being too heavy. Crunchy, creamy, and chocolatey—one bite and you’ll be hooked!
Perfect for Holidays and Gifting
Homemade treats always make great gifts, and these snacks are no exception. They’re easy to package in small bags or decorative boxes, making them a fun and thoughtful gift for holidays, birthdays, or special occasions. You can even make a large batch in advance and store them in the fridge or freezer for later.
Kid-Friendly and Fun to Make
This recipe is so simple that even kids can join in the fun. They’ll love assembling the little peanut butter sandwiches and dipping them in chocolate. It’s a great way to get the whole family involved in the kitchen, and because there’s no baking required, it’s a safe and mess-free activity.
A Snack for Any Moment
Whether you’re enjoying a movie night, need a creative dessert for a potluck, or just want a quick, homemade snack, these Cheez-It Peanut Butter Snacks are the perfect solution. They’re easy, delicious, and versatile, making them a staple recipe for any occasion.
What You Need to Make These Irresistible Cheez-It Chocolate PB Bites
Cheez-It Crackers: The Perfect Crunchy Base
Cheez-It crackers are the foundation of this snack, providing the perfect balance of crunch, saltiness, and cheesy flavor. Their light, flaky texture adds a satisfying crispiness, making them an ideal contrast to the creamy peanut butter and smooth chocolate coating. Unlike traditional crackers, Cheez-Its bring a bold, savory taste that enhances the sweetness of the chocolate, creating an irresistible sweet-and-salty combination.
Why Use Cheez-It Crackers?
- Crunchy Texture – Their light, airy crunch adds a satisfying bite to every piece.
- Salty & Savory Flavor – The slight saltiness balances the sweetness of the chocolate, making the flavor more complex and addictive.
- Perfect Size – Their small, square shape makes them easy to work with and perfect for bite-sized snacks.
- Pairs Well with Peanut Butter – The cheesy, salty taste of Cheez-Its enhances the nutty richness of peanut butter, making each bite more flavorful.
Choosing the Right Type of Cheez-Its
While the original Cheez-It crackers work perfectly for this recipe, you can also experiment with different varieties:
- White Cheddar Cheez-Its – For a slightly sharper cheese flavor.
- Want more flavor? Try Extra Toasty Cheez-Its for that deep, slightly smoky crunch.
- Try Cheez-It Grooves if you’re looking for a snack with an even more intense crunch.
- Reduced Fat Cheez-Its – A lighter option with the same great taste.
Customizing with Cheez-Its
One of the best parts of this recipe is that it’s easy to customize using different Cheez-It varieties. You can also crush extra Cheez-Its and sprinkle them on top of the chocolate coating for added texture and an extra cheesy crunch.
A Snack Favorite with Endless Possibilities
Cheez-It crackers aren’t just great on their own—they’re a versatile ingredient that can be used in sweet and savory snacks. Their flaky, cheesy, and crispy texture makes them the ideal base for these Cheez-It Peanut Butter Snacks, turning a simple combination of ingredients into a flavor-packed treat.
Peanut Butter: The Creamy, Nutty Filling
Peanut butter is a key ingredient in these Cheez-It Peanut Butter Snacks, providing a rich, creamy texture and a delicious nutty flavor that pairs perfectly with both the salty crackers and the sweet chocolate coating. Its smooth consistency and slightly savory taste help balance the flavors, making this snack an irresistible combination of sweet, salty, and creamy goodness.
Why Peanut Butter Works So Well in This Recipe
- Creamy Texture – Peanut butter adds a smooth, luscious layer between the crunchy Cheez-Its, creating a satisfying contrast.
- Nutty & Savory Flavor – The slightly salty, roasted taste of peanut butter complements the cheesy crackers and enhances the sweetness of the chocolate.
- Great Binding Agent – It holds the Cheez-Its together, making it easy to dip them in chocolate without falling apart.
- Nutritional Benefits – Peanut butter is a good source of healthy fats, protein, and fiber, making this snack both delicious and slightly more filling than a typical dessert.
Choosing the Best Peanut Butter for This Recipe
While classic creamy peanut butter is the most commonly used option, you can customize the recipe based on your preference:
- Crunchy Peanut Butter – Adds an extra texture with small peanut pieces for more crunch.
- Natural Peanut Butter – A healthier option with minimal added sugar and no hydrogenated oils. Be sure to mix thoroughly before using.
- Honey or Flavored Peanut Butter – Honey-roasted or chocolate-flavored peanut butter can add an extra layer of sweetness.
Alternative Spreads for Variations
If you want to switch things up, try using different spreads for a fun twist:
- Almond Butter – A milder, slightly sweeter alternative to peanut butter.
- Cashew Butter – Adds a rich, buttery taste with a smooth texture.
- Nutella or Chocolate Hazelnut Spread – For an even sweeter, more chocolate-forward flavor.
- Sunflower Seed Butter – A nut-free option for those with allergies.
How to Use Peanut Butter in This Recipe
Spread, stack, snack! Layer a bit of peanut butter between two Cheez-Its and get ready for magic. Press them together gently so the peanut butter holds them in place. Be careful not to use too much peanut butter, as it can cause the crackers to slide apart when dipping them in chocolate.
Peanut butter is the glue that holds this snack together, adding a rich, nutty depth that makes these treats incredibly delicious. Whether you stick with classic peanut butter or experiment with other nut and seed butters, this ingredient is essential for achieving the perfect balance of flavors and textures in this sweet and salty snack.
For inspiration on different types of peanut butter or recipes, you could look at PeanutButterLovers.com.
Chocolate: The Sweet & Decadent Coating
Chocolate is the finishing touch that makes these Cheez-It Peanut Butter Snacks so indulgent. Not only does it add a layer of sweetness, but it also enhances the contrast between the salty, cheesy crackers and the creamy peanut butter. One bite, and you’re hooked—this flavor and texture combo is seriously addictive.
Moreover, chocolate helps bind the snack together, ensuring that the peanut butter-filled Cheez-Its hold their shape. Whether you dip the entire sandwich in chocolate or drizzle it lightly on top, it transforms a simple snack into something special. Because of its versatility, chocolate allows for endless flavor variations, making this treat customizable to your preferences.
Why Chocolate is Essential for This Recipe
There are several reasons why chocolate is a must-have ingredient in this snack. First of all, it provides the perfect balance of sweetness and richness. Additionally, it creates a satisfying texture contrast, as the smooth chocolate coating complements the crunchy crackers and creamy peanut butter. Most importantly, it brings all the flavors together, making the snack more enjoyable.
Here’s why chocolate works so well in this recipe:
- Enhances Flavor – The sweetness of chocolate softens the saltiness of the Cheez-Its, creating a harmonious blend of sweet and savory.
- Adds a Smooth Texture – Once the chocolate sets, it forms a velvety, melt-in-your-mouth layer that contrasts beautifully with the crunchy crackers.
- Holds Everything Together – Since peanut butter alone might not be enough to secure the crackers, chocolate acts as a binding layer, making the snack easier to eat.
- Customizable Options – There are several types of chocolate to choose from, allowing you to tailor the flavor to your liking.
Best Types of Chocolate to Use
Before choosing which chocolate to use, consider how sweet or rich you want the final snack to be. Although milk chocolate is the most popular option, other varieties can bring a different twist to the recipe.
- Milk Chocolate – This is the classic choice, offering a smooth, creamy sweetness that pairs beautifully with peanut butter.
- Dark Chocolate – If you prefer a richer, slightly bitter contrast, dark chocolate is an excellent option. Since it contains less sugar, it intensifies the salty-sweet balance.
- White Chocolate – For those who enjoy a sweeter, creamier alternative, white chocolate provides a delicious contrast to the salty crackers.
- Semi-Sweet Chocolate – This option is not too sweet, yet not too bitter, making it a great middle ground for those who like a balanced taste.
- Flavored Chocolate – If you want to be creative, try salted caramel chocolate, peanut butter-flavored chocolate, or even spicy chocolate for a unique twist.
Melting Chocolate the Right Way
To achieve a smooth, even coating, it’s important to melt the chocolate properly. While the process is simple, following the right steps ensures that the chocolate won’t burn or seize.
Two reliable methods for melting chocolate are:
- Microwave Method
- Begin by chopping the chocolate into small, evenly sized pieces.
- Next, place it in a microwave-safe bowl and heat in 30-second intervals, stirring after each round.
- Continue the process until the chocolate is completely melted and silky smooth.
- Double Boiler Method
- Start by filling a small pot with water and bringing it to a gentle simmer.
- Then, place a heatproof bowl over the pot, ensuring that it does not touch the water.
- After that, add the chocolate and stir consistently until it melts into a smooth, glossy texture.
Pro Tip: If your chocolate turns out too thick, try adding a small amount of coconut oil or vegetable shortening. This will help thin it out, making it easier to coat the snacks evenly.
How to Coat the Snacks with Chocolate
Once your chocolate is perfectly melted, it’s time to coat your Cheez-It Peanut Butter Snacks. Depending on your preference, you can choose from different coating styles:
- Full Coating – Completely dip the peanut butter sandwich in melted chocolate for a rich, candy-like treat. This method ensures every bite is fully covered in sweetness.
- Half-Dipped – If you want a more balanced flavor, dip only half of each snack, leaving part of the Cheez-It exposed. That way, you can enjoy both the cheesy crunch and the chocolate layer in a single bite.
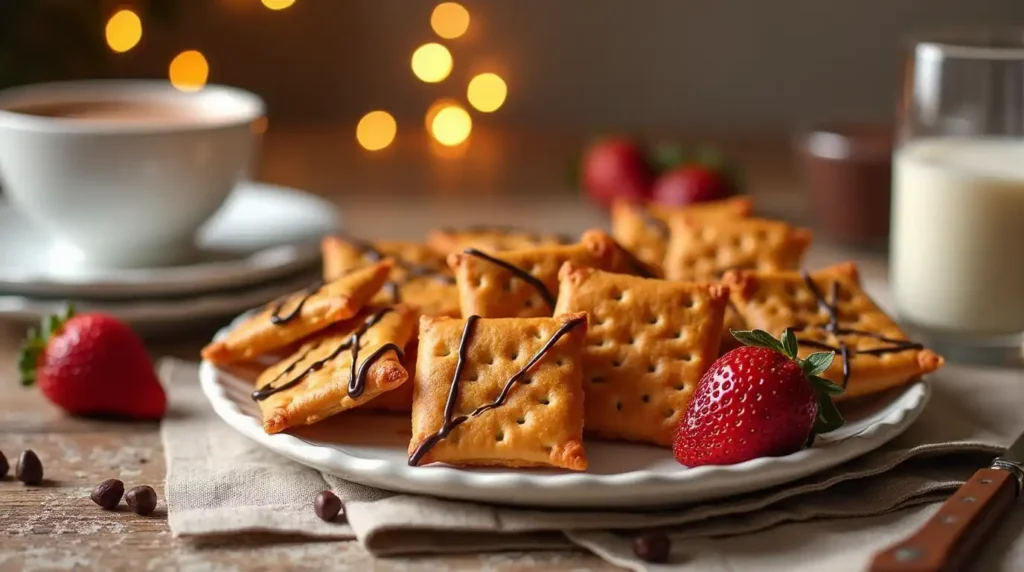
- Drizzled Chocolate – For a lighter chocolate touch, drizzle melted chocolate over the top instead of dipping. This method allows the flavors of the peanut butter and crackers to shine through while still adding a hint of sweetness.
Optional Toppings for Extra Flavor
To make these snacks even more exciting, consider adding toppings before the chocolate hardens. Not only do they enhance the flavor, but they also create a more visually appealing treat. Here are some delicious topping ideas:
- Sprinkle sea salt to enhance the sweet-and-salty contrast.
- For a boost in texture and flavor, sprinkle in chopped nuts—almonds, peanuts, or pecans work beautifully.
- Top with toasted coconut flakes for a hint of tropical sweetness.
- Crush extra Cheez-Its and sprinkle them over the chocolate for additional cheesy flavor.
- Drizzle caramel or extra peanut butter over the top for an extra layer of richness.
Chocolate: The Final Touch That Elevates the Snack
In the end, chocolate is the essential finishing touch that transforms these Cheez-It Peanut Butter Snacks from simple to spectacular. Not only does it enhance the flavor, but it also creates an indulgent texture that makes each bite more satisfying.
Furthermore, because chocolate comes in so many varieties, you can easily customize the recipe to suit your taste. Whether you love milk, dark, or white chocolate, this final coating takes the snack to another level.
By using the right type of chocolate and melting it properly, you can ensure a smooth, even coating that makes these snacks both delicious and visually appealing. So, if you’re looking for an easy way to elevate a simple snack, adding chocolate is always the best choice!
Simple Steps to Create Delicious Cheez-It Peanut Butter Snacks
Prepare Your Ingredients
Before you start making Cheez-It Peanut Butter Snacks, it’s essential to gather and prepare all your ingredients. Taking a few minutes to get everything ready will make the process smoother, faster, and more enjoyable. Proper preparation ensures that your snacks come together seamlessly and that each ingredient is used effectively.
Gather Your Ingredients
To make these delicious sweet and salty treats, you will need the following:
- Cheez-It Crackers – These act as the crispy, cheesy base of the snack. Be sure to use the original variety or experiment with flavors like White Cheddar or Extra Toasty for a unique twist.
- Peanut Butter – Choose between creamy or crunchy peanut butter based on your preference. Make sure it’s at room temperature, as this makes it easier to spread.
- Chocolate – You can use milk, dark, semi-sweet, or white chocolate for coating. Chop it into small, uniform pieces to make melting quicker and more consistent.
- Optional Toppings – If you want to customize your snacks, have sea salt, crushed nuts, caramel drizzle, or extra crushed Cheez-Its on hand for garnishing.
Set Up Your Workstation
Having a clean and organized workspace will make assembling these snacks much easier. Follow these steps to get your station ready:
- Line a Baking Sheet – Place a sheet of parchment paper or wax paper on a baking tray. This prevents the chocolate-covered snacks from sticking and makes cleanup effortless.
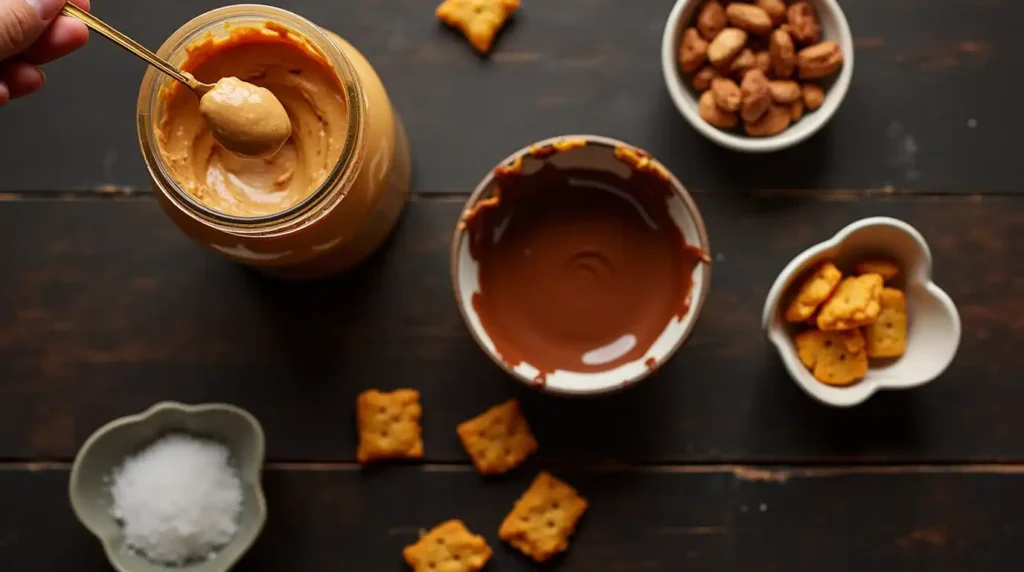
- Arrange Your Ingredients – Set out the Cheez-Its, peanut butter, and melted chocolate in separate bowls for easy access.
- Prepare Dipping Tools – If you’re fully coating the snacks in chocolate, have a fork or dipping tool ready to help lift them out of the melted chocolate without making a mess.
- Chill Space for Setting – Clear some space in the fridge or freezer, as you’ll need a cool place for the chocolate to harden.
Prepping the Peanut Butter & Chocolate
- Peanut Butter: Stir it well before using to ensure an even consistency. If it’s too thick, you can slightly warm it in the microwave for a few seconds to make it easier to spread.
- Chocolate: Melt your chocolate using either the microwave method (heating in short bursts and stirring) or the double boiler method (using steam from simmering water to gently melt the chocolate).
By preparing your ingredients ahead of time, you’ll make the assembly process smoother and more efficient. Once everything is ready, you can move on to assembling your Cheez-It Peanut Butter Snacks without interruptions!
Assemble the Snacks
Now that your ingredients are prepared, it’s time to start assembling your Cheez-It Peanut Butter Snacks. This step is simple, but taking the time to assemble them properly ensures that each bite has the perfect balance of crunchy, creamy, sweet, and salty flavors.
1: Lay Out the Cheez-It Crackers
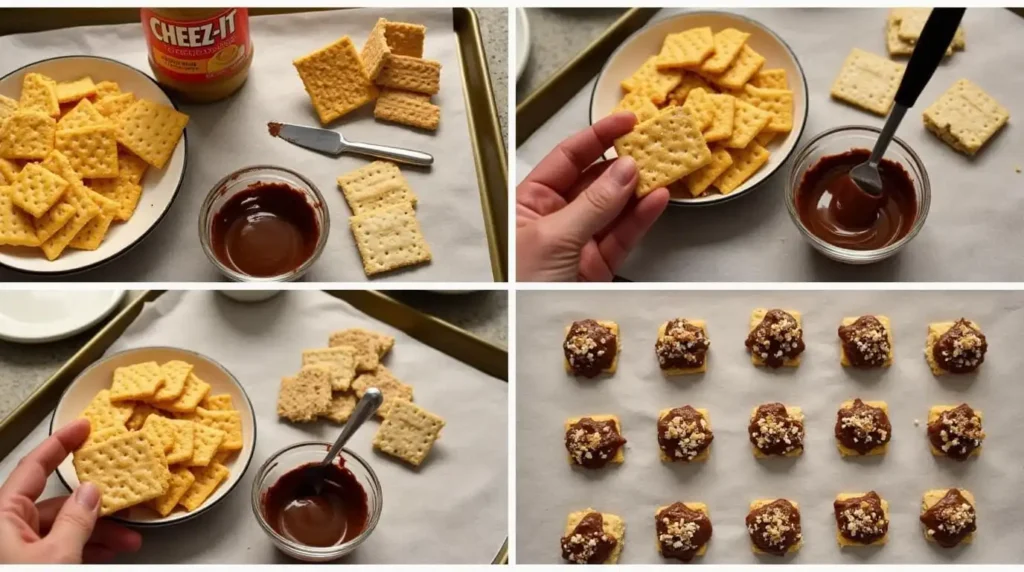
Start by arranging half of the Cheez-It crackers on a flat surface, such as a parchment-lined baking sheet or a clean cutting board. Make sure they are evenly spaced and not overlapping so that it’s easy to add the peanut butter.
2: Spread the Peanut Butter
- Using a small spoon, butter knife, or piping bag, spread a small dollop of peanut butter onto the center of each Cheez-It cracker.
- If you prefer a thicker, creamier filling, add a slightly larger amount of peanut butter. However, avoid overloading the crackers, as too much peanut butter may cause the sandwiches to slide apart when dipped in chocolate.
- If using crunchy peanut butter, ensure that the peanut chunks are evenly distributed so that the crackers stay level when stacked.
3: Create the Sandwiches
- Place a second Cheez-It cracker on top of each peanut butter-covered cracker, gently pressing down to create a sandwich.
- Be careful not to press too hard, as this could cause the peanut butter to squeeze out from the sides. A light press is enough to hold them together while still keeping their shape.
- Continue this process until all of the sandwiches are assembled.
4: Chill the Sandwiches (Optional, But Recommended)
Although not required, chilling the sandwiches for 5-10 minutes before dipping them in chocolate can help them hold their shape better. This step is especially useful if your kitchen is warm or if the peanut butter is slightly runny. Simply place the assembled sandwiches in the refrigerator or freezer for a few minutes to firm up before moving on to the next step.
By taking the time to assemble the snacks properly, you ensure that every bite delivers the perfect combination of crispy Cheez-It crackers, smooth peanut butter, and delicious chocolate coating. Now, you’re ready for the next step: dipping them in melted chocolate for the ultimate finishing touch!
Melt the Chocolate
Melting the chocolate correctly is crucial for achieving a smooth, velvety coating on your Cheez-It Peanut Butter Snacks. Although this process is straightforward, following the right steps will prevent issues like burning or clumping. Consequently, your snacks will look and taste even better once the chocolate sets.
Choose Your Preferred Melting Method
You have two main options for melting chocolate: the microwave method and the double boiler method. Both are effective, yet each offers its own advantages. Decide which method works best for you based on your kitchen setup and comfort level.
Microwave Method
- Prepare the Chocolate
First, chop the chocolate into small, uniform pieces. Doing this allows the chocolate to melt smoothly and consistently, without any clumps. - Heat in Intervals
Next, place the chocolate in a microwave-safe bowl. Warm it in 20 to 30-second intervals, stirring between each to ensure a smooth, even melt. - Avoid Overheating
Because chocolate can burn easily, stop heating as soon as most of it is melted. In fact, the residual heat will melt the remaining pieces as you stir.
Tip: If you notice the chocolate thickening or becoming grainy, add a small amount of coconut oil or vegetable shortening. This not only thins the chocolate but also gives it a silkier texture.
Double Boiler Method
- Set Up the Double Boiler
Begin by filling a small pot with a few inches of water. Next, heat the water until it reaches a gentle simmer. - Place a Heatproof Bowl
Afterward, choose a heatproof bowl that can sit on top of the pot without touching the water. Carefully place the chocolate in this bowl. - Stir Gently
Meanwhile, stir the chocolate gently with a spatula or spoon as it melts. This approach helps distribute the heat evenly, thus preventing scorching.
Tip: If you add any flavor extracts—such as vanilla, mint, or almond—stir them in once the chocolate is mostly melted. Doing so will allow the flavors to blend thoroughly.
Achieving a Smooth, Even Finish
Regardless of the method you select, keep in mind that slow and steady heat prevents the chocolate from overheating. Moreover, stirring consistently helps distribute the warmth and melt the chocolate evenly. Once you see that the chocolate is fully melted, remove it from the heat source to avoid scorching.
By taking the time to melt the chocolate carefully, you’ll create a luxurious coating for your Cheez-It Peanut Butter Snacks. As a result, each crunchy, peanut-buttery bite will be enhanced by a sweet, silky layer of chocolate that tastes every bit as delightful as it looks.
Dip & Set
Now that you have perfectly melted chocolate and assembled Cheez-It Peanut Butter sandwiches, it’s time to give them their deliciously indulgent coating. This step not only adds a velvety sweetness but also helps keep the sandwiches intact, ensuring that each bite is as satisfying as possible.
Step 1: Prepare Your Work Area
Before you begin dipping, organize your workspace to avoid unnecessary mess. Place a parchment-lined baking sheet nearby so you can easily transfer the coated snacks. This setup makes cleanup simpler and helps the chocolate set without sticking to the tray.
Step 2: Dip the Sandwiches
- Submerge or Drizzle
- Full Dip: For a candy-like shell, use a fork or dipping tool to lower the peanut butter sandwich into the bowl of melted chocolate. Make sure it’s fully submerged. Then, lift it out and gently tap off any excess chocolate.
- Half-Dipped: If you prefer a balance of flavors, dip only half of the sandwich in chocolate. This option leaves some of the cracker exposed and offers a nice visual contrast.
- Drizzle Method: Instead of dipping, drizzle the melted chocolate over the top. This technique uses less chocolate yet still adds plenty of sweetness.
- Remove Excess Chocolate
After dipping, allow the extra chocolate to drip off for a moment.A gentle tap of the fork against the bowl helps shake off extra chocolate, making your treats look polished and mess-free.
Step 3: Place the Coated Snacks
Carefully lay each dipped sandwich onto the prepared parchment-lined baking sheet, giving them space to set.Be sure to space them out so they don’t stick together. If any sandwiches shift or tip, use a toothpick or the back of a spoon to reposition them.
Step 4: Optional Toppings
While the chocolate is still soft, you can add toppings to personalize your snacks. For example, a light sprinkle of sea salt highlights the sweet-and-salty contrast, while crushed nuts or extra Cheez-Its add an appealing crunch. A drizzle of caramel or peanut butter can also elevate both the look and taste of your finished snacks.
Step 5: Let Them Set
Finally, place the baking sheet in the refrigerator or freezer to allow the chocolate to harden. Depending on how thick the chocolate layer is, this might take anywhere from 10 to 30 minutes. Once the coating is firm, the snacks are ready to enjoy!
Why This Step Matters
- Locks in Flavor: Dipping the sandwiches in chocolate creates a sealed exterior that keeps the peanut butter fresh and flavorful.
- Improves Texture: The crisp snap of the hardened chocolate contrasts beautifully with the crunchy crackers and creamy filling.
- Customizable Finishes: During this stage, you can experiment with various toppings and drizzles, turning a simple recipe into a custom treat that suits your taste preferences.
By taking a few extra moments to dip and set your snacks properly, you’ll ensure they have the ideal combination of textures and flavors. As soon as the chocolate solidifies, your Cheez-It Peanut Butter Snacks are officially complete—and ready to be savored.
How to Customize Cheez-It Peanut Butter and Chocolate Treats
Flavor Variations
When it comes to Cheez-It Peanut Butter Snacks, you can easily customize the flavors to suit your personal preferences. Best of all, experimenting with different add-ins gives this simple recipe endless possibilities and keeps it feeling fresh.Here are a few ideas to help you create unique twists on this sweet-and-salty treat:
- Nutella & Hazelnuts
If you’re a fan of chocolatey spreads, replace peanut butter with Nutella. Additionally, sprinkle crushed hazelnuts on top of the melted chocolate for extra crunch and a richer nutty flavor. - Almond Butter & Coconut
If you prefer a slightly milder taste, switch peanut butter for almond butter. Furthermore, top each snack with toasted coconut flakes to add a sweet, tropical flair. - Caramel Drizzle
For those who have a serious sweet tooth, drizzle a thin layer of caramel sauce over the chocolate-coated crackers. Consequently, each bite delivers a decadent burst of sweetness that contrasts beautifully with the salty Cheez-Its. - Chocolate on Chocolate
If you can’t get enough chocolate, stir in a small handful of mini chocolate chips or chocolate chunks with the peanut butter. As a result, you’ll get bursts of melted chocolate in every bite before you even dip the crackers in their final chocolate coating. - Spicy Peanut Butter
For a bold kick, mix a dash of cayenne pepper or a drizzle of hot honey into your peanut butter. However, remember to taste-test as you go to ensure the spice level doesn’t overpower the rest of the flavors.
No matter which variation you try, feel free to mix and match different toppings or coatings. Ultimately, the goal is to enjoy the sweet, salty, and sometimes spicy flavors that make Cheez-It Peanut Butter Snacks so hard to resist!
Serving Cheez-It Peanut Butter Snacks in Fun and Creative Ways
Choosing the right toppings can take your Cheez-It Peanut Butter Snacks to the next level. Not only do toppings add extra flavor, but they also introduce new textures and visual appeal. In this section, you’ll discover why toppings matter and explore several easy ways to personalize your snacks.
1. Why Toppings Matter
Toppings turn a simple chocolate-coated cracker sandwich into a special treat. By incorporating sweet, salty, crunchy, or colorful elements, you can diversify the overall taste and appearance. Moreover, toppings can help highlight specific flavors—such as emphasizing the sweet-and-salty contrast or adding a layer of nuttiness.
2. Sea Salt
- Flavor Profile: Adds a pronounced salty edge that amplifies the sweetness of the chocolate.
- Texture Boost: Coarse sea salt crystals provide a subtle crunch.
- Application Tip: Sprinkle sea salt right after dipping your snacks so the crystals adhere before the chocolate sets.
3. Crushed Nuts
- Flavor Profile: Introduces a rich, toasty element that complements peanut butter.
- Texture Boost: Offers extra crunch and a satisfying bite.
- Flavor Boost: Toast the nuts lightly before mixing them in to unlock a deeper, richer taste.
4. Toasted Coconut Flakes
- Flavor Profile: Delivers a mellow sweetness and a tropical twist.
- Texture Boost: Adds a crisp, airy bite that pairs well with crunchy Cheez-Its.
- Application Tip: Sprinkle the flakes while the chocolate is still wet, ensuring they stick securely.
5. Caramel or Peanut Butter Drizzle
- Flavor Profile: Heightens sweetness and provides an indulgent finish.
- Texture Boost: Caramel can set to a chewy consistency, while warm peanut butter adds a smooth layer on top.
- Application Tip: Use a spoon or small piping bag to create thin drizzles for a professional look.
6. Crushed Cheez-Its
- Flavor Profile: Reinforces the salty, cheesy element at the core of this snack.
- Texture Boost: Provides even more crunch on top of an already crispy sandwich.
- Application Tip: Lightly press the crumbs into the chocolate to secure them in place.
7. Colorful Sprinkles or Edible Glitter
- Flavor Profile: Primarily adds sweetness, though taste can be mild.
- Texture Boost: Creates a fun, crunchy pop—especially when using larger sprinkles.
- Application Tip: Best for celebrations or themed parties, as they add a playful, festive flair.
Mix and Match for Unlimited Possibilities
Feel free to combine any of these toppings to create new flavor profiles. For instance, you might pair sea salt with caramel drizzle for an upscale salted-caramel vibe, or mix toasted coconut with crushed nuts for extra crunch and a tropical twist. Ultimately, the goal is to enjoy a snack that fits your taste while highlighting the irresistible sweet-and-salty nature of Cheez-It Peanut Butter Snacks.
Storing Cheez-It Peanut Butter and Chocolate Snacks for Maximum Freshness
After putting in the effort to make your Cheez-It Peanut Butter Snacks delicious, you’ll want to store them properly so they stay fresh and tasty. The right storage method helps preserve both flavor and texture, ensuring that the crackers remain crunchy and the chocolate coating stays intact.
1. Room Temperature vs. Refrigerator
- Room Temperature (Short-Term): If you plan to enjoy these snacks within a few days, store them in an airtight container at room temperature. This prevents them from absorbing moisture and keeps the crackers crispy.
- Refrigerator (Longer Freshness): If you need them to last a bit longer—up to a week—the fridge is a great option. However, place them in a sealed container or zip-top bag to protect against humidity and refrigerator odors.
2. Preventing Sticking
Because these snacks are often chocolate-dipped, it’s crucial to keep them from sticking together. Place sheets of parchment paper or wax paper between layers in your container. This barrier stops the chocolate from merging, helping the snacks maintain their shape.
3. Freezing for Extended Storage
If you want to store your snacks for more than a week, consider freezing them. Line a freezer-safe container with parchment paper, arrange the snacks in a single layer, and add another layer of paper on top if needed. Moreover, ensure the container is tightly sealed to prevent freezer burn.
4. Thawing and Serving
When you’re ready to enjoy your frozen snacks, transfer them to the refrigerator or leave them on the counter for about 15–20 minutes. This gradual thawing process helps prevent condensation, which can make the crackers soggy. Finally, serve them slightly chilled or at room temperature, depending on your preference.
Bottom Line
Whether you’re storing them for a day or a month, keeping your Cheez-It Peanut Butter Snacks fresh and crunchy is all about controlling moisture and temperature. With these tips, you can extend their shelf life and ensure every bite remains irresistibly crisp and flavorful.
Serving Suggestions
Although Cheez-It Peanut Butter Snacks are already delicious on their own, there are several ways to present and enjoy them that can elevate your snacking experience. Below are a few ideas to help you serve these sweet-and-salty bites in style.
1. Party Platters and Dessert Tables
If you’re hosting a get-together, arrange the snacks on a decorative tray alongside other finger foods or desserts. Furthermore, consider labeling them with small signs so guests know they’re in for a sweet-and-salty combination. Pair them with fruit skewers, mini cupcakes, or a chocolate fountain for an eye-catching and diverse spread.
2. Snack Break Pairings
These crunchy, chocolatey treats go well with both warm and cold beverages. For instance, serve them with a cup of coffee or hot chocolate for a cozy afternoon indulgence. Alternatively, pair them with a glass of cold milk to highlight the contrast between the creamy filling and the crisp Cheez-It crackers.
3. Lunchbox Treats or On-the-Go Snacks
Because they’re bite-sized and easy to pack, Cheez-It Peanut Butter Snacks make a convenient option for lunchboxes or road trips. Moreover, they stay fresh for several days when stored correctly. Slip a few into a resealable bag or small container for a quick pick-me-up during work, school, or travel.
4. Festive Gift Ideas
If you’re looking for a unique homemade gift, wrap these snacks in cellophane bags or decorative tins. Additionally, consider including a personalized note or tag explaining the sweet-and-salty blend. This thoughtful presentation is perfect for birthdays, holidays, or even just a simple “thinking of you” surprise.
Bringing It All Together
Whether you’re serving them at a party or enjoying them as a quick treat, Cheez-It Peanut Butter Snacks adapt effortlessly to various occasions. Most importantly, the combination of salty, crunchy crackers, creamy peanut butter, and rich chocolate never fails to delight. By exploring different serving ideas, you’ll keep this snack both fresh and exciting for yourself and anyone lucky enough to share it with you.
Conclusion
Crafting these Cheez-It Peanut Butter Snacks is not only a fun and effortless process but also a testament to how simple ingredients can create an irresistibly sweet-and-salty experience. By sandwiching creamy peanut butter between crunchy Cheez-Its and coating them in melted chocolate, you’ll have a snack that’s perfect for any occasion—whether you’re hosting a party, packing lunchbox treats, or simply looking for a delicious mid-afternoon pick-me-up.
With the flexibility to explore various spreads, toppings, and chocolate types, you can easily tailor this recipe to your preferences. Best of all, proper storage ensures that your snacks remain fresh and crunchy, ready to satisfy whenever cravings strike. Give this recipe a try, and discover just how effortless it can be to turn ordinary pantry staples into a crowd-pleasing delight!
(FAQ)
1. Can I use other types of crackers instead of Cheez-Its?
Absolutely. Although Cheez-Its offer a unique cheesy flavor, you can experiment with similar crackers if you prefer. However, keep in mind that the distinct cheese taste and light crunch are key elements of this recipe, so your snacks may differ slightly in flavor and texture.
2. What’s the best type of peanut butter to use?
It depends on your preference. Creamy peanut butter spreads more easily, creating a smooth filling, while crunchy peanut butter adds extra texture. Just be sure to stir the peanut butter well before using, especially if it’s a natural variety with separated oils.
3. How long will these snacks stay fresh?
When stored in an airtight container at room temperature, they typically last for about three to five days. If you refrigerate them, you can extend their freshness to about a week. For even longer storage, freeze them in a well-sealed container for up to one month.
4. Can I make these nut-free?
Yes. Substitute peanut butter with a nut-free alternative such as sunflower seed butter or cookie butter. You’ll still get a delicious sandwich filling that pairs well with the salty Cheez-Its.
5. Do I have to use a specific type of chocolate?
Not at all. You can use milk, dark, white, or even flavored chocolate—each will impart a distinct taste. Dark chocolate enhances the salty notes, while white chocolate creates a sweeter overall flavor.
6. What if my melted chocolate is too thick?
If your chocolate becomes thick or hard to work with, add a small amount of coconut oil or vegetable shortening. This technique thins the chocolate and provides a silkier texture, making dipping or drizzling easier.
7. Are there any creative topping ideas?
Absolutely. Sprinkling sea salt, crushed nuts, or coconut flakes can elevate the flavor profile. You can also drizzle caramel or peanut butter on top for added richness. Feel free to get creative with sprinkles, edible glitter, or even extra crushed Cheez-Its for more crunch!
8. How should I serve these snacks?
They are versatile enough to serve at parties, include in lunchboxes, or enjoy as an afternoon pick-me-up. Pair them with coffee, milk, or even hot chocolate for a delicious contrast in flavors. For special occasions, place them on a decorative platter alongside other bite-sized treats.
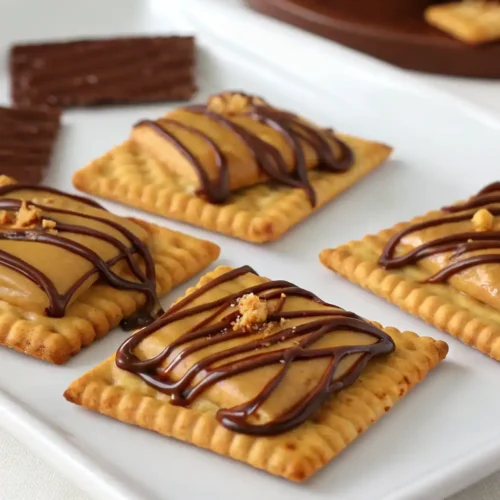
Cheez-It Peanut Butter Snacks with Chocolate Drizzle
Ingredients
- 1 cup Cheez-It crackers (regular or Grooves)
- ½ cup creamy peanut butter
- ½ cup chocolate chips (milk, dark, or semi-sweet)
- 1 tsp coconut oil (optional, for smoother melting)
- Optional: chopped nuts (almonds, peanuts, pecans)
- Optional: sea salt flakes
- Optional: caramel drizzle
Instructions
- -Assemble the sandwiches: Spread a thin layer of peanut butter on one Cheez-It cracker and top with another to create a mini sandwich. Repeat until all crackers are used.-Melt the chocolate: Place chocolate chips (and optional coconut oil) in a microwave-safe bowl. Heat in 20–30 second intervals, stirring well after each, until smooth.-Dip the sandwiches: Using a fork, dip each peanut butter sandwich into the melted chocolate. Tap the fork gently against the bowl to remove excess chocolate.-Add toppings: Place dipped sandwiches on a parchment-lined baking sheet. While the chocolate is still wet, sprinkle chopped nuts, sea salt, or drizzle caramel on top as desired.-Set: Refrigerate or let sit at room temperature until the chocolate is fully set (about 15–30 minutes).-Enjoy: Serve immediately or store in an airtight container in a cool place.
Notes
- Customize the Crunch: Use Cheez-It Grooves for a bolder, crispier bite, or try Extra Toasty Cheez-Its for a deeper roasted flavor.
- Nutty Add-Ins: Sprinkle chopped almonds, peanuts, or pecans on top of the chocolate for added texture and flavor.
- Flavor Boost: Add a light caramel drizzle for a sweet finish, or a pinch of sea salt for contrast.
- Make-Ahead Friendly: Store in an airtight container in the fridge for up to 5 days—great for snacks or gifting.
- Chocolate Tip: Stir chocolate between each microwave interval to prevent burning and ensure a smooth melt.