There’s a certain kind of culinary chaos that only a kitchen can produce, and it was on a rainy Thursday that I found myself staring at a bag of chicken breasts, a jar of Caesar dressing, and a stack of flour tortillas that had been abandoned on the counter for weeks. The air was thick with the scent of garlic and paprika, the sound of sizzling oil, and the faint hum of the refrigerator. I was in a frantic rush to salvage dinner for a group of friends who had just arrived, and I knew I had to do something memorable, not just another bland salad. I grabbed the chicken, tossed it in a quick seasoning blend, and, with a mischievous grin, declared, “This is going to be the best wrap you’ve ever tasted.” And that was the moment the idea hit me: combine the classic Caesar’s bright, tangy notes with the handheld convenience of a wrap, and you’d have a dish that’s both nostalgic and daring.
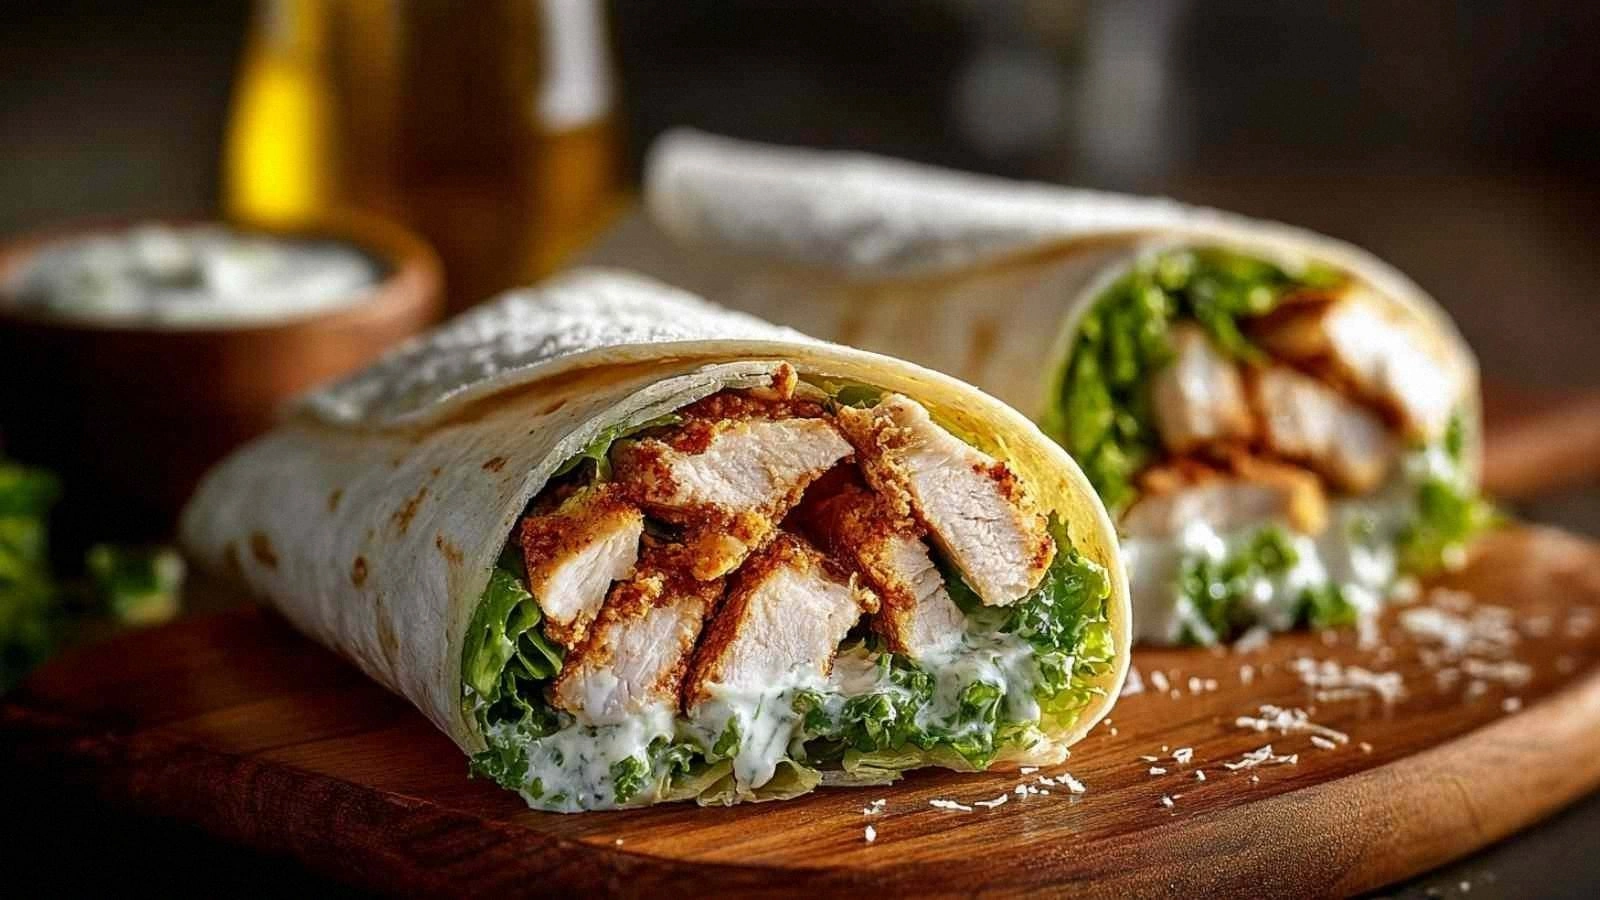
Picture the first bite: the crunch of fresh romaine, the creamy, buttery coating of Parmesan‑laden sauce, and the tender, seared chicken that melts in your mouth, all wrapped in a warm tortilla that’s slightly crisp at the edges. The aroma is a comforting blend of garlic, lemon, and a hint of mustard, while the texture is a delightful contrast between the crisp lettuce and the silky sauce. My friend, who had never tried a Caesar wrap before, was skeptical, but the moment she tasted it, her eyes widened and she exclaimed, “I dare you to taste this and not go back for seconds.” I was right on target—this is hands down the best version you’ll ever make at home. The secret? A homemade dressing that’s richer than any store‑bought version, a perfectly seasoned chicken, and a tortilla that’s warmed just enough to be pliable but still firm.
What sets this recipe apart from the endless variations you’ll find online is the meticulous attention to every single detail—from the exact ratio of spices in the seasoning blend to the precise amount of milk that gives the sauce that velvety finish. I’ve spent countless evenings experimenting with different types of cheese, different tortilla brands, and even different cuts of chicken, and each tweak led to a subtle shift in flavor or texture. But the version you’ll find here is the culmination of those experiments, distilled into a single, foolproof formula that guarantees a satisfying bite every time. Most recipes get this completely wrong by either over‑seasoning the chicken or under‑coating it with the dressing, resulting in a dry or soggy wrap. Here, the chicken is juicy, the sauce is thick enough to cling to every leaf, and the tortilla is warm and flexible.
Picture yourself pulling the finished wraps out of the skillet, the kitchen smelling incredible, the sound of the tortilla’s gentle sizzle echoing off the walls, and the anticipation of that first bite building in your chest. The moment you lay the first wrap on the counter, the aroma of lemon and Parmesan hits you like a wave of summer. I’ve had friends who have never tried a Caesar wrap before, and when they taste this, they’re instantly hooked. The combination of creamy dressing, crisp lettuce, and tender chicken is a flavor explosion that will leave you craving more. Let me walk you through every single step—by the end, you’ll wonder how you ever made it any other way.
What Makes This Version Stand Out
- Flavor: The dressing is a harmonious blend of mayonnaise, Parmesan, lemon, and Dijon mustard, creating a creamy texture that coats every ingredient without overpowering the fresh romaine.
- Texture: The chicken is seared to a golden crust and then sliced thin, ensuring each bite is juicy and tender, while the tortilla is warmed to perfection to avoid tearing.
- Ingredient Quality: Using fresh, high‑grade Parmesan and real lemon juice elevates the dish from ordinary to gourmet.
- Ease of Preparation: The entire recipe takes under an hour, with minimal cleanup—perfect for a busy weekday or a relaxed weekend brunch.
- Make‑Ahead Potential: The wraps can be assembled in advance and stored in the fridge for up to 24 hours, making them ideal for meal prep.
- Visual Appeal: The vibrant green of the romaine, the golden hue of the chicken, and the subtle sheen of the dressing make this wrap Instagram‑ready.
- Customization: Swap out chicken for grilled shrimp, tofu, or even a hearty bean mix to cater to any dietary preference.
- Audience Impact: Friends and family will rave about the fresh, bold flavors and the comforting, handheld format.
Alright, let’s break down exactly what goes into this masterpiece…
Inside the Ingredient List
The Flavor Base
At the heart of this wrap is a dressing that’s richer and more complex than the canned versions you’ll find at the grocery store. The mayonnaise provides a creamy canvas, while the grated Parmesan adds depth and a subtle nutty undertone. Lemon juice brings brightness and cuts through the richness, and Dijon mustard adds a mild, savory kick. If you’re feeling adventurous, a splash of Worcestershire sauce can deepen the umami profile, giving the dressing a slightly savory edge that pairs beautifully with the chicken. Don’t skip the garlic—fresh minced garlic adds a punch of flavor that lingers on the palate, making each bite unforgettable.
The Texture Crew
Romaine lettuce is the star of the texture game, offering a crisp bite that balances the softness of the sauce and the tenderness of the chicken. Croutons add a satisfying crunch, preventing the wrap from becoming soggy. The flour tortillas are the vessel that holds everything together; they should be warmed just enough to be pliable but still firm enough to hold the fillings without tearing. The shredded Parmesan on top gives a slight crunch when you bite, while also enhancing the overall flavor profile.
The Unexpected Star
One of the most surprising elements of this wrap is the use of fresh milk in the dressing. A tablespoon of milk not only helps thin the sauce to the perfect consistency but also adds a subtle sweetness that balances the acidity of the lemon. The paprika in the seasoning blend gives the chicken a gentle smoky flavor, while the garlic and onion powders provide a savory base that grounds the dish. A pinch of Worcestershire sauce introduces a subtle, savory depth that elevates the overall taste experience. The combination of these seemingly ordinary ingredients creates a flavor profile that’s anything but ordinary.
The Final Flourish
When you assemble the wrap, the final flourish comes from a generous sprinkle of shredded Parmesan on top of the chicken before you roll it up. This not only adds a burst of flavor but also creates a slight crust when the tortilla warms, giving you that satisfying snap when you take a bite. The croutons, placed strategically on top of the lettuce, ensure that each bite has a crunchy element that contrasts beautifully with the creamy dressing. Finally, the lemon juice in the dressing adds a bright, zesty note that cuts through the richness, leaving a clean finish on your palate. This is the little detail that turns a good wrap into a memorable one.
Everything’s prepped? Good. Let’s get into the real action…
The Method — Step by Step
- Heat the skillet. Place a large, heavy‑bottom skillet over medium‑high heat and let it get hot until a drop of water sizzles. Drizzle one tablespoon of olive oil, swirling it around to coat the surface. The oil should shimmer but not smoke—this is the moment the flavor foundation begins to form. While the pan heats, you’ll hear the subtle crackle that signals the skillet is ready.
- Season the chicken. Pat the chicken breasts dry with paper towels to remove excess moisture; this helps the seasoning adhere. Toss the chicken in garlic powder, onion powder, paprika, black pepper, and salt, ensuring every surface is coated. The seasoning should look like a fine dusting, not a thick crust. This step locks in flavor and creates a golden crust when seared.
- Sear the chicken. Slide the seasoned chicken into the hot skillet, laying it flat to avoid steaming. Let it sear for 3–4 minutes on each side until a golden brown crust forms and the juices run clear. Flip only once to maintain even cooking. The aroma of garlic and paprika rising from the pan should make your kitchen feel like a five‑star restaurant.
- Rest and slice. Transfer the chicken to a cutting board and let it rest for five minutes; this allows juices to redistribute. Slice the chicken into thin strips or bite‑size pieces—whichever feels more convenient for wrapping. The rest period is essential; skipping it will leave the chicken dry and less flavorful.
- Prepare the dressing. In a medium bowl, combine half a cup of mayonnaise, two tablespoons of grated Parmesan, one tablespoon of fresh lemon juice, one teaspoon of Dijon mustard, one minced clove of garlic, one‑quarter teaspoon of Worcestershire sauce, and one tablespoon of milk. Whisk until the mixture is smooth and creamy, with no lumps. The dressing should have a silky consistency that clings to the chicken and lettuce.
- Coat the chicken. Toss the sliced chicken in the dressing, ensuring each piece is evenly coated. Let it sit for two minutes so the flavors mingle and the dressing thickens slightly. The coating should feel like a velvet blanket, not a greasy film.
- Warm the tortillas. Place each tortilla in a dry skillet over low heat for about 15 seconds on each side, or until it’s warm and pliable. The warmth will prevent the tortilla from tearing when you roll it, and it adds a subtle toasted flavor. If you don’t have a skillet, you can wrap the tortillas in a damp paper towel and microwave for 10–15 seconds.
- Assemble the wrap. Lay a warm tortilla flat on a clean surface. Spread a generous handful of chopped romaine across the center, then add the coated chicken. Sprinkle shredded Parmesan and croutons over the top. Fold the sides in and roll tightly from the bottom up, securing the filling. Slice the wrap in half diagonally and serve immediately for the best texture.
That’s it — you did it. But hold on, I've got a few more tricks that'll take this to another level…
Insider Tricks for Flawless Results
The Temperature Rule Nobody Follows
Many cooks assume that any medium‑high heat will do the trick for searing chicken, but the truth is the skillet’s temperature is king. Use a thermometer to ensure the pan is at 375°F; this guarantees a quick sear that locks in juices. If you’re using a non‑stick pan, preheat it for a full minute before adding oil. A properly heated pan gives you a beautiful crust without over‑cooking the inside.
Why Your Nose Knows Best
When the chicken starts to sear, the aroma of garlic and paprika will fill the kitchen. Trust that scent as a cue that the crust is forming. If the smell is faint, the pan isn’t hot enough; if it’s too strong, you’re burning the spices. Your nose is a reliable guide, so listen to it.
The 5‑Minute Rest That Changes Everything
Resting the chicken after searing is not just a courtesy; it’s a science experiment that keeps the meat juicy. The juices redistribute throughout the fibers, preventing the chicken from drying out when you bite. Skip this step, and you’ll end up with a dry, over‑cooked wrap.
Warming Tortillas Just Right
Too hot and the tortilla will tear; too cold and it won’t hold the fillings. Warm each tortilla for about 15 seconds on each side in a dry skillet. The tortilla should feel soft enough to bend without cracking. If you’re in a hurry, wrap the tortillas in a damp paper towel and microwave for 10–15 seconds.
Choosing the Right Croutons
Not all croutons are created equal. Opt for a lightly toasted, buttery variety that will stay crisp even after the wrap is assembled. Avoid pre‑seasoned croutons that might add too much salt, which can overpower the delicate dressing. If you’re feeling fancy, make your own by cubing bread, tossing it in olive oil, and baking until golden.
Keeping the Dressing Fresh
Store any leftover dressing in an airtight container in the refrigerator for up to three days. When you’re ready to use it again, give it a quick stir and add a splash of milk if it’s thickened. This keeps the dressing silky and prevents separation.
Creative Twists and Variations
This recipe is a playground. Here are some of my favorite ways to switch things up:
Spicy Chipotle Caesar Wrap
Swap the plain mayonnaise for a chipotle‑infused mayo to add a smoky heat. Add sliced jalapeños to the lettuce for an extra kick. This version is perfect for those who love a little spice in their salad.
Greek‑Inspired Wrap
Replace the Parmesan with crumbled feta and add chopped cucumbers and olives. Drizzle a bit of extra virgin olive oil and a squeeze of lemon for a Mediterranean flair. This twist gives the wrap a fresh, tangy character.
Protein‑Packed Power Wrap
Use grilled shrimp instead of chicken for a lighter protein option. Add a handful of quinoa for extra fiber and a subtle nutty flavor. This version is great for a post‑workout meal.
Vegan Caesar Wrap
Replace the chicken with grilled tofu or tempeh and use a dairy‑free mayo. Use a vegan Parmesan alternative and keep the rest of the ingredients the same. This makes the dish completely plant‑based while keeping all the classic flavors.
Breakfast Caesar Wrap
Swap the chicken for scrambled eggs and add a sprinkle of chives. Use a whole‑wheat tortilla for extra fiber. This twist turns the wrap into a hearty breakfast or brunch option.
Crunchy Avocado Caesar Wrap
Add sliced avocado on top of the lettuce for a creamy texture. The avocado’s healthy fats pair beautifully with the Caesar dressing. This version adds a luxurious mouthfeel to every bite.
Storing and Bringing It Back to Life
Fridge Storage
Store assembled wraps in an airtight container in the refrigerator for up to 24 hours. Keep the dressing separate until you’re ready to serve to prevent sogginess. This method ensures the lettuce stays crisp and the tortilla remains pliable.
Freezer Friendly
Wrap each individual portion in parchment paper, then place in a freezer bag. Freeze for up to 3 months. When you’re ready to eat, thaw overnight in the fridge and reheat in a skillet for 2–3 minutes to restore warmth.
Best Reheating Method
Reheat the wrap in a dry skillet over medium heat for 2–3 minutes on each side, or until the tortilla is warm and the filling is heated through. Add a tiny splash of water before reheating if the wrap feels dry; the steam will bring back the moisture. Finish with a quick drizzle of extra dressing if desired.