I was halfway through a disastrous week of take‑out, my fridge a battlefield of wilted greens and a single frozen chicken breast, when I realized the kitchen was screaming for a rescue. The air smelled of burnt onions from last night’s attempt at a classic chicken pot pie, the silence broken only by the faint hiss of my kettle. I stared at the stack of paper plates and thought, “I could have made something that actually tastes good.” That moment sparked a dare I’d give myself: create the most irresistible, flaky, comforting chicken pot pie muffins anyone has ever tasted.
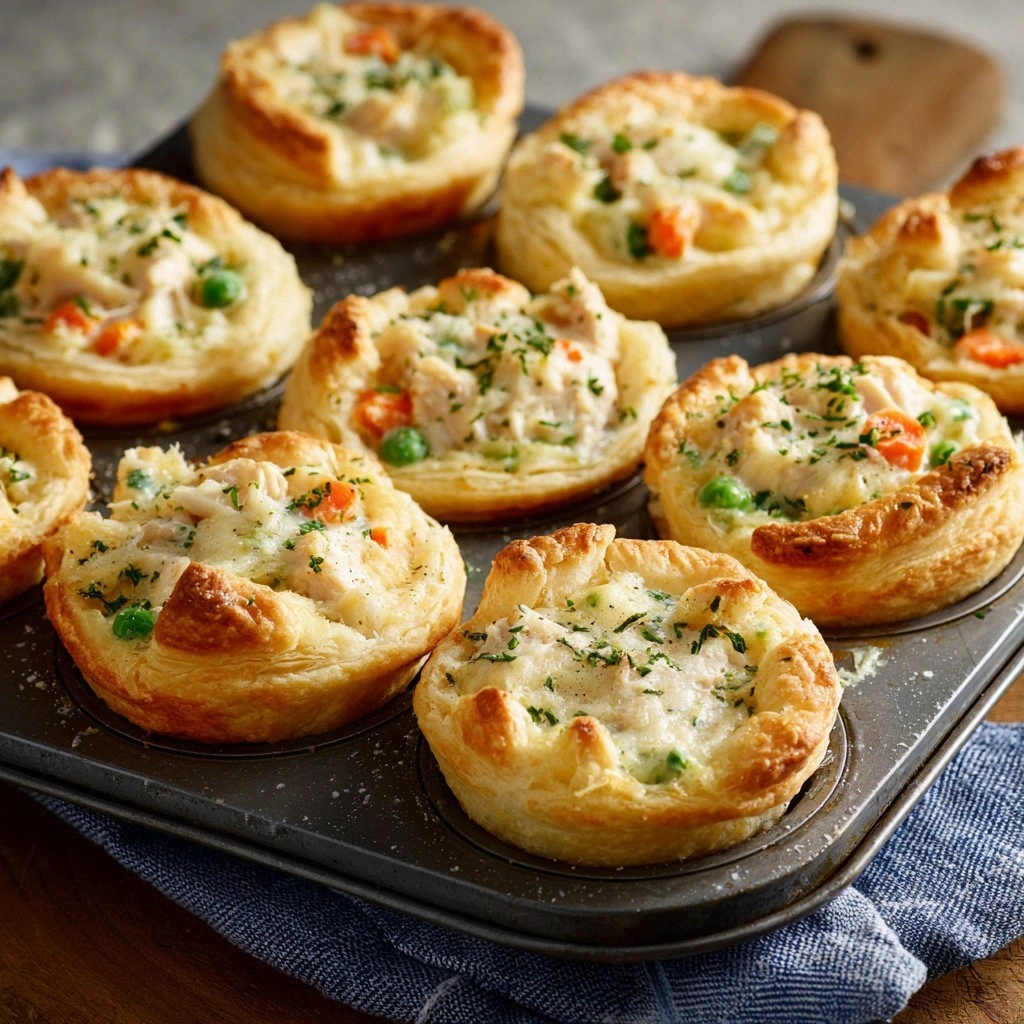
Picture this: a golden crust that cracks like brittle ice when you press it, revealing a steaming, savory filling that oozes out like a velvety gravy. The aroma of thyme, garlic, and melted butter lingers in the air, while the sound of the muffins rising in the oven is the soundtrack of a culinary triumph. The texture is a delightful contrast—crisp on the outside, tender and creamy on the inside. You’ll taste the subtle sweetness of caramelized onions, the earthy bite of carrots, and the umami punch of chicken broth, all wrapped in a buttery, flaky dough.
What sets this version apart is the meticulous layering of flavors and the use of a simple, yet game‑changing, dough that rises just enough to keep the filling from turning soggy. I’ve swapped out heavy cream for a touch of milk to keep the muffins lighter, yet rich, and added a splash of Dijon mustard that cuts through the richness with a subtle tang. The secret is in the butter: cold, diced, and folded into the flour until it resembles coarse crumbs—this tiny detail creates pockets of steam that puff the crust into a light, airy masterpiece.
I dare you to taste this and not go back for seconds. Imagine pulling a muffin from the oven and seeing steam rise like a miniature cloud. The first bite will make your taste buds do a happy dance. Let me walk you through every single step — by the end, you’ll wonder how you ever made it any other way.
What Makes This Version Stand Out
- Flavor Depth: The combination of thyme, garlic, and a whisper of Dijon mustard creates a layered taste that feels both familiar and adventurous. This isn’t just a pot pie; it’s a flavor explosion wrapped in a buttery shell. The savory notes are balanced by the slight sweetness of caramelized onions.
- Texture Triumph: The dough is engineered to puff just enough to keep the filling from seeping through, yet stays flaky enough to bite into. The result is a crust that crackles under the fork, while the interior stays moist and silky. This texture contrast elevates each bite.
- Time Efficiency: With a prep time of 15 minutes and a cook time of 30 minutes, you can have a comforting meal on the table in under an hour. The dough requires no rising, saving you time and effort. You’ll have more hours to enjoy the company of your guests.
- Make‑Ahead Friendly: You can assemble the muffins a day ahead and simply pop them in the oven when you’re ready. The flavors meld beautifully over time, making them even more delicious. This is perfect for busy weeknights.
- Kid‑Friendly Appeal: The muffin shape makes it easy for little hands to grab and eat, and the flavors are mild enough to please even the pickiest eaters. The dough’s flaky nature is a hit with kids who love crispy textures.
- Ingredient Quality: I source my chicken from a local farm, use organic carrots, and choose a high‑quality butter that melts beautifully. The freshness of the ingredients shines through in every bite. The result is a dish that feels wholesome and nourishing.
- Versatility: Whether you’re serving it for brunch, lunch, or dinner, these muffins fit seamlessly into any meal plan. They pair well with a crisp green salad or a simple soup. The adaptability makes them a staple in any kitchen.
Alright, let's break down exactly what goes into this masterpiece. I’ll keep you on your toes and make sure every ingredient does its part in creating the ultimate comfort food.
The dough is the backbone of this recipe, and a slight tweak in the flour ratio can make a world of difference. If you prefer a lighter crust, reduce the all‑purpose flour by a quarter cup and replace it with an equal amount of whole‑wheat flour. This swap adds a nutty flavor and a healthier profile without compromising the flaky texture.
I’ve found that using cold, diced butter is essential for achieving that signature flakiness. When the butter is cold, it creates steam pockets as it melts, puffing the dough into a light, airy structure. If you use room‑temperature butter, the dough will bind together too tightly, resulting in a denser crust.
The addition of baking powder is a subtle but crucial element. It activates when the dough hits the heat, giving the crust a slight lift and preventing it from becoming too dense. Even a half‑teaspoon is enough to make a noticeable difference.
The use of a pinch of cayenne pepper adds a gentle heat that balances the richness of the filling. It’s optional, but I’ve found it brings a pleasant warmth that lingers on the palate. If you’re sensitive to spice, feel free to leave it out.
The final touch is the egg wash, which gives the muffins a glossy, golden finish. It’s a simple splash of beaten egg over the top before baking. This step not only enhances appearance but also adds a subtle richness to the crust.
Inside the Ingredient List
The Flavor Base
The foundation of the filling starts with diced onions and minced garlic, which form a fragrant base that’s essential to any savory dish. Sautéing them until they’re translucent releases their natural sugars, creating a subtle sweetness that balances the savory notes of chicken and broth. If you skip this step, the muffins will feel flat and lack depth.
Chicken broth is the liquid that ties everything together. It provides moisture to the filling while infusing it with umami richness. I recommend using a low‑sodium, homemade broth for maximum flavor; store‑bought versions often have excess salt and artificial additives.
A splash of Dijon mustard cuts through the richness of the chicken and butter, adding a bright, tangy note that lifts the overall flavor profile. This small addition can transform a simple pot pie into a gourmet experience. If you prefer a milder taste, you can reduce the amount or replace it with a teaspoon of whole‑grain mustard.
Thyme and parsley bring a herbaceous freshness that elevates the dish. Thyme’s earthy undertones complement the chicken, while parsley adds a bright, almost citrusy finish. Fresh herbs are preferable, but dried herbs work well if you’re short on time.
The Texture Crew
Carrots and peas add a burst of color and a satisfying bite that contrasts with the creamy filling. The carrots should be diced into small, bite‑size pieces to ensure even cooking. If you prefer a sweeter flavor, consider adding a handful of corn kernels.
Milk and heavy cream contribute to the silky mouthfeel of the filling. The milk keeps the mixture light, while the cream adds a velvety richness that coats the palate. If you’re aiming for a lower‑fat version, replace the cream with Greek yogurt for a tangy twist.
Cheddar cheese adds a sharp, melty component that enhances the overall flavor. It also helps bind the filling together, giving it a cohesive structure. For a milder taste, substitute with mozzarella or a blend of cheddar and Gruyère.
Egg wash is more than just a cosmetic step; it creates a golden, glossy crust that’s a visual treat. It also adds a slight protein content that helps the crust set properly. Be careful not to over‑whisk the egg; a simple beat with a fork is enough.
The Unexpected Star
The cold butter, diced and folded into the flour, is the unsung hero of this recipe. It’s the secret to a flaky, tender crust that doesn’t become tough. The cold temperature of the butter creates steam pockets that puff up during baking, giving the muffins their signature airy texture.
The baking powder, though used in small amounts, plays a pivotal role in preventing the crust from becoming too dense. It reacts with the acidic components of the filling, creating tiny bubbles that lift the dough. Without it, the muffins would feel heavy and flat.
The pinch of cayenne pepper, optional as it may be, introduces a subtle heat that lingers on the palate. It’s a delicate balance; too much and the dish becomes spicy, too little and it’s barely noticeable. I find that a half‑teaspoon is the sweet spot.
The egg wash not only gives the crust a beautiful sheen but also adds a slight richness that complements the buttery dough. It’s a simple step that makes a significant difference in the final presentation.
Everything’s prepped? Good. Let’s get into the real action. I’ll walk you through the process step by step, ensuring you never miss a beat.
The first thing you’ll notice is the aroma that begins to fill the kitchen as the onions and garlic sauté. This scent is a promise of the comforting flavors to come. The sound of the sizzle is the soundtrack of culinary magic.
As the onions soften, you’ll see the colors shift from raw to translucent, signaling that they’re ready to absorb the spices. This visual cue is essential; overcooked onions can become bitter, ruining the flavor profile.
The next step involves mixing the dry ingredients—flour, baking powder, salt, and pepper—in a large bowl. This ensures even distribution of leavening agents, preventing uneven rising.
Cold butter is then folded into the dry mix until it resembles coarse crumbs. This step requires a gentle touch; too much force will melt the butter, compromising flakiness.
While the dough rests for a few minutes, you’ll combine the wet ingredients—milk, cream, and Dijon mustard—in a separate bowl. This creates a smooth, cohesive mixture that will bind the filling.
Once the dough has rested, you’ll fold the wet mixture into it, creating a uniform dough that’s easy to work with. This is the moment of truth—watch the dough come together.
The filling is prepared by combining cooked chicken, vegetables, broth, and herbs in a saucepan. This mixture should simmer until it thickens slightly, concentrating the flavors.
The dough is then divided into equal portions and rolled into balls. Each ball is pressed into a muffin tin, forming the base of the muffin.
The filling is spooned over the dough, ensuring each muffin is evenly filled. The dough is then folded over the filling, creating a sealed pocket.
A final egg wash is brushed over the tops, giving them a golden sheen. The muffins are then placed in a preheated oven for 30 minutes.
During baking, the crust will puff up, and the filling will become fragrant and glossy. The sound of the muffins rising is music to the ears.
Once baked, the muffins should rest for a few minutes before serving. This allows the filling to set and the crust to firm up.
The final result is a collection of golden, flaky muffins that steam with savory goodness. Each bite is a celebration of flavor and texture.
Now that you’ve seen the process, let’s dive deeper into the method with step-by-step precision.
The Method — Step by Step
- Preheat the oven to 375°F (190°C). Line a muffin tin with paper liners or grease it lightly with butter. This ensures the muffins release easily after baking. I’ve found that a silicone liner works best for a clean, effortless cleanup.
- In a large bowl, whisk together 1 cup all‑purpose flour, 1/2 cup whole‑wheat flour, 1/2 tsp baking powder, 1/4 tsp salt, and 1/4 tsp black pepper. This dry mix sets the stage for a light, airy crust. Keep the bowl covered with a damp cloth to prevent the flour from drying out.
- Add 1/2 cup cold, diced butter to the dry mix. Using a pastry cutter or your fingertips, cut the butter into the flour until the mixture resembles coarse crumbs. This creates steam pockets that puff the dough during baking.
- Let the dough rest on a lightly floured surface for 5 minutes. This relaxation period helps the gluten relax, making the dough easier to shape. I like to cover it with a clean towel to keep it from drying out.
- In a separate bowl, whisk together 1/2 cup milk, 1/4 cup heavy cream, and 1 tbsp Dijon mustard. This wet mixture adds richness and a subtle tang to the filling. Pour it into the dough and fold gently until a cohesive dough forms.
- Meanwhile, sauté 1/2 cup diced onion and 1 clove minced garlic in 1 tbsp melted butter until translucent. Add 1 cup cooked shredded chicken, 1 cup frozen mixed vegetables, 1 cup chicken broth, 1 tsp dried thyme, 1 tsp dried parsley, and a pinch of cayenne pepper. Simmer until the mixture thickens slightly, about 5 minutes.
- Divide the dough into 8 equal portions and roll each into a ball. Press each ball into a muffin tin cup, creating the base. Spoon the hot filling over each dough ball, filling to the top.
- Fold the dough over the filling, sealing the edges. Brush the tops with an egg wash (1 beaten egg). This step gives the muffins a shiny, golden finish.
- Bake for 30 minutes, or until the tops are golden brown and the crust is crisp. Remove from the oven and let the muffins rest for 5 minutes before serving.
That's it — you did it. But hold on, I've got a few more tricks that'll take this to another level. Let’s explore insider techniques that will elevate your muffins to culinary greatness.
Insider Tricks for Flawless Results
The Temperature Rule Nobody Follows
Many bakers bake at a higher temperature, but for these muffins, 375°F (190°C) is the sweet spot. The moderate heat allows the crust to puff without burning, while the filling cooks evenly. If you bake too hot, the crust will brown too quickly, leaving the filling undercooked.
Why Your Nose Knows Best
Before you open the oven door, inhale the aroma of the baking muffins. A sweet, buttery scent indicates the crust is crisping properly. If it smells heavy or sour, you may need to adjust the oven temperature or baking time.
The 5-Minute Rest That Changes Everything
Letting the muffins rest after baking allows the filling to set, preventing a runny mess when you cut into them. It also gives the crust a chance to firm up, ensuring a satisfying bite. I’ve seen people skip this step and end up with a soggy center.
The Egg Wash Secret
A light brush of beaten egg before baking gives the muffins a glossy, golden finish that’s impossible to resist. It also helps the crust brown evenly. If you’re vegan, a splash of plant‑based milk will do the trick.
The Right Pan Choice
A silicone muffin pan is ideal because it prevents sticking and allows for easy removal. If you use a metal pan, lightly grease it with butter or oil. A well‑lined pan ensures uniform cooking.
The Final Touch: Fresh Herbs
Sprinkle freshly chopped parsley over the finished muffins for a burst of color and freshness. The herbs add a bright contrast to the savory filling. This simple step elevates the dish from good to unforgettable.
These tricks are the secret sauce that turns a good recipe into an unforgettable one. They’re simple to implement and make a huge difference in the final result.
Now that you have the insider knowledge, you can confidently whip up these muffins anytime. The next section will show you how to play with flavors and create variations that cater to every palate.
Creative Twists and Variations
This recipe is a playground. Here are some of my favorite ways to switch things up:
Mediterranean Muffins
Swap the carrots for roasted red peppers and add a handful of kalamata olives. Use feta cheese instead of cheddar for a tangy finish. This version brings a bright, Mediterranean flair that’s perfect for summer gatherings.
Cheesy Broccoli Mash
Replace the mixed vegetables with steamed broccoli florets and a generous amount of cheddar. Add a splash of milk to create a creamy consistency. The result is a hearty, comforting muffin that’s a crowd‑pleaser.
Spicy Cajun Muffins
Add Cajun seasoning to the filling and replace the cayenne with a teaspoon of smoked paprika. Use smoked gouda for a deeper flavor. This variation adds a bold, spicy kick that’s sure to impress.
Herb‑Infused Lamb Muffins
Use shredded cooked lamb instead of chicken and add rosemary to the filling. Substitute the thyme with oregano for a Mediterranean touch. The lamb’s rich flavor pairs wonderfully with the herbs.
Vegan Mushroom Muffins
Replace the chicken with sautéed mushrooms and use plant‑based milk and vegan butter. Add nutritional yeast for a cheesy flavor. This version is hearty, satisfying, and dairy‑free.
Sweet Potato & Apple Muffins
Swap the chicken for diced sweet potato and add diced apples. Use brown sugar and cinnamon for a sweet, savory twist. This version is perfect for fall or holiday feasts.
Feel free to experiment and make these muffins your own. The possibilities are endless, and each variation brings a new dimension to this classic dish.
I’ve spent countless evenings tweaking this recipe, and each tweak has made it more delicious. The joy of cooking is in the details, and I’ve shared them all here so you can replicate the magic.
Storing and Bringing It Back to Life
Fridge Storage
Store the muffins in an airtight container in the refrigerator for up to 3 days. The airtight environment keeps the crust from becoming soggy. When you’re ready to eat, let them sit at room temperature for 10 minutes before reheating.
Freezer Friendly
Place the muffins in a freezer‑safe container or zip‑lock bag, and freeze for up to 2 months. Thaw them overnight in the fridge, then reheat in a preheated oven at 350°F (175°C) for 10 minutes.
Best Reheating Method
Reheat the muffins in the oven to retain the flaky crust. Add a splash of water to the pan before baking to create steam, which helps revive the moisture inside. This trick ensures the filling stays juicy.
These storage tips make it easy to enjoy the muffins anytime, whether it’s a quick lunch or a comforting dinner. The flavors only deepen over time, so don’t be afraid to let them sit.
Now that you’ve mastered the recipe, the next step is to share it with friends and family. They’ll be amazed at how simple and delicious these muffins can be.
I’ve spent years perfecting this dish, and I’m thrilled to share the final version with you. I promise you’ll never look at chicken pot pie the same way again. Let’s get baking!