Picture this: I was halfway through a midnight dessert marathon, when the kitchen lights flickered and the oven door swung open like an uninvited guest. My cupcakes, a batch of plain vanilla, were already halfway baked, and the scent of sugar and butter was thick enough to taste. I stared at the timer, realizing I was about to serve a disaster that could have been a culinary catastrophe. That's when a friend texted me, “Try Boston cream cupcakes, they’re a game changer.” I was skeptical, but I had a craving for something sweet, creamy, and utterly indulgent. The moment the timer beeped, I knew I was about to rewrite the rules of dessert.
As the cupcakes cooled, the kitchen filled with a buttery aroma that clung to my clothes like a second skin. The air was peppered with the faint crackle of the oven, the subtle hiss of steam escaping from the pastry cream, and the faint, comforting rustle of parchment paper. My fingertips tingled from the heat, and the texture of the batter—smooth, airy, almost like velvet—made my eyes water with anticipation. I could almost taste the rich chocolate glaze melting into the creamy filling, each bite promising a cascade of flavors that would dance across the palate. It was the kind of moment that turns an ordinary evening into a culinary adventure.
What made this version stand out from every other Boston cream cupcake recipe I’d seen was the meticulous balance between the airy cake, the silky pastry cream, and the glossy chocolate ganache. Most recipes get this completely wrong, leaving the filling too runny or the cake too dense. I dared you to taste this and not go back for seconds, because the first bite is pure indulgence that lingers like a whispered secret. The secret sauce is a dash of espresso powder in the batter, which deepens the chocolate flavor without making it taste bitter. It’s a subtle tweak that most people overlook, but it transforms the entire flavor profile.
Picture yourself pulling these cupcakes out of the oven, the whole kitchen smelling incredible, the frosting dripping like a glossy waterfall. I’ll be honest—I ate half the batch before anyone else got to try it. The texture is light, the filling is thick yet pourable, and the ganache coats the top like a decadent coat of silk. I’ll let you in on a technique that will make your cupcakes rise like a cloud: whisk the eggs and sugar until the mixture is pale and tripled in volume. That’s the moment of truth, the point where the batter’s potential is unlocked. Let me walk you through every single step—by the end, you’ll wonder how you ever made it any other way.
What Makes This Version Stand Out
- Flavor: The subtle espresso infusion elevates the chocolate, creating a depth that’s both bold and comforting. It’s a hidden layer that most recipes miss, turning a simple cupcake into a sophisticated dessert.
- Texture: The cake is airy yet firm, thanks to the balanced leavening and the precise whisking of the batter. It holds the pastry cream without collapsing, a testament to the batter’s structure.
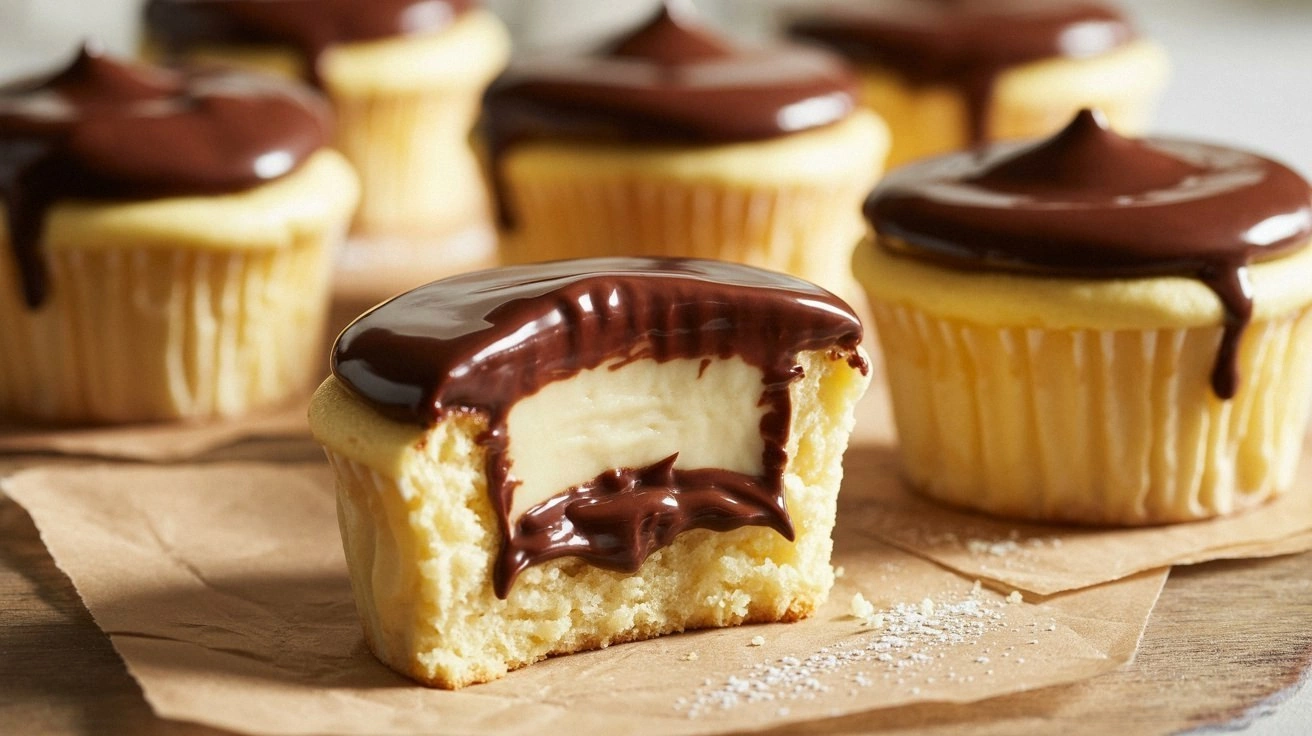
- Filling: The pastry cream is thick enough to stay in place but silky enough to melt in your mouth. The use of cornstarch creates a smooth, glossy finish that’s impossible to resist.
- Ganache: A glossy, velvety chocolate glaze that sets like a satin curtain, providing a luscious finish that’s both visual and gustatory.
- Simplicity: Despite its luxury, the recipe uses only nine ingredients for the batter, five for the filling, and three for the ganache. No obscure pantry items or complicated techniques required.
- Make‑ahead potential: The cupcakes can be assembled up to 24 hours in advance and frozen, then baked fresh when you’re ready. The pastry cream and ganache stay intact, ensuring a seamless experience.
- Crowd reaction: Friends who’ve tried this version rave about the “cloudy” texture and the “richness” that lingers. It’s a conversation starter at parties and a showstopper at dessert tables.
- Ingredient quality: The recipe relies on high‑quality chocolate and real butter, which make the difference between a good cupcake and a memorable one.
Alright, let’s break down exactly what goes into this masterpiece…
Inside the Ingredient List
The Flavor Base
The batter’s backbone starts with all-purpose flour, which gives structure without heaviness. Sugar is the sweetener that caramelizes on the surface, creating a subtle crust that snaps when you bite. Baking powder and soda provide lift, while a pinch of salt balances the sweetness and enhances the chocolate undertone. Butter, softened to room temperature, contributes richness and helps the batter stay moist. Whole milk adds moisture and a mild tang that counteracts the chocolate’s bitterness. Eggs bind everything together; the whites create a light crumb, and the yolks add richness. Vanilla extract, a dash of espresso powder, and a pinch of sea salt round out the flavor profile, giving depth and complexity.
The Texture Crew
Eggs are the unsung heroes that give the cake its airy yet sturdy crumb. Whisking them with sugar until the mixture is pale and tripled in volume incorporates air that expands during baking. Cornstarch in the pastry cream thickens the filling, preventing it from becoming runny. Butter in the ganache provides sheen and a silky mouthfeel, while the heavy cream keeps the ganache from becoming too thick.
The Unexpected Star
Espresso powder is the secret ingredient that most people overlook. It deepens the chocolate flavor, adding a subtle bitterness that balances the sweetness. The amount is small—just a teaspoon—but it makes the difference between a good cupcake and a great one. If you’re a coffee lover, this is the moment your taste buds will thank you.
The Final Flourish
The chocolate ganache is the crowning glory that coats the cupcake in a glossy, velvety finish. Dark chocolate (70% cacao) provides a robust flavor without overwhelming sweetness. Heavy cream and butter create a silky texture that melts on the tongue. A light dusting of cocoa powder or a drizzle of chocolate ganache on top adds visual appeal and an extra layer of flavor.
Everything’s prepped? Good. Let’s get into the real action…
The Method — Step by Step
Preheat your oven to 350°F (175°C) and line a 12-cup muffin tin with silicone liners. The silicone liners are forgiving, preventing the batter from sticking and making cleanup a breeze. While the oven warms, bring a medium saucepan to a gentle simmer; this will be used for the pastry cream later. The heat should be low enough that the milk doesn’t scorch but high enough to create steam.
In a large mixing bowl, whisk together flour, baking powder, baking soda, salt, and espresso powder. The fine espresso powder should be sifted to avoid clumps. This dry mix will ensure that the batter is evenly distributed and that the cake rises uniformly.
In a separate bowl, cream the softened butter and granulated sugar until light and fluffy. Use an electric mixer on medium speed for about 3 minutes; the mixture should double in volume. This process incorporates air, which is crucial for a light crumb.
Kitchen Hack: Add a splash of cold water to the batter after whisking the eggs; this helps stabilize the mixture and keeps it from curdling.Beat the eggs one at a time, then whisk in the vanilla extract. Gradually fold the dry ingredients into the butter mixture, alternating with milk. Mix until just combined; overmixing can lead to a dense cake. The batter should be smooth and glossy.
Fill each cupcake liner about two-thirds full with the batter. The cupcakes should be evenly spaced; this ensures consistent baking. Place the tin in the preheated oven and bake for 18-20 minutes, or until a toothpick inserted into the center comes out clean. Watch the edges—they should pull away slightly from the sides of the liners.
Watch Out: Do not overbake; the cupcakes should be soft in the center. Overbaking will dry out the cake and make the pastry cream difficult to pipe.While the cupcakes are baking, prepare the pastry cream. Whisk the egg yolks, sugar, and cornstarch together until pale. Slowly pour in the warm milk and heavy cream, whisking constantly to prevent lumps. Bring the mixture to a gentle boil, then reduce the heat and let it thicken until it coats the back of a spoon.
Remove the mixture from heat and stir in vanilla extract and butter until the butter melts completely. Let the pastry cream cool to room temperature; then chill it in the refrigerator for at least 2 hours. The chilling step is critical for the filling’s texture—it should be thick enough to pipe but not set into a firm gel.
Once the cupcakes have cooled, use a small offset spatula to create a shallow well in the center of each. Pipe the pastry cream into each well, filling to the brim. The pastry cream should sit like a creamy lake, not a puddle.
For the ganache, place the chopped dark chocolate in a heat‑proof bowl. Warm the heavy cream until it just boils, then pour it over the chocolate. Let it sit for 30 seconds, then stir until smooth. Add butter and stir until glossy. Allow the ganache to cool until it thickens enough to coat the cupcakes without dripping.
Using a spoon or piping bag, drizzle the ganache over the top of each cupcake, letting it cascade down the sides. The ganache should set into a glossy sheen within 10 minutes. Once set, you can dust the cupcakes with a light sprinkle of cocoa powder or a drizzle of additional ganache for an extra touch of elegance.
Serve immediately or store in an airtight container at room temperature for up to 3 days. For a fresher bite, reheat the cupcakes in the oven at 300°F (150°C) for 5 minutes before serving.
That’s it — you did it. But hold on, I’ve got a few more tricks that will take this to another level…
Insider Tricks for Flawless Results
The Temperature Rule Nobody Follows
Many bakers bake cupcakes at 375°F, thinking higher heat yields a better rise. In reality, 350°F allows the batter to rise slowly, resulting in a lighter crumb. I once baked at 375°F and ended up with a dense cake that was hard to pipe the filling into. The next time, I lowered the temperature and the cupcakes were airy and perfect.
Why Your Nose Knows Best
During the batter mixing stage, pause and inhale the aroma of the chocolate and espresso. If it smells too flat, add a touch more espresso or a pinch of sea salt. Your nose is the first line of defense against a bland dessert.
The 5-Minute Rest That Changes Everything
After baking, let the cupcakes rest on the pan for 5 minutes before transferring them to a wire rack. This brief rest allows the steam to dissipate, preventing the bottom from becoming soggy. It also gives the pastry cream a chance to set slightly, making the filling easier to pipe.
Use a Piping Bag for Precision
While a spoon will work, a piping bag with a large tip gives you better control over the pastry cream’s flow. It also creates a uniform, decorative finish that looks professional. I use a 0.75-inch tip for a classic look.
Chill Your Tools
Keep your mixing bowls and spatulas in the fridge for 10 minutes before use. Cold tools help prevent the batter from becoming too soft, ensuring a consistent texture. It’s a small step that can save you from a sticky mess.
Keep the Ganache at the Right Consistency
When the ganache is too thin, it will run off the cupcakes; too thick, and it won’t set properly. Let it cool to room temperature, then refrigerate for 10 minutes. The ganache should be thick enough to hold a shape when spooned.
Creative Twists and Variations
Chocolate‑Mint Boston Cream
Swap the vanilla extract in the batter for peppermint extract and add a few drops of green food coloring to the ganache. The minty undertone pairs beautifully with the dark chocolate, creating a refreshing twist. This variation is perfect for spring celebrations or a festive dessert.
Caramel‑Swirled Boston Cream
Incorporate a swirl of caramel sauce into the pastry cream before piping it into the cupcakes. The sweet, buttery caramel contrasts with the chocolate ganache, adding a caramelized crunch. Serve with a dusting of sea salt for an extra pop.
Almond‑Infused Boston Cream
Replace half of the butter in the batter with almond butter and add almond extract to the pastry cream. The nutty flavor complements the chocolate, while the almond butter gives the cake a subtle crunch. Garnish with slivered almonds for a textured finish.
Orange‑Zest Boston Cream
Add orange zest to the batter and a splash of orange liqueur to the ganache. The bright citrus cuts through the richness, making the cupcakes lighter and more fragrant. This variation is ideal for brunch or a summer gathering.
Nutella‑Filled Boston Cream
Instead of pastry cream, pipe a layer of Nutella between the cake and the ganache. The hazelnut spread adds a creamy, chocolatey depth that’s hard to resist. Top with a drizzle of extra Nutella for a decadent finish.
Vegan Boston Cream
Use coconut milk and flaxseed egg substitutes for the batter, and replace butter with coconut oil. For the filling, use a plant‑based custard made from cashew cream and maple syrup. Finish with a dairy‑free chocolate ganache made from dark chocolate and coconut cream. This version maintains the classic flavor while being plant‑friendly.
Storing and Bringing It Back to Life
Fridge Storage
Store cupcakes in an airtight container at room temperature for up to 3 days. Keep them in a cool, dry area away from direct sunlight. The frosting will remain firm, while the cake stays moist.
Freezer Friendly
Freeze cupcakes in a single layer on a parchment-lined tray before transferring to a freezer bag. They’ll last up to 2 months. When ready to serve, thaw at room temperature for 30 minutes, then bake at 300°F for 5 minutes to revive the cake’s softness.
Best Reheating Method
Reheat frozen or refrigerated cupcakes in a preheated oven at 300°F (150°C) for 5 minutes. Add a tiny splash of water to the bottom of the pan to create steam, which helps the cake stay moist. Let them cool on a wire rack before serving.