I remember the night I nearly ruined a dessert that should have been a triumph. I had a handful of apples, a jug of yogurt, and an unshakable confidence that I could turn a simple idea into a masterpiece. The kitchen smelled of cinnamon and fresh fruit, the air thick with the promise of something sweet and unexpectedly light. I was determined to make a cake that would not only taste incredible but also feel like a comforting hug in a mug. I dared myself to create a version that would outshine every other apple cake in my memory. The moment the batter hit the pan, I knew something extraordinary was about to happen.
When the batter first touched the parchment, a faint hiss filled the room—an audible confirmation that the mixture was ready to rise. The aroma that followed was a warm, buttery whisper of vanilla and apple, coaxing even the most skeptical of taste buds into anticipation. I could almost hear the gentle clink of the timer as it ticked toward the golden hour. The batter’s texture was silky, the kind that slides off a spoon like a well‑coated ribbon. I imagined the final product: a cake that would melt on the tongue, leaving behind a lingering hint of fresh apples and a dusting of powdered sugar. The anticipation was almost tangible, like the hush before a drum solo.
I was not just baking; I was orchestrating a flavor symphony where every element had a role. The yogurt adds a subtle tang that balances the sweetness, while the apples bring a juicy, crisp contrast that keeps the cake from becoming too dense. The cinnamon is the secret agent, weaving its warm spice through each bite and creating an invisible thread that ties the whole dessert together. The oil keeps the cake moist, preventing it from drying out as it bakes. The baking powder and soda create the lift that transforms the batter into a fluffy, airy confection. Together, these ingredients perform a culinary ballet that is both simple and spectacular.
Most apple cakes I’ve tried ended up either too dry or too sweet, lacking that subtle depth that makes a dessert memorable. This version, however, strikes the perfect balance between sweet and tart, lightness and richness. The texture is a dream: moist yet firm, with a crumb that breaks like a delicate cloud. The flavor profile is layered, offering a burst of apple followed by a lingering cinnamon finish. The use of plain yogurt instead of sour cream keeps the cake lighter while adding a tang that cuts through the sugar. The result is a cake that feels like a warm hug and a celebratory toast rolled into one.
The real kicker? I discovered that adding a splash of vanilla extract at the very end of the batter, just before it goes into the oven, unlocks a deeper flavor profile that’s almost impossible to describe. It’s subtle, yet it amplifies the apples and cinnamon, giving the cake a more complex aroma that lingers on the plate. I dare you to taste this and not go back for seconds. I’ve seen people finish a whole loaf in one sitting, and I’ve even confessed to myself that I ate half before anyone else got a chance to try it. If you’re skeptical, let me walk you through every single step — by the end, you’ll wonder how you ever made it any other way.
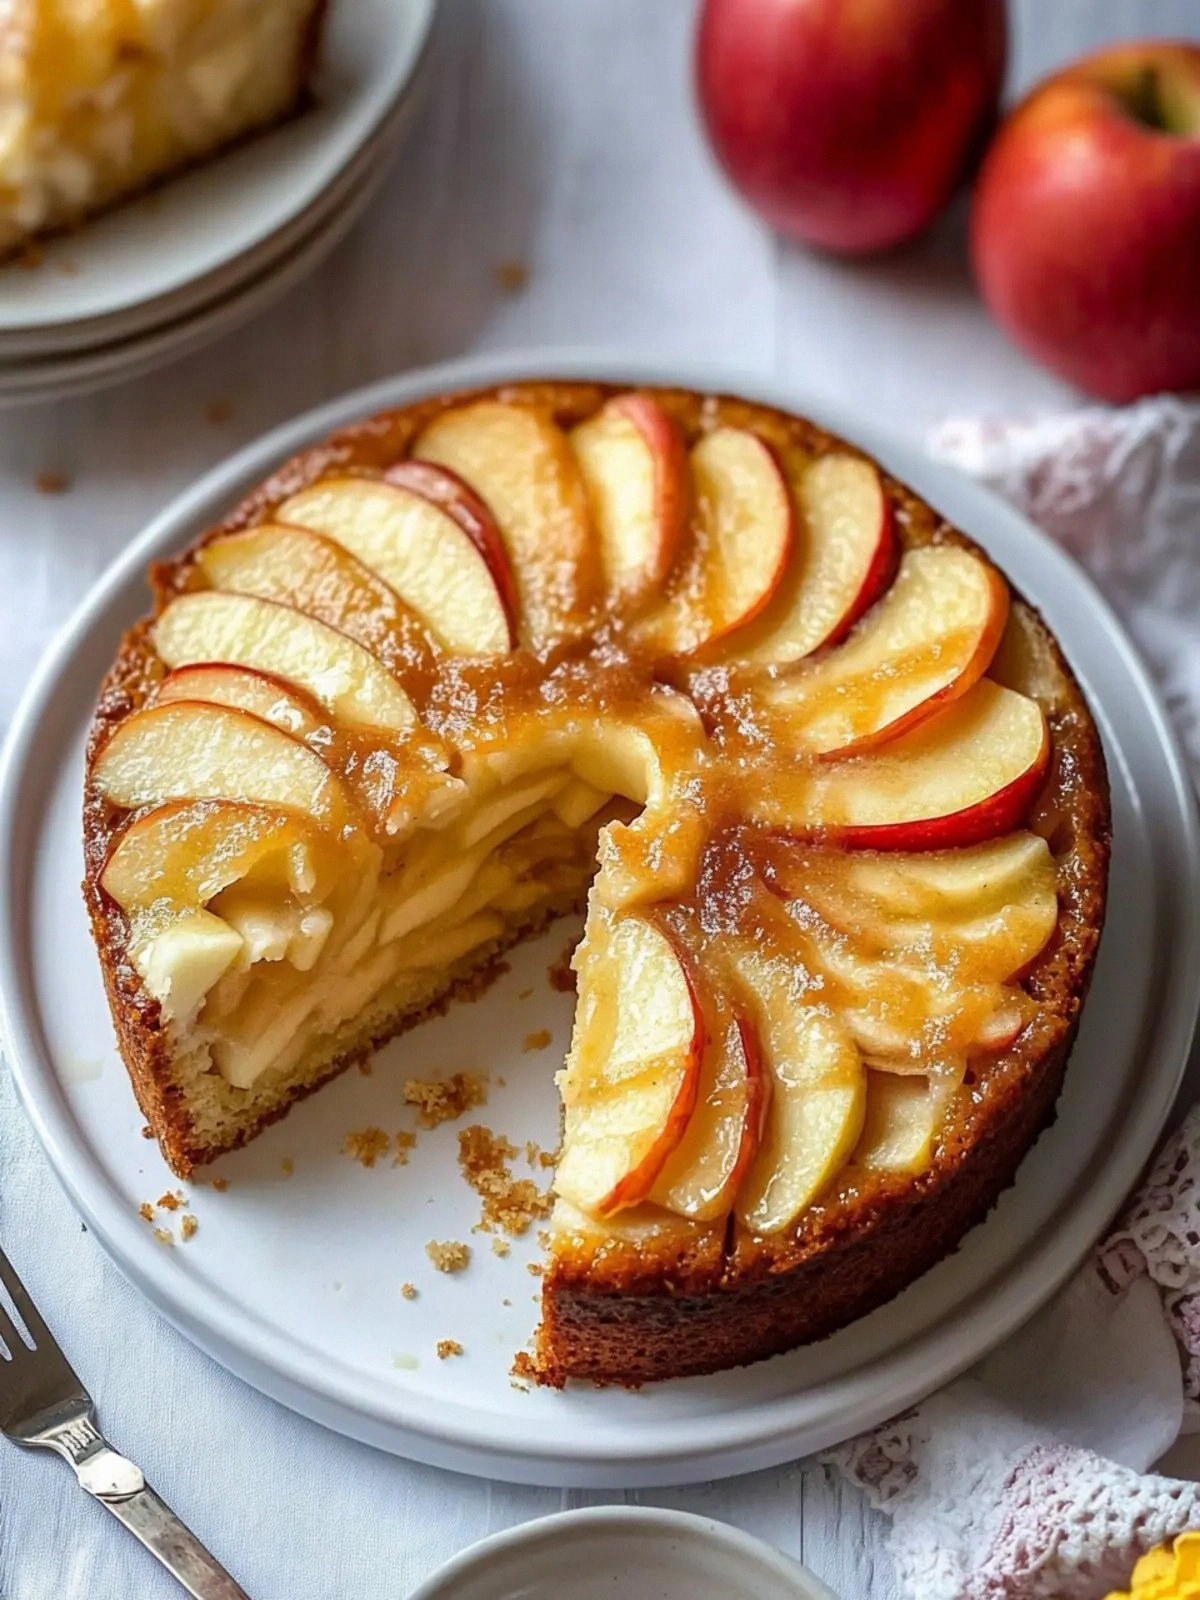
Picture yourself pulling this out of the oven, the whole kitchen smelling incredible, the timer chiming, and a golden crust forming a perfect halo around the soft interior. The steam rises like a cloud of sweet perfume, and you can’t help but feel a surge of triumph. The first slice is a revelation; the apple pieces are juicy, the crumb airy, and the dusting of powdered sugar gives it that classic finishing touch. The cake is not just a dessert; it’s a statement, a declaration that you can make something delicious and comforting at the same time. It’s the kind of dish that makes you want to brag to anyone who will listen. And if you’re still not convinced, stay tuned for the next part, where I’ll reveal the secrets that make this version truly unforgettable.
I’ve spent countless hours experimenting with apple cakes, and this particular recipe is the culmination of everything I’ve learned. The process is straightforward, yet each step is essential. The batter’s consistency is crucial; too thick, and you’ll end up with a dense cake; too thin, and it won’t hold its shape. The apples must be diced evenly so they cook at the same rate, ensuring that every bite has a burst of flavor. The yogurt’s acidity is key to balancing the sweetness and giving the cake a subtle tang that makes it feel fresh. The baking powder and soda work in harmony to create that light, airy rise that’s so satisfying. When you combine all these elements, you get a cake that’s as beautiful to look at as it is to eat.
If you’ve ever struggled with a cake that turns out too dense or too sweet, you’re not alone. I’ve been there, and I’ve found that the trick lies in the precise balance of ingredients and the right baking technique. The next sections will guide you through each element, from the base flavors to the finishing touches. I’ll share insider tips that will elevate your baking game and ensure that every batch is a triumph. Let’s dive into the details, and I promise you’ll see why this recipe is hands down the best version you’ll ever make at home.
What Makes This Version Stand Out
- Taste: The combination of fresh apples and warm cinnamon creates a flavor profile that is both comforting and exhilarating. The yogurt’s subtle tang cuts through the sweetness, leaving a clean finish. This balance is achieved through precise measurements and the strategic use of spices, ensuring each bite is a harmonious experience.
- Texture: The cake’s crumb is airy yet firm, thanks to the right ratio of flour and leavening agents. The oil keeps the interior moist, while the apples provide a pleasant juiciness that prevents the cake from feeling dry. The result is a cake that melts in your mouth without becoming mushy.
- Simplicity: The recipe uses only ten ingredients, all of which are pantry staples or readily available in any grocery store. There are no obscure or hard‑to‑find items, making this cake approachable for bakers of all skill levels.
- Uniqueness: The use of plain yogurt instead of heavy cream or sour cream gives this cake a lighter, tangier profile that sets it apart from traditional apple cakes. This subtle twist adds depth without compromising the classic apple flavor.
- Crowd Reaction: Friends who try this cake often comment on its moistness and the perfect balance of sweetness and spice. Many say it’s the cake that will be requested at every gathering, and it’s easy to see why.
- Ingredient Quality: Using fresh, firm apples and high‑quality yogurt makes a noticeable difference. The recipe’s reliance on these core ingredients ensures a consistent and flavorful outcome.
- Cooking Method: Mixing the batter gently to avoid over‑mixing preserves the cake’s lightness. Baking at the correct temperature and time ensures a golden crust while keeping the interior tender.
- Make‑ahead Potential: Once baked, the cake can be stored in an airtight container for up to five days, making it perfect for busy weeknights or holiday parties.
Alright, let's break down exactly what goes into this masterpiece. Each component has a specific purpose, and together they create a cake that feels both indulgent and wholesome. The next section will take you through the ingredient list, revealing the science behind each element.
Inside the Ingredient List
The Flavor Base
Plain yogurt is the star of this cake, providing a gentle tang that balances the sweetness of the apples and sugar. Its acidity reacts with the baking soda to create carbon dioxide bubbles, giving the cake a light lift. If you substitute Greek yogurt, the cake will be denser but richer in protein. For a dairy‑free option, try coconut yogurt; it will add a subtle coconut flavor that complements the apple.
The Texture Crew
All‑purpose flour and the leavening agents—baking powder and baking soda—work together to create a tender crumb. The oil keeps the batter moist, preventing it from drying out during baking. If you prefer a crispier top, sprinkle a light dusting of flour over the batter before baking. Skipping the oil will result in a cake that’s dry and crumbly, so keep it on the list.
The Unexpected Star
Ground cinnamon is the subtle spice that ties everything together. It brings warmth and depth, turning a simple apple cake into a comforting dessert. A pinch of nutmeg or allspice can be added for a more complex flavor profile. If you’re allergic to cinnamon, substitute with a teaspoon of ground ginger for a different twist.
The Final Flourish
Powdered sugar is the finishing touch that adds sweetness and a silky texture. It’s also used to dust the top, giving the cake a classic look. If you prefer a lower sugar option, use a sugar substitute or reduce the amount to ¾ cup. The apples are the core of the cake; they provide juiciness, natural sweetness, and a pleasant bite. Choosing firm apples like Fuji or Honeycrisp ensures they hold their shape during baking.
Everything’s prepped? Good. Let’s get into the real action. The method is where the magic happens, and each step is crucial to achieving that perfect rise and flavor. I’ll walk you through the process step by step, adding a few personal touches along the way.
The Method — Step by Step
- Preheat your oven to 350°F (175°C). Grease a 9-inch round cake pan and line the bottom with parchment paper for easy removal. The parchment should be snug but not too tight. This step ensures a smooth release and a crisp edge. The smell of the pan heating up is a good indicator that the oven is ready.
- In a large bowl, whisk together the plain yogurt, granulated sugar, and eggs until the mixture is smooth and pale. The whisking should be vigorous enough to incorporate air, giving the batter a light feel. If the mixture looks too thick, add a tablespoon of milk to thin it slightly. The goal is a silky consistency that pours easily.
- Add the vegetable oil to the wet mixture, whisking until fully incorporated. The oil adds moisture and helps the cake stay soft. At this point, you can also add a splash of vanilla extract for an extra layer of flavor. The vanilla will mingle with the yogurt, creating a subtle depth that’s hard to resist.
- Whisk the flour, baking powder, baking soda, salt, and ground cinnamon in a separate bowl. The dry ingredients must be evenly distributed to avoid pockets of flour. Sifting the flour can help achieve a smoother batter. The spices should be well blended to ensure consistent flavor throughout.
- Gradually fold the dry mixture into the wet batter, stirring gently until just combined. Over‑mixing can cause the cake to become dense, so stop as soon as the flour is incorporated. The batter should still look slightly lumpy; this is normal and will help the cake rise.
- Fold in the diced apples gently, ensuring they’re evenly distributed. The apples should be coated with the batter to prevent them from sinking to the bottom. A light touch preserves their texture, so you’ll get a juicy bite in every slice.
- Pour the batter into the prepared pan, smoothing the top with a spatula. The batter should fill the pan to about three‑quarters full. This allows room for the cake to rise without overflowing.
- Bake for 30 to 35 minutes, or until a toothpick inserted into the center comes out clean. The cake’s edges should be golden brown, and the top should have a slight crust. The aroma will intensify, signaling that the cake is ready.
- Let the cake cool in the pan for 10 minutes before transferring it to a wire rack. Cooling in the pan prevents the cake from becoming soggy at the bottom. Once on the rack, let it cool completely before dusting with powdered sugar.
- Dust the cooled cake with powdered sugar, creating a delicate, sweet finish. The sugar should melt slightly on contact, giving a silky texture. Serve immediately or store in an airtight container.
That’s it — you did it. But hold on, I've got a few more tricks that'll take this to another level. These insider tips will help you avoid common pitfalls and ensure that every bite is flawless.
Insider Tricks for Flawless Results
The Temperature Rule Nobody Follows
Many bakers bake at a higher temperature to get a quick rise, but this can cause the cake to crack or become dry. I’ve found that baking at 350°F (175°C) gives a steady rise and a beautiful golden crust. Keep the oven door closed during the first 20 minutes to maintain a consistent temperature. If your oven runs hot, use an oven thermometer to check the actual temperature. The result? A cake that’s evenly baked with a perfect crumb.
Why Your Nose Knows Best
As the cake bakes, the aroma will change from sweet to nutty to slightly caramelized. Trust your nose; when the smell is rich and comforting, it’s a sign that the cake is nearing perfection. A strong apple scent indicates that the apples are releasing their juices. If you’re unsure, take a quick sniff from the oven vent. The scent will guide you to the ideal baking time.
The 5-Minute Rest That Changes Everything
After removing the cake from the oven, let it rest in the pan for 5 minutes. This pause allows the steam to redistribute, preventing the cake from becoming soggy at the edges. The rest period also helps the cake set, making it easier to remove from the pan. Skipping this step can lead to a cake that’s too fragile and falls apart when sliced.
Don’t Skip the Parchment
Parchment paper may seem like a minor detail, but it’s a game changer. It ensures a smooth release and protects the bottom of the cake from burning. If you forget to line the pan, the cake will stick, and the texture will be uneven. Even a thin layer of parchment will make a big difference in the final product.
Keep an Eye on the Apple Pieces
Apple pieces that are too large can burst and create a watery center. Dice them uniformly to ensure even cooking. If you prefer a crunchier texture, add a handful of chopped walnuts or pecans. The nuts will add a delightful crunch and a nutty flavor that complements the apple.
Use a Cooling Rack
Cooling the cake on a wire rack prevents moisture from collecting at the bottom. This keeps the cake from becoming soggy and preserves its airy structure. The rack also allows air to circulate around the cake, ensuring even cooling. Without a rack, the cake can develop a damp crust that affects its texture.
These tricks are not just suggestions; they’re proven methods that I’ve tested over dozens of batches. Each tip is a small adjustment that leads to a dramatic improvement in texture, flavor, and overall satisfaction. I’ve seen friends who struggled with dense cakes transform their baking with these simple changes.
Creative Twists and Variations
This recipe is a playground. Here are some of my favorite ways to switch things up:
Maple Apple Delight
Replace the plain yogurt with a mix of yogurt and maple syrup. The syrup adds a subtle sweetness that pairs beautifully with the apple. The result is a cake with a richer, caramel-like flavor. Serve it with a drizzle of maple on top for an extra indulgence.
Spiced Apple Crumble
Add a tablespoon of ground ginger and a pinch of cloves to the dry mix. This gives the cake a warm, spiced profile reminiscent of autumn. The spices deepen the apple flavor and add a comforting aroma. Finish with a crumble topping of oats and butter for texture.
Citrus Zest Twist
Grate the zest of one orange into the batter. The citrus adds brightness that cuts through the sweetness. The zest also enhances the apple’s natural flavor, giving the cake a refreshing lift. This version is perfect for spring or summer gatherings.
Nutty Apple Crunch
Fold in a handful of chopped pecans or walnuts before baking. The nuts add crunch and a buttery flavor that complements the apples. They also provide a protein boost, making the cake a more balanced dessert. The nuts brown slightly during baking, adding a delightful texture.
Chocolate Apple Fusion
Add 2 tablespoons of cocoa powder to the dry mix for a chocolatey twist. The chocolate pairs surprisingly well with apple, creating a dessert that feels both comforting and indulgent. Dust the finished cake with cocoa powder for a sophisticated finish.
Herbal Infusion
Infuse the yogurt with a sprig of fresh rosemary or thyme before mixing. The herbs add a subtle savory note that contrasts the sweetness. This version is ideal for a brunch or a unique dessert option. The herb infuses the batter as it bakes, giving a faint aromatic hint.
Each of these variations brings a new dimension to the classic apple yogurt cake. Whether you’re looking for a richer flavor, a lighter twist, or a completely different experience, these ideas will keep your baking routine exciting and delicious.
Storing and Bringing It Back to Life
Fridge Storage
Store the cooled cake in an airtight container for up to five days. Wrap it in plastic wrap before placing it in the container to preserve moisture. The cake stays fresh and moist, with the apples retaining their natural juiciness. When you’re ready to serve, let it sit at room temperature for 10 minutes to soften.
Freezer Friendly
Wrap the cake tightly in plastic wrap and place it in a freezer bag. It can be frozen for up to two months. Thaw overnight in the refrigerator, then let it come to room temperature before serving. The texture remains excellent, and the apples keep their flavor.
Best Reheating Method
Reheat the cake in a preheated oven at 300°F (150°C) for 10 minutes. Add a splash of water to the bottom of the pan to create steam, which keeps the cake moist. Alternatively, microwave on medium power for 30 seconds, then let it cool for a minute. The cake should retain its airy crumb and sweet aroma.
These storage tips ensure that your apple yogurt cake stays fresh and delicious, even days after baking. Whether you’re planning a party or just want a sweet treat for the next day, these methods keep the cake at its best.
Now that you’ve mastered the core recipe, you might wonder how to keep the excitement going. The next step is to experiment with flavors, textures, and presentation. Think about how you can pair this cake with coffee, tea, or even a splash of bourbon for a grown‑up twist. The possibilities are endless, and the only limit is your imagination.
Remember, the key to a great cake is balance. Don’t be afraid to tweak the sweetness or spice level to suit your taste. If you prefer a drier cake, reduce the yogurt slightly. If you love a sweeter finish, add a bit more sugar or a drizzle of honey. The beauty of this recipe is its adaptability; it’s a canvas waiting for your personal touch.