
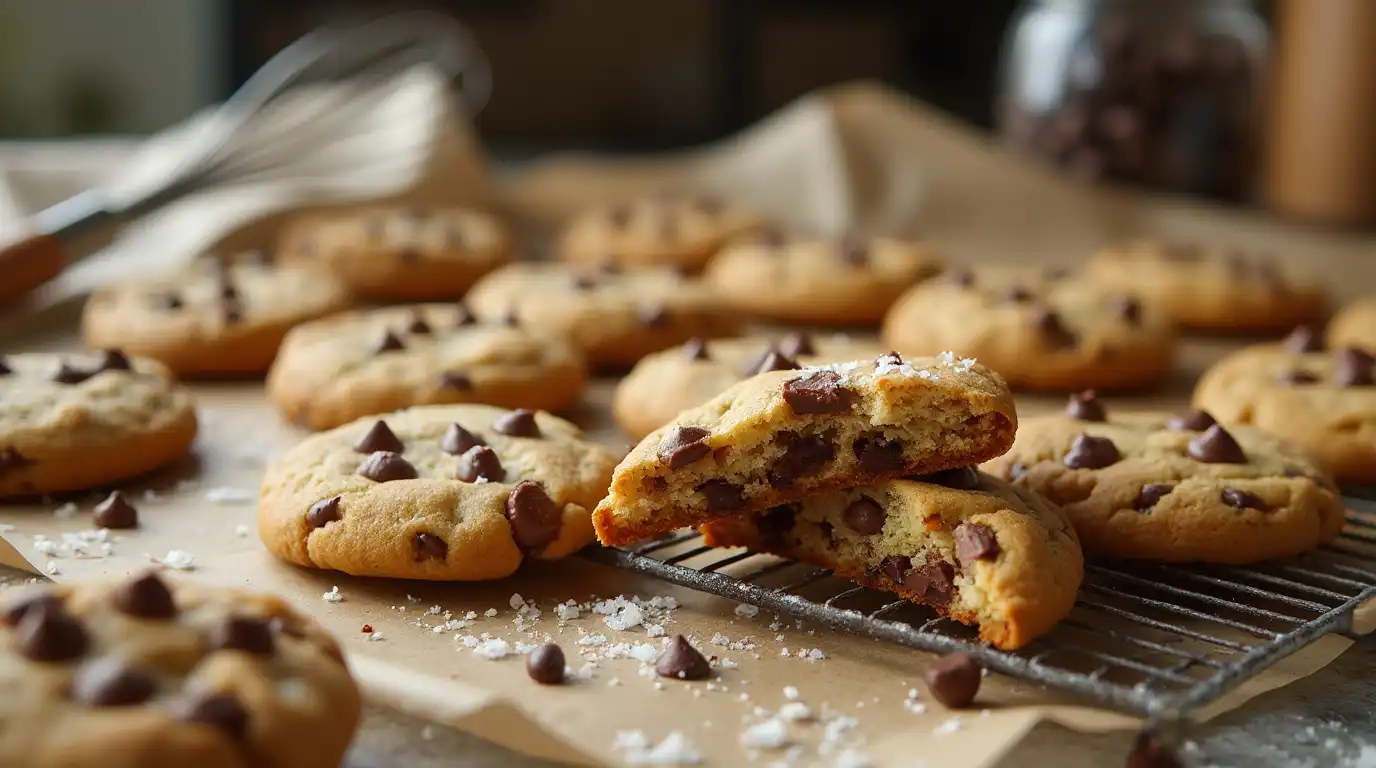
Disney chocolate chip cookies are iconic for their rich flavors and magical appeal. These cookies are a favorite among baking enthusiasts who love their chewy texture and delightful sweetness. Whether you’re baking for family, friends, or just yourself, this Disney chocolate chip cookie recipe is sure to impress.
Achieving perfect cookies often depends on one key factor: precise measurements. Using metric measurements ensures consistency and accuracy in every batch. This guide will walk you through the steps to create these famous cookies with ease, whether you’re a seasoned baker or just starting out.
Ingredients for Perfect Disney Chocolate Chip Cookies
Must-Have Ingredients for Disney Chocolate Chip Cookie Recipe
To recreate the perfect Disney chocolate chip cookies, using the right ingredients is absolutely essential. Not only does each ingredient play a specific role in achieving the cookies’ signature chewy texture, but it also contributes to their rich and unforgettable flavor. Here’s a detailed look at the must-have ingredients for this recipe:
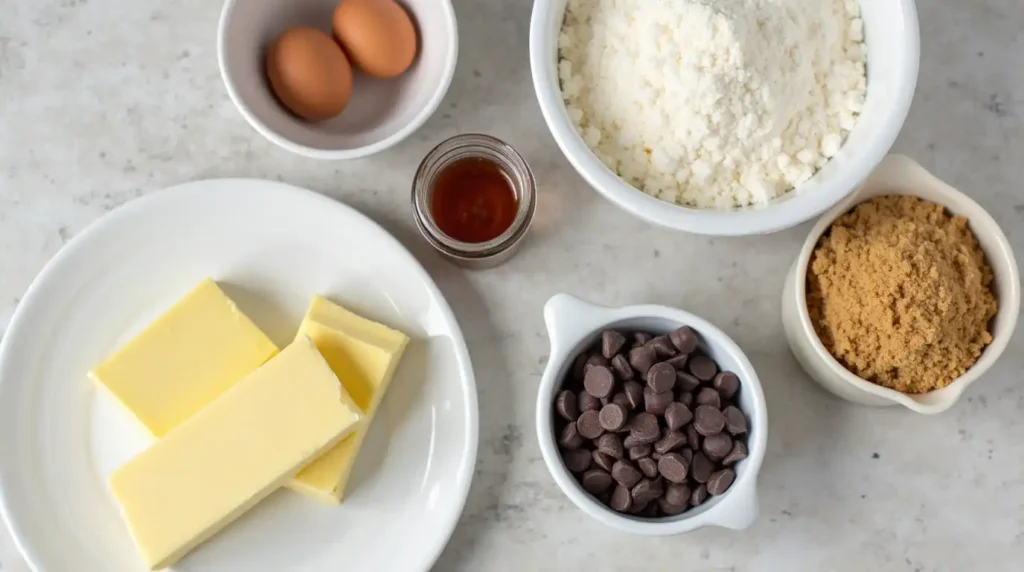
1. All-Purpose Flour
First of all, all-purpose flour provides the structure needed to hold the cookies together. For consistent results, it is crucial to measure the flour accurately. For this reason, using a scale or the spoon-and-level method when working with metric measurements is highly recommended.
2. Butter
Next, unsalted butter is key to creating rich and flavorful cookies. To ensure a smooth process, make sure your butter is softened to room temperature. This will not only make it easier to cream with sugar but also help achieve the cookies’ light and tender texture.
3. Sugar
Additionally, a mix of granulated sugar and brown sugar is used to create the perfect balance of sweetness and chewiness. While granulated sugar allows the cookies to spread evenly, brown sugar adds moisture and a caramel-like flavor, which enhances the overall taste.
4. Eggs
Moreover, eggs are essential for binding the ingredients together and adding moisture to the dough. It is best to use large eggs and add them one at a time, as this ensures proper incorporation into the batter.
5. Vanilla Extract
To further elevate the flavor, vanilla extract is indispensable. Specifically, pure vanilla extract works best to add warmth and sweetness to your cookies.
6. Chocolate Chips
Of course, high-quality semi-sweet chocolate chips are a must-have. These provide bursts of chocolatey goodness in every bite. Alternatively, you can customize your cookies by using milk or dark chocolate chips for variety.
7. Baking Soda
Equally important, baking soda acts as a leavening agent, helping the cookies rise slightly and develop a soft, chewy texture. Furthermore, it reacts with the acidity in brown sugar to create a balanced and harmonious flavor.
8. Salt
Finally, a small amount of salt is essential for balancing the sweetness and enhancing the flavors of the other ingredients.Even the smallest amount can elevate the dish.
By carefully selecting these ingredients and adhering to metric measurements for precision, you’ll be able to bake cookies that truly capture the magic of Disney. So, don’t overlook the quality of your ingredients—it’s what makes the perfect cookie possible!
Tips for Choosing Quality Ingredients for Disney Chocolate Chip Cookies
When it comes to baking the perfect Disney chocolate chip cookies, the quality of your ingredients is just as important as following the recipe. Using high-quality ingredients not only ensures that your cookies taste better but also gives them the ideal texture and appearance that make them truly magical. Here’s a deeper look into why quality matters in each key component of your recipe:
1. High-Quality Butter
To start with, butter is a critical ingredient that directly affects the flavor and texture of your cookies. Using unsalted, high-fat butter results in richer, more flavorful cookies. On the other hand, cheap or low-quality butter often contains a higher water content, which may lead to flat, less flavorful cookies. Therefore, it’s best to opt for brands that emphasize purity and consistency in their products.
2. Premium Chocolate Chips
Similarly, the chocolate chips are the highlight of any chocolate chip cookie. High-quality chocolate chips, made with higher cocoa content and fewer additives, melt better and provide a smoother, creamier flavor in every bite. Furthermore, brands that specialize in baking chocolate or use top-tier ingredients can significantly elevate your cookies.
3. Fresh Ingredients
Freshness also plays a significant role in the success of your cookies. For example, using fresh eggs ensures better structure and moisture, while fresh brown sugar retains its natural molasses flavor, adding depth to your cookies. Additionally, fresh baking soda ensures proper leavening, which gives your cookies the desired soft and chewy texture.
4. Pure Vanilla Extract
Vanilla extract enhances the overall flavor profile of your cookies, adding warmth and sweetness. Specifically, pure vanilla extract provides a more natural and robust flavor compared to imitation vanilla. Thus, it complements the richness of butter and chocolate, creating a harmonious taste.
5. High-Quality Flour
Even the flour matters when it comes to baking. For instance, all-purpose flour from reputable brands tends to be more consistent in texture and protein content. This directly impacts the structure and tenderness of your cookies. Conversely, low-quality flour may lead to uneven baking results or inconsistent textures.
6. Avoiding Additives
Finally, many lower-quality ingredients include unnecessary additives or preservatives that can alter the taste and texture of your cookies. By choosing natural, minimally processed ingredients, you can ensure a more authentic and delightful flavor.
By prioritizing quality over cost, you can achieve cookies that not only look good but also taste as if a professional baked them. Additionally, investing in better ingredients elevates the baking process, making it more rewarding. After all, every bite of your Disney chocolate chip cookie should feel as magical as a trip to the park itself!
Kitchen Tools
To bake the perfect Disney chocolate chip cookies, having the right kitchen tools is just as important as using high-quality ingredients. Proper tools not only make the baking process easier but also ensure consistent and professional results. Here’s a detailed look at the essential kitchen tools you’ll need:
1. Digital Kitchen Scale
A digital kitchen scale is an invaluable tool for baking, especially when using metric measurements. Unlike measuring cups, a scale provides precise measurements, which is critical for achieving the ideal cookie texture. For example, even a slight difference in flour or sugar weight can affect the outcome, so measuring by grams ensures accuracy every time.
2. Mixing Bowls
A good set of mixing bowls is a must-have for any baker.Be sure to grab two bowls — one for your dry ingredients and one for the wet. Stainless steel or glass bowls are preferable as they are durable, easy to clean, and don’t retain odors or stains. Choose bowls with non-slip bases to prevent accidents while mixing.
3. Hand Mixer or Stand Mixer
“A hand or stand mixer is essential for creaming butter and sugar—a crucial step for achieving the right cookie texture. While a hand mixer is more affordable and portable, a stand mixer is ideal for hands-free mixing and handling larger batches of dough. Either tool ensures your dough is properly mixed without overworking it.
4. Silicone Spatulas
Silicone spatulas are perfect for scraping down the sides of your mixing bowls to ensure all ingredients are fully incorporated. Heat-resistant and versatile for multiple kitchen uses. Look for a spatula with a sturdy handle and flexible edge for the best results.
5. Cookie Scoop
For even baking, use a cookie scoop to portion dough uniformly. This tool is especially useful when you’re baking in batches, as it speeds up the process and produces cookies with a professional appearance. Choose a scoop that matches your desired cookie size, such as small, medium, or large.
6. Baking Sheets
Investing in high-quality baking sheets is essential for evenly baked cookies. Opt for heavy-duty sheets with a light-colored, nonstick surface to prevent over-browning. Using parchment paper or silicone baking mats on the sheets will also ensure the cookies don’t stick and make cleanup easier.
7. Wire Cooling Rack
A wire cooling rack is crucial for allowing your cookies to cool properly. Placing cookies on a cooling rack ensures air circulates around them, preventing the bottoms from becoming soggy. Cooling the cookies completely also helps set their texture before serving.
8. Measuring Cups and Spoons
While a kitchen scale is ideal for most measurements, measuring cups and spoons are still necessary for small quantities of liquid ingredients, like vanilla extract or baking soda. Opt for stainless steel or durable plastic sets for longevity.
9. Oven Thermometer
Oven temperatures can vary, even in well-calibrated ovens. “Using an oven thermometer helps verify that your oven reaches and maintains the correct baking temperature.This small investment can make a significant difference in achieving perfectly baked cookies.
Your Easy Step-by-Step Recipe for Disney’s Famous Chocolate Chip Cookies
Getting Your Disney Chocolate Chip Cookie Dough Ready
Proper dough prep is essential for perfect Disney-style cookies.Each phase of the process plays a role in creating cookies that are soft, chewy, and packed with flavor. By following these steps carefully, you’ll ensure that your dough is just right for baking.
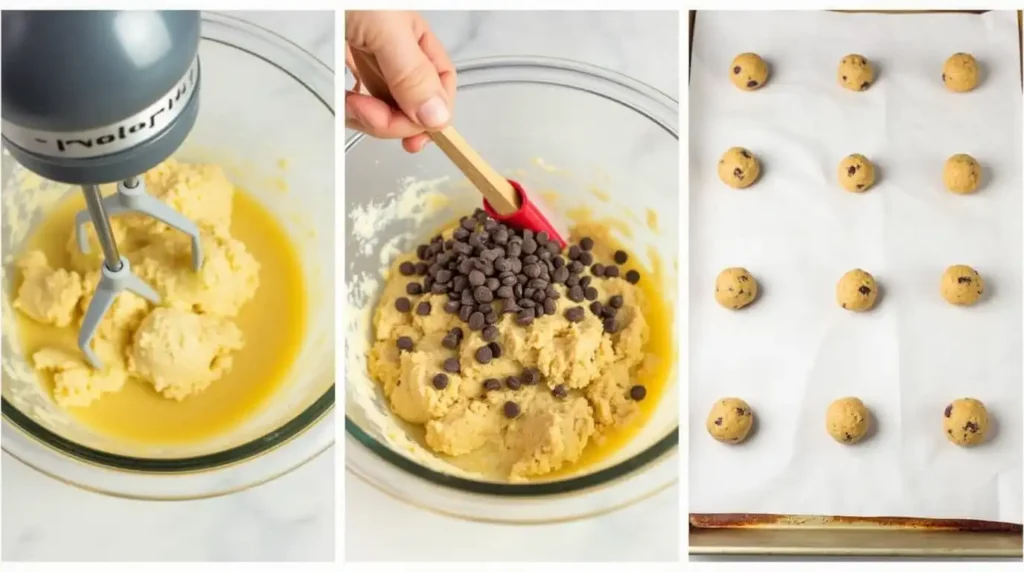
1. Creaming the Butter and Sugar
The first step in preparing the dough is creaming the butter and sugar together. This process is essential for incorporating air into the mixture, which contributes to the cookies’ soft texture. Here are some tips to get it right:
- Use softened butter for easy mixing; cold butter won’t blend properly.
- Beat the butter and sugar with a hand mixer or stand mixer until the mixture is light and fluffy, typically about 2-3 minutes.
- Combine both granulated and brown sugar to achieve the perfect balance of sweetness and chewiness.
2. Adding the Wet Ingredients
Once the butter and sugar are creamed, the next step is to add the wet ingredients. These include eggs, vanilla extract, and any liquid components in the recipe. Follow these tips:
- Add eggs one at a time, mixing well after each addition to ensure they are fully incorporated.
- Use pure vanilla extract for a richer flavor that enhances the cookies.
- If the recipe calls for a liquid like milk, add it gradually to avoid over-saturating the dough.
3. Mixing the Dry Ingredients
In a separate bowl, mix together the dry ingredients, which usually include flour, baking soda, and salt. Properly combining these ingredients ensures even distribution throughout the dough. Here’s how:
- Sift or whisk the dry ingredients to break up any clumps and aerate the mixture.
- Slowly add the dry ingredients to the wet mixture, mixing on low speed to prevent overworking the dough. Overmixing can lead to tough cookies.
4. Folding in the Chocolate Chips
Once the wet and dry ingredients are fully combined, it’s time to add the chocolate chips. Here’s how to do it for the best results:
- Use a spatula or wooden spoon to gently fold the chocolate chips into the dough.
- Distribute the chips evenly so that every cookie has bursts of chocolatey goodness.
- For extra indulgence, you can mix in additional toppings like chopped nuts or white chocolate chips.
5. Chilling the Dough (Optional but Recommended)
Chilling the dough can make a big difference in the final texture and flavor of your cookies. Here’s why it’s beneficial:
- Chilling allows the flavors to meld together, resulting in richer, more developed flavors.
- It helps firm up the dough, which prevents the cookies from spreading too much while baking.
- For best results, cover the dough with plastic wrap and refrigerate for at least 30 minutes or up to 24 hours.
By taking care during each step of dough preparation, you’re setting the stage for baking cookies that are soft, chewy, and full of flavor. Whether you’re baking for a special occasion or just for fun, this attention to detail will make all the difference in achieving the perfect batch of Disney chocolate chip cookies!
Benefits of Using Metric Measurements in Baking
When it comes to baking, precision is key, and using metric measurements can make all the difference in achieving consistent results. Metric measurements eliminate guesswork and ensure that your Disney chocolate chip cookies turn out perfectly every time. Let’s explore why and how to use metric measurements effectively in your baking.
1. Why Metric Measurements Matter
Metric measurements are based on weight (grams) and volume (milliliters), which are far more accurate than the traditional cup-and-spoon system. Here’s why they matter:
- Accuracy: Baking is a science, and small differences in ingredient quantities can significantly impact the texture and flavor of your cookies. Metric measurements ensure precision, reducing errors caused by inconsistent scooping.
- Consistency: Using a kitchen scale to weigh ingredients guarantees that every batch of cookies is consistent, whether you’re making them for the first time or the tenth.
- Ease of Scaling Recipes: Metric measurements make it easier to double or halve a recipe without complicated conversions, which is especially helpful for varying batch sizes.
2. Essential Metric Tools
To successfully use metric measurements, you’ll need a few key tools:
- Digital Kitchen Scale: A reliable kitchen scale is essential for measuring ingredients like flour, sugar, and butter accurately. Look for a scale that allows you to switch between grams and ounces for versatility.
- Measuring Jug with Milliliters: For liquid ingredients like milk or vanilla extract, a measuring jug with clear milliliter markings ensures precise measurements.
- Metric Conversion Chart: If you’re used to imperial measurements, a conversion chart can be a handy reference while transitioning to metric.
3. Tips for Metric Accuracy
Using metric measurements effectively requires some best practices to avoid common mistakes:
- Tare the Scale: Always zero out the weight of your container before measuring ingredients to ensure accuracy.
- Measure Flour Properly: Instead of scooping, weigh your flour to avoid compacting it, which can lead to dense cookies.
- Double-Check Liquid Measurements: For liquids, pour slowly and at eye level to get an accurate reading on your measuring jug.
4. Benefits for Baking Disney Chocolate Chip Cookies
Using metric measurements is especially beneficial when baking cookies because small differences in ingredient amounts can drastically affect the outcome:
- Texture: The right balance of wet and dry ingredients ensures cookies that are soft and chewy rather than dry or overly dense.
- Flavor: Precision in sugar measurements helps achieve the perfect level of sweetness without overwhelming other flavors.
- Spread and Shape: Accurate measurements of butter and flour control how much the cookies spread during baking, giving you evenly shaped cookies every time.
5. Adapting Recipes to Metric
If you come across recipes that use imperial measurements, don’t worry—adapting them to metric is straightforward:
- Use Conversion Tools: Online calculators or apps can quickly convert cups, teaspoons, and tablespoons into grams or milliliters.
- Test and Refine: While conversions are accurate, slight variations can occur. It’s always a good idea to test the recipe and make minor adjustments for your preferences.
By adopting metric measurements, you’re not only making your baking more precise but also aligning with professional techniques used in kitchens worldwide. Whether you’re an experienced baker or just starting out, switching to metric will elevate your Disney chocolate chip cookies, ensuring every batch is consistently magical.
Baking Disney Chocolate Chip Cookies Like a Pro
Baking the perfect Disney chocolate chip cookies isn’t just about following a recipe—it’s about understanding the techniques and nuances that elevate your baking from good to exceptional. Whether you’re a beginner or an experienced baker, these tips will help you bake like a pro and achieve cookies that are as delicious as they are magical.
1. Preheating the Oven
The foundation of successful baking starts with preheating the oven. This step ensures that your cookies bake evenly and develop the perfect texture. Here’s how to get it right:
- Preheat Fully: Always allow your oven to reach the correct temperature before placing your cookies inside. For most recipes, this is around 175°C (350°F).
- Use an Oven Thermometer: Even if your oven has a temperature dial, it may not always be accurate. A simple oven thermometer can help you verify the exact temperature.
2. Using the Right Bakeware
The type of baking sheet you use can greatly influence how your cookies turn out. For best results:
- Choose Light-Colored Baking Sheets: Darker sheets absorb more heat, which can cause your cookies to brown too quickly on the bottom.
- Line Your Sheets: Use parchment paper or a silicone baking mat to prevent sticking and promote even baking.
- Avoid Overcrowding: Leave enough space between cookies (at least 2 inches) to allow for spreading.
3. Positioning in the Oven
Where you place your baking sheet in the oven matters more than you might think. For optimal results:
- Use the Center Rack: Baking in the middle of the oven ensures even heat distribution.
- Rotate the Pan: About halfway through baking, rotate the pan 180 degrees to account for any hot spots in your oven.
4. Timing and Monitoring
Professional bakers know that cookie baking is all about timing. Here’s how to master it:
- Follow the Recipe Timing: Start by adhering to the recipe’s suggested bake time, typically 10-12 minutes.
- Look for Visual Cues: Perfect cookies will have golden edges but may still look slightly soft in the center. Cookies will set further while cooling.
- Don’t Rely Solely on a Timer: Ovens vary, so keep an eye on your cookies during the last few minutes.
5. Cooling Like a Pro
Properly cooling your cookies is just as crucial as baking them for the perfect texture. Incorrect cooling can lead to soggy or overcooked cookies. Follow these tips:
- Cool on the Baking Sheet: Allow cookies to rest on the baking sheet for 2-3 minutes after removing them from the oven. This helps them firm up slightly.
- Transfer to a Wire Rack: Move the cookies to a wire cooling rack to cool completely. This prevents steam from getting trapped underneath, which could make the cookies soggy.
6. Understanding Cookie Spread
If your cookies are spreading too much or not enough, the issue may be with your dough or baking conditions:
- Too Much Spread: This could indicate the butter was too soft, or the dough wasn’t chilled. “Chilling the dough for at least 30 minutes can improve texture and flavor.
- Too Little Spread: Excessive flour or cold dough can prevent spreading. Weigh your ingredients carefully and let the dough rest at room temperature for a few minutes before baking.
7. Personalizing Your Cookies
To take your cookies to the next level, consider professional touches:
- Add a Sprinkle of Sea Salt: A light sprinkle of flaky sea salt on top of your cookies before baking enhances the flavors and adds a touch of sophistication.
- Experiment with Chocolate: Use a mix of chocolate chips, chunks, or even chocolate disks for varying textures.
- Consistency Is Key: Use a cookie scoop to ensure even-sized cookies, which bake uniformly.
By applying these pro-level tips and techniques, you’ll achieve cookies that look and taste like they came straight from a professional bakery. Not only will your cookies turn out consistently perfect, but you’ll also gain the confidence to experiment and refine your baking skills. With these strategies, your Disney chocolate chip cookies are guaranteed to impress every time!
Tips for Even Cookies
When baking cookies, achieving evenness in size, shape, and texture is key to professional-looking results. Uneven cookies may bake inconsistently, leading to some that are overdone while others are undercooked. By following these expert tips, you can ensure your Disney chocolate chip cookies turn out evenly baked and picture-perfect every time.
1. Use a Cookie Scoop
A cookie scoop is one of the simplest yet most effective tools for creating even cookies. Here’s why it matters:
- Consistent Size: A cookie scoop ensures that every cookie is the same size, which helps them bake uniformly.
- Efficient Shaping: Scooping the dough not only speeds up the process but also gives the cookies a uniform round shape.
- Choose the Right Size: Depending on your desired cookie size, use a small, medium, or large scoop. For standard cookies, a medium (about 2 tablespoons) works well.
2. Weigh Your Dough
If you want absolute precision, weighing the dough is the way to go. This is especially useful when you’re making a smaller batch or want cookies that look identical:
- Weigh Each Portion: Use a digital kitchen scale to measure out equal amounts of dough for each cookie.
- Prevent Overbaking: Even-sized cookies bake at the same rate, preventing smaller cookies from overcooking while larger ones remain underdone.
3. Chill the Dough
Chilling the dough before baking can help create more evenly shaped cookies. Here’s how:
- Firm Dough Holds Shape: Cold dough spreads less, leading to cookies that are thicker and more uniform.
- Enhances Flavor: Allowing the dough to chill for at least 30 minutes gives the ingredients time to meld, resulting in richer flavor.
- Preventing Over-Spreading: Chilling prevents cookies from flattening too much during baking.
4. Arrange Cookies Properly on the Baking Sheet
How you arrange your cookies on the baking sheet affects how they bake. Follow these tips for proper placement:
- Leave Space Between Cookies: Cookies need room to spread, so leave at least 2 inches between each ball of dough.
- Use the Center of the Oven: Bake one sheet at a time in the middle rack for even heat distribution.
- Rotate the pan 180 degrees halfway through baking to promote even browning and consistent results.
5. Use Parchment Paper or Silicone Mats
The surface you bake your cookies on can impact their spread and texture:
- Even Heat Distribution: Parchment paper and silicone mats promote consistent baking, reducing hot spots that can cause uneven cookies.
- Nonstick Surface: These liners prevent cookies from sticking and make removal effortless.
- Easy Cleanup: They also simplify cleaning your baking sheets.
6. Avoid Overmixing the Dough
Overmixing cookie dough can create tough or uneven cookies. Here’s how to prevent it:
- Mix Until Just Combined: Once the dry ingredients are added, mix only until no streaks of flour remain.
- Hand Fold Add-Ins: Gently fold in chocolate chips or other mix-ins to avoid overworking the dough.
7. Bake One Sheet at a Time
Baking multiple sheets at once can lead to uneven baking, as the heat may not circulate evenly. For the best results:
- Bake in Batches: Bake one sheet at a time for the most consistent cookies.
- Switch Racks if Necessary: If baking multiple sheets, rotate them halfway through and switch their positions between racks.
8. Test Bake a Few Cookies First
To ensure perfect results, bake a small test batch before committing to the entire dough:
- Check Spread and Texture: If cookies spread too much, chill the dough longer. If they don’t spread enough, let the dough warm slightly.
- Adjust Time and Temperature: Use the test bake to fine-tune your oven temperature or baking time for the best outcome.
By following these tips, you’ll bake cookies that are consistently sized, evenly baked, and beautifully shaped. These small adjustments and techniques can elevate your baking skills, ensuring that every batch of Disney chocolate chip cookies looks and tastes just right!
Tips for Perfecting Disney Chocolate Chip Cookies
Avoiding Common Mistakes
Even the most experienced bakers can encounter issues when baking cookies, and small missteps can significantly impact the final result. However, by understanding and avoiding these common mistakes, you can ensure your Disney chocolate chip cookies turn out perfectly every time. Here’s what to watch out for:
1. Measuring Ingredients Incorrectly
One of the most frequent mistakes in baking is inaccurate measurement of ingredients. Since precision is key to achieving the perfect texture and flavor in your cookies, it’s important to measure carefully.
- Flour: Over-measuring flour often results in dense, dry cookies. Therefore, always use a digital scale or the spoon-and-level method for accuracy.
- Butter: Using too much or too little butter directly affects the cookies’ spread and softness. Consequently, ensure you measure butter precisely in grams for consistency.
- Sugars: The ratio of granulated sugar to brown sugar is crucial for texture. While too much granulated sugar can make cookies crisp, too much brown sugar may result in cookies that are overly soft.
2. Using Butter at the Wrong Temperature
The temperature of butter plays a critical role in cookie texture. Unfortunately, many bakers make the mistake of using butter that is too cold or too melted.
- Softened Butter: Butter should be softened but not melted. Specifically, room temperature butter is ideal for creaming with sugar.
- Over-Melted Butter: If your butter is too melted, it can cause cookies to spread excessively during baking. If necessary, chill the dough before baking to prevent this.
3. Overmixing the Dough
Overmixing is another common error that often leads to tough, dense cookies. To avoid this:
- Mix Until Just Combined: Stop mixing as soon as the flour is fully incorporated. Overworking the dough develops too much gluten, which can result in tough cookies.
- Gentle Folding: When adding chocolate chips or mix-ins, fold them in gently to prevent overmixing.
4. Skipping the Chilling Step
Skipping the chilling step frequently causes cookies to spread too much and lose their shape. For best results:
- Firms Up Butter: Chilling allows the butter to solidify, helping the cookies retain their shape during baking.
- Enhances Flavor: Moreover, chilling gives the flavors time to meld, creating a deeper, richer taste.
5. Incorrect Baking Temperature
Using the wrong oven temperature is another common issue. Even slight variations often lead to underbaked or overbaked cookies.
- Use an Oven Thermometer: Since ovens can vary in temperature, a thermometer helps ensure accuracy.
- Preheat Fully: Always preheat your oven and wait until it reaches the correct temperature before baking.
6. Not Using the Right Bakeware
The type of bakeware you use can greatly affect the cookies’ texture and browning.
- Avoid Dark Pans: Dark-colored pans absorb more heat, which often overbrowns or burns the bottom of your cookies.
- Line the Pan: Therefore, use parchment paper or a silicone baking mat for even heat distribution and easy cleanup.
7. Overcrowding the Baking Sheet
Placing too many cookies on one baking sheet leads to uneven baking. Since cookies need room to spread properly:
- Leave Space: Ensure at least 2 inches of space between each cookie.
- Bake in Batches: Instead of overcrowding the sheet, bake smaller batches for more consistent results.
8. Baking Too Long
Overbaking is a common mistake that often leads to dry or hard cookies. To keep them soft and chewy:
- Check Early: Begin checking for doneness a couple of minutes before the recommended baking time.
- Soft Centers: Remove cookies when the edges are set, and the centers still appear slightly underbaked. Let cool cookies will firm up as they rest.
9. Ignoring Cooling Time
Skipping or rushing the cooling process can cause cookies to break or become soggy. To prevent this:
- Cool on the Pan First: Allow cookies to rest on the baking sheet for 2-3 minutes after removing them from the oven.
- Use a Cooling Rack: Transfer cookies to a wire rack to cool completely, allowing air to circulate and prevent sogginess.
By avoiding these common mistakes, you’ll be able to bake cookies that are soft, chewy, and perfectly delicious. Additionally, paying attention to these details ensures your cookies will look and taste as magical as you envisioned!
Customizing Your Cookies
One of the best parts about baking cookies is the opportunity to make them your own. While the classic Disney chocolate chip cookie recipe is undeniably magical, customizing your cookies allows you to tailor them to your personal preferences or experiment with new flavors and textures. Here are some creative ideas and techniques to help you elevate and personalize your cookies.
1. Experimenting with Chocolate
Although traditional recipes call for semi-sweet chocolate chips, you can mix and match different types of chocolate to create unique flavor profiles. Here are some options to try:
- Dark Chocolate: For a richer, slightly bitter flavor that balances the sweetness of the dough.
- Milk Chocolate: Adds a creamy and sweeter taste that complements the cookie base.
- White Chocolate: Brings a smooth, buttery flavor that pairs beautifully with additional mix-ins like cranberries or nuts.
- Chocolate Chunks or Disks: These melt differently than chips, creating pools of gooey chocolate for a more indulgent texture.
2. Adding Nuts and Seeds
For added crunch and flavor, consider incorporating nuts or seeds into your cookies. Popular options include:
- Walnuts: A classic pairing with chocolate chip cookies, offering a buttery texture and mild flavor.
- Pecans: Slightly sweet and rich, pecans add a luxurious touch.
- Almonds: Thinly sliced or chopped almonds bring a nutty crunch without overwhelming the flavor.
- Pumpkin Seeds or Sunflower Seeds: Great for a nut-free alternative, these seeds add both texture and a subtle, earthy flavor.
3. Playing with Mix-Ins
Beyond chocolate and nuts, there are countless mix-ins that can transform your cookies into something truly special. Some ideas include:
- Dried Fruits: Raisins, cranberries, or chopped apricots add a chewy, tart contrast to the sweetness of the cookie dough.
- Caramel Bits or Toffee: These mix-ins melt slightly during baking, creating a rich and gooey texture.
- Shredded Coconut: For a tropical twist, coconut adds both flavor and a slightly chewy texture.
- Marshmallows: Add mini marshmallows for a fun, gooey element reminiscent of s’mores.
4. Infusing Unique Flavors
If you want to go beyond the traditional vanilla flavor, try experimenting with other extracts and spices:
- Extracts: Almond, hazelnut, or orange extract can provide subtle but impactful flavor enhancements.
- Spices: A pinch of cinnamon, nutmeg, or cardamom can give your cookies a warm and aromatic quality.
- Citrus Zest: Lemon or orange zest adds a bright, tangy note that complements the sweetness.
5. Adjusting Texture and Thickness
Customizing the texture of your cookies is another way to make them your own. Here’s how:
- Thinner, Crispy Cookies: Flatten the dough slightly before baking and reduce chilling time for a crispier result.
- Thicker, Chewy Cookies: Chill the dough for longer and scoop larger portions to create cookies with a dense, chewy center.
- Soft, Cake-Like Cookies: Add a touch more flour or substitute some of the butter with cream cheese for a cake-like texture.
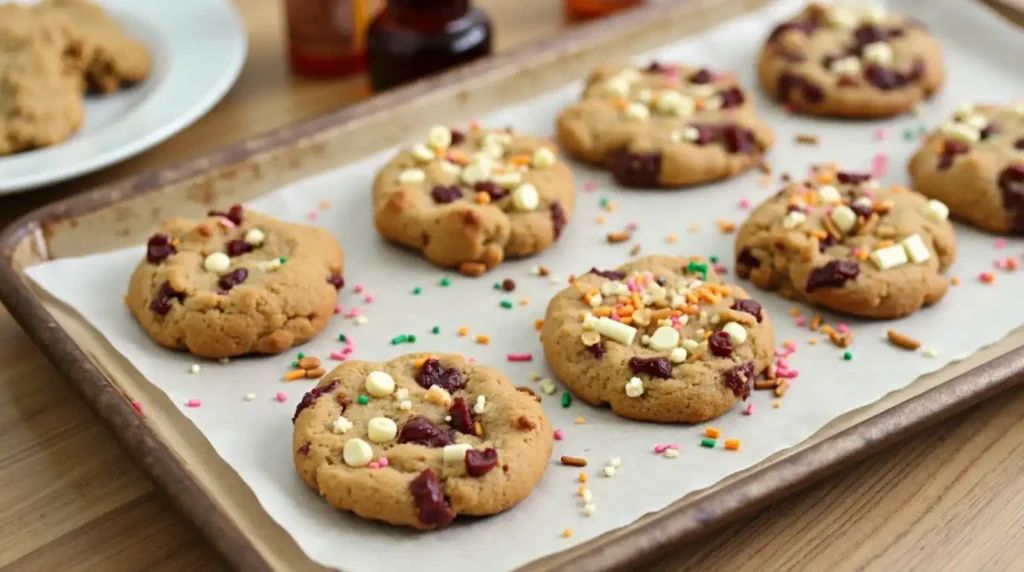
6. Decorative Finishes
Adding decorative touches can make your cookies stand out visually:
- Sea Salt Sprinkles: A light sprinkle of flaky sea salt enhances the flavor and gives your cookies a gourmet appearance.
- Chocolate Drizzle: Melt additional chocolate and drizzle it over the cooled cookies for a bakery-worthy finish.
- Sprinkles or Colored Sugar: Perfect for festive occasions, these toppings add a fun and colorful touch.
7. Seasonal and Themed Variations
Tailor your cookies to match holidays or special events:
- Holiday Spices: Add ginger, cloves, or peppermint extract for a festive twist.
- Themed Colors: Use colored sprinkles or mix-ins to match party themes or seasonal celebrations.
- Shaped Cookies: Use cookie cutters or shape the dough to create unique designs.
Customizing your cookies not only makes them more enjoyable to bake but also allows you to explore your creativity. Whether you’re adding unexpected mix-ins, playing with textures, or creating visually stunning designs, these small tweaks can turn a simple batch of cookies into a personalized masterpiece. Most importantly, have fun experimenting and let your imagination guide you to your next favorite cookie creation!
Storage and Freshness
Storing your cookies properly is essential to maintaining their texture, flavor, and freshness. Whether you want to keep your Disney chocolate chip cookies soft and chewy for days or prepare them in advance for a special occasion, proper storage techniques will ensure they taste as delicious as when they came out of the oven. Below are several tips to help you preserve their magic.
1. Storing Baked Cookies
To maintain the perfect balance of softness and chewiness, follow these tips for storing baked cookies:
- Use an Airtight Container: First and foremost, place your cookies in an airtight container to prevent them from drying out. Airtight glass or plastic containers are ideal for maintaining freshness.
- Layer with Parchment Paper: Additionally, if you’re stacking cookies, place a sheet of parchment paper between each layer to prevent them from sticking together.
- Store at Room Temperature: Generally, it’s best to keep your cookies at room temperature for up to 5-7 days. However, avoid refrigeration, as it can dry them out and alter their texture.
- Add Moisture Control: Furthermore, adding a slice of bread to the container helps maintain the cookies’ moisture, keeping them soft for longer.
2. Freezing Cookies
Freezing baked cookies is an excellent option if you want to make a large batch ahead of time. Here’s how to do it:
- Cool Completely: First, ensure the cookies are completely cool before freezing. Otherwise, condensation may form, which can make them soggy.
- Individually Wrap Cookies: To preserve freshness and prevent freezer burn, wrap each cookie in plastic wrap or aluminum foil.
- Store in a Freezer Bag or Container: After wrapping, place the cookies in a resealable freezer bag or airtight container. Don’t forget to label the bag with the date for easy reference.
- Thaw Before Enjoying: Finally, when you’re ready to eat, remove the cookies from the freezer and let them thaw at room temperature for 30 minutes. Alternatively, you can warm them in the oven at 175°C (350°F) for 2-3 minutes for a freshly baked taste.
3. Storing Cookie Dough
If you prefer to bake cookies fresh as needed, storing the dough is a great alternative. Here’s how to store cookie dough effectively:
- Refrigerating Dough: For short-term storage, keep the dough in an airtight container or wrap it tightly in plastic wrap. Refrigerated dough lasts for up to 3 days and, moreover, benefits from resting, which enhances flavor and texture.
- Freezing Dough Balls: To store for longer, scoop individual portions of dough onto a baking sheet lined with parchment paper. Once frozen solid, transfer the dough balls to a freezer bag. This method allows you to bake only what you need.
- Bake Straight from the Freezer: Conveniently, frozen cookie dough can be baked directly from the freezer. Just don’t forget to tack on an extra 1–2 minutes of baking time if needed
4. Extending Freshness
To keep your cookies fresh for as long as possible, follow these additional tips:
- Avoid Air Exposure: Always seal the container immediately after taking cookies out to prevent them from going stale.
- Store Separately: Additionally, if your cookies have strong flavors (e.g., peppermint or spices), store them separately from other cookies to avoid flavor transfer.
- Temperature Control: Lastly, keep cookies in a cool, dry place, away from direct sunlight or heat, which can cause them to soften excessively or melt chocolate chips.
5. Reviving Stale Cookies
If your cookies lose some of their freshness, don’t worry—there are several ways to revive them:
- Microwave Trick: For a quick fix, place a slightly damp paper towel over a few cookies and microwave them for 10-15 seconds. This helps to soften the cookies and bring back some of their original moisture.
- Oven Refresh: Alternatively, warm the cookies in a preheated oven at 175°C (350°F) for 3-5 minutes to make them taste freshly baked.
By using these storage techniques, you can enjoy your Disney chocolate chip cookies for days or even weeks after baking. Moreover, whether you’re storing baked cookies or freezing dough for later, these methods will ensure they stay soft, chewy, and full of flavor. Ultimately, proper storage lets you savor every magical bite as if they just came out of the oven!
Serving Ideas
The way you serve your cookies can truly make a difference in creating a memorable experience. Whether you’re enjoying Disney chocolate chip cookies at home with family or presenting them at a gathering, thoughtful serving ideas can take these delicious treats to the next level. Here are some creative and practical ways to serve your cookies.

1. Warm and Fresh from the Oven
There’s nothing quite like the taste of warm, freshly baked cookies. To serve them at their best:
- Reheat for Freshness: If your cookies have been stored, you can warm them in the oven at 175°C (350°F) for 2-3 minutes. This simple step refreshes their texture and brings out the delightful aroma of melted chocolate.
- Pair with Milk or Coffee: Additionally, serve warm cookies with a cold glass of milk for a classic pairing, or offer them with hot coffee or tea for an adult-friendly treat.
- Add a Sprinkle of Sea Salt: Moreover, just before serving, sprinkle a pinch of flaky sea salt on top for a gourmet touch that enhances the flavors.
2. Make It a Dessert Platter
For parties or special occasions, a dessert platter featuring your cookies can impress guests and add variety:
- Pair with Other Treats: Combine your cookies with brownies, mini cupcakes, or macarons to create an enticing assortment of sweets.
- Add Fresh Fruits: Furthermore, complement the sweetness of the cookies with fresh fruits like strawberries, grapes, or apple slices for balance.
- Incorporate Dips: To make it even more exciting, serve alongside bowls of chocolate ganache, caramel sauce, or whipped cream for dipping.
3. Ice Cream Cookie Sandwiches
If you want to turn your cookies into a show-stopping dessert, pair them with ice cream:
- Choose Your Flavors: For instance, use classic vanilla or chocolate ice cream, or try adventurous flavors like mint chocolate chip or salted caramel.
- Assemble the Sandwiches: Scoop a generous portion of ice cream onto the flat side of one cookie, then top it with another cookie and gently press.
- Roll the Edges: To add texture and flair, roll the edges of the ice cream sandwich in chocolate chips, sprinkles, or crushed nuts.
4. Cookie Sundae Bar
For an interactive and customizable dessert, consider setting up a cookie sundae bar:
- Start with Cookies: Begin by providing a stack of your Disney chocolate chip cookies as the base.
- Offer Ice Cream Options: Additionally, include a variety of ice cream flavors to cater to different tastes.
- Toppings Galore: Lay out bowls of toppings such as hot fudge, caramel, whipped cream, sprinkles, crushed candy bars, and cherries so guests can build their perfect sundae.
5. Presentation Matters
The way you present your cookies can significantly enhance the overall experience:
- Decorative Plating: Arrange cookies on a beautiful platter or tiered tray. For added flair, garnish with edible flowers, powdered sugar, or a drizzle of chocolate.
- Holiday Themes: Similarly, use seasonal decorations like colorful napkins, ribbons, or themed plates to match the occasion.
- Individual Wrapping: Alternatively, wrap each cookie in cellophane or paper bags with a ribbon for party favors or gifts.
6. Themed Serving Ideas
For a Disney-inspired touch, you can incorporate creative serving ideas that align with the magic of Disney:
- Disney-Themed Plates: Serve your cookies on plates featuring Disney characters or logos for an extra dose of fun.
- Cookie Cutter Shapes: Moreover, use Mickey Mouse-shaped cookie cutters to create themed cookies for a Disney party.
- Add a Magical Drink: Pair your cookies with a colorful Disney-inspired drink like hot chocolate with whipped cream and sprinkles.
7. Packaged for Sharing
Cookies also make a thoughtful and versatile gift, and there are many ways to package them beautifully:
- Cookie Boxes: Use decorative boxes lined with parchment paper to pack a selection of cookies. This not only looks professional but also keeps the cookies fresh.
- Mason Jars: For a more personal touch, stack cookies in a mason jar, add a ribbon, and attach a handwritten note.
- Seasonal Wrapping: During holidays, wrap cookies in festive paper or use themed gift bags to make them extra special.
By incorporating these serving ideas, you can turn a simple batch of Disney chocolate chip cookies into a magical experience. Whether you’re enjoying them warm, dressing them up for a party, or gifting them to friends, these creative serving suggestions ensure that your cookies will leave a lasting impression.
Conclusion
Disney chocolate chip cookies are more than just a dessert—they’re a little piece of magic you can create in your own kitchen. By using accurate metric measurements, high-quality ingredients, and following the tips shared in this blog post, you can bake cookies that are soft, chewy, and absolutely delicious every time. Whether you’re preparing them for a cozy family gathering, a fun party, or simply to satisfy your sweet tooth, these cookies are sure to impress.
Additionally, customizing your cookies, storing them properly, and presenting them creatively can make your baking experience even more enjoyable. Whether you’re a beginner or an experienced baker, the joy of making these cookies lies in the details, from mixing the dough to sharing the final results with loved ones.
Now it’s your turn to bring the Disney magic to life in your kitchen. Try out the recipe, experiment with your own variations, and share your creations with friends and family. After all, the best part of baking is sharing the happiness it brings. So, grab your apron, preheat your oven, and get ready to bake a batch of perfect Disney chocolate chip cookies that everyone will love!
For more tips on baking techniques, check out Better Homes & Gardens’ guide on measuring ingredients or learn about why chilling cookie dough matters.
Disney Chocolate Chip Cookies
Ingredients
- 2½ cups all-purpose flour
- ¾ tsp baking soda
- tsp salt
- 1 cup unsalted butter, softened
- 1 cup packed light brown sugar
- ¾ cup granulated sugar
- 2 large eggs
- 1 tbsp vanilla extract
- 2 cups semi-sweet chocolate chips
Instructions
- -Preheat your oven to 350°F (175°C). Line a baking sheet with parchment paper.-In a medium bowl, whisk together flour, baking soda, and salt. Set aside.-In a large bowl, cream the softened butter, brown sugar, and granulated sugar until light and fluffy (about 2–3 minutes).-Add eggs one at a time, beating well after each addition. Mix in the vanilla extract.-Gradually add the dry ingredients to the wet ingredients and mix until just combined.-Fold in the chocolate chips evenly.-Scoop cookie dough using a cookie scoop and place on the prepared baking sheet, spacing them about 2 inches apart.-Bake for 10–12 minutes, or until the edges are golden and the centers are just set.-Let cool on the baking sheet for 5 minutes before transferring to a wire rack.
Notes
- Don’t overmix the dough once the dry ingredients are added — this helps keep the cookies soft and tender.
- Chilling the dough for 30 minutes before baking can help prevent spreading and enhance the flavor.
- Use a cookie scoop for evenly sized cookies that bake consistently.
- Let the cookies rest on the baking sheet for 5 minutes after baking — they’ll continue to set as they cool.
- For gooier centers, slightly underbake the cookies and let them finish setting on the pan.
- Swap in your favorite chips! Milk chocolate, dark chocolate, or even white chocolate chips work beautifully.
- Make it Disney-sized! Use a large scoop for big, bakery-style cookies and adjust bake time by 2–3 minutes.
- Freeze extra dough in scoops for a quick, fresh-baked cookie anytime — just add a minute or two to the bake time.