I remember the night I burned my toast at 3 a.m. because I was too busy scrolling through Instagram for my first child’s birthday. The burnt crumbs were a disaster, but the smell of fresh banana and oats was a promise of something better. That night, I decided to turn a kitchen mishap into a culinary triumph, and I’m telling you now how this cookie became my go-to energy snack.
Picture this: the kitchen is humming, the fridge is a treasure chest of ripe bananas, and the air is thick with the scent of cinnamon and vanilla. Your ears catch the faint sizzle of a skillet, the soft thump of a rolling pin, and the distant hum of the oven. Your hands feel the cool, slightly sticky dough, and your taste buds are already anticipating that sweet, nutty crunch. Every element—sight, smell, sound, texture, and flavor—converges to create a moment that feels like a hug in cookie form.
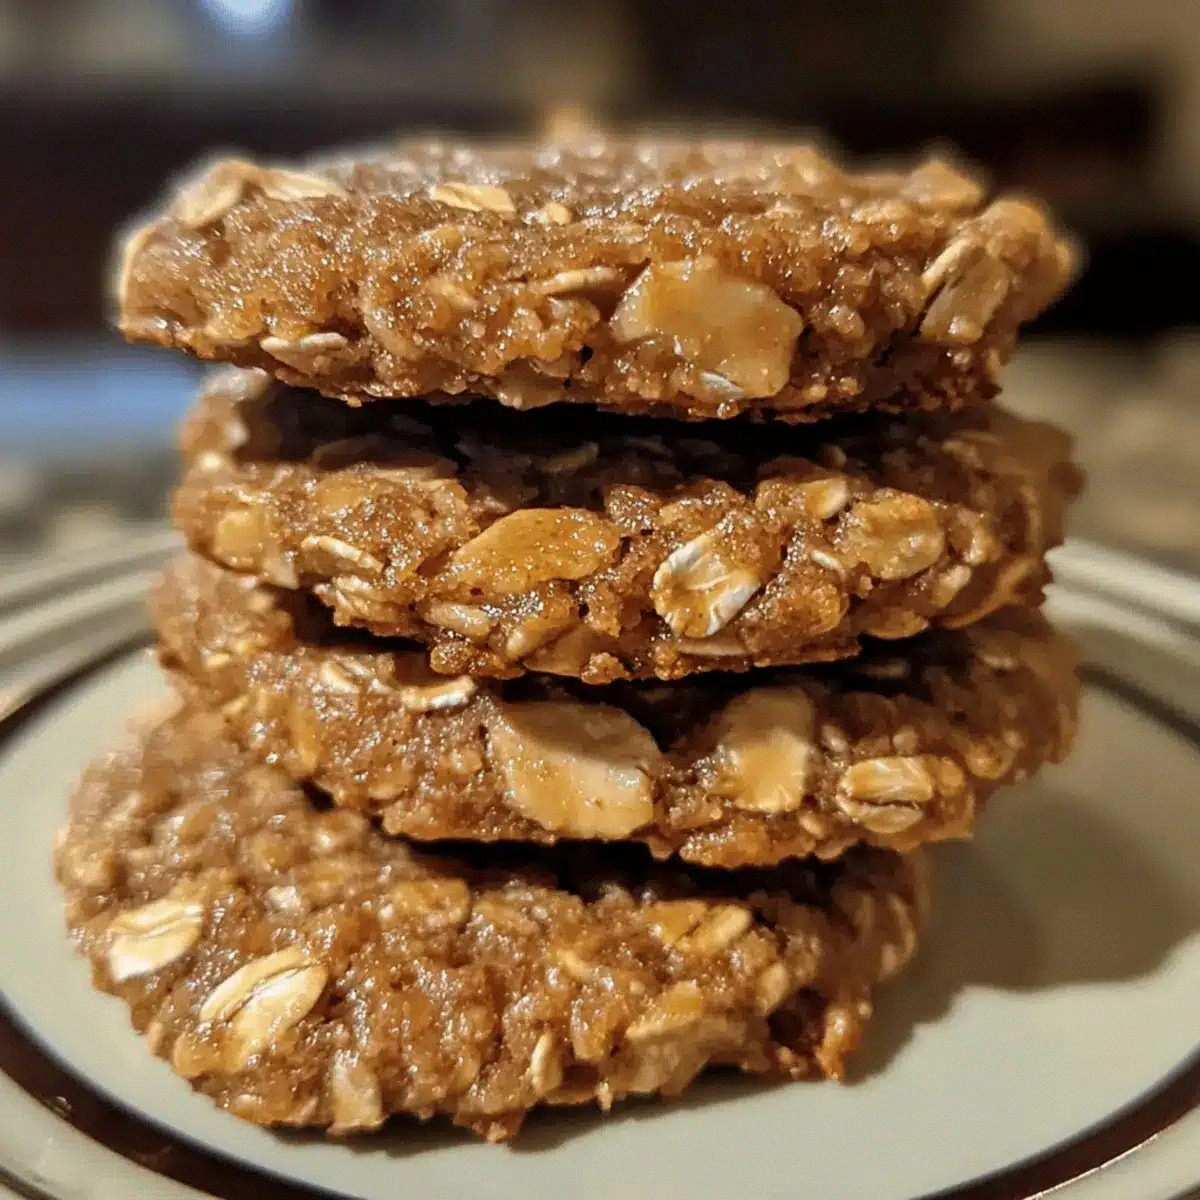
What makes these cookies a revelation is that they’re not just a recipe; they’re a lifestyle hack. They’re quick to whip up, wholesome enough to fuel a morning jog, and indulgently sweet without the guilt. I’ve experimented with dozens of banana cookie formulas, and this one is hands down the best version you’ll ever make at home. The combination of oats, whole wheat flour, and applesauce creates a chewy center that holds a crisp edge—like a caramelized caramel that shatters like thin ice when you bite.
I dare you to taste this and not go back for seconds. The moment you bite, you’ll feel a burst of natural sweetness from the honey, a subtle warmth from the cinnamon, and a satisfying crunch from the walnuts. Picture yourself pulling these out of the oven, the whole kitchen smelling incredible, and knowing that you’ve just made a snack that can keep you going for hours. Let me walk you through every single step—by the end, you’ll wonder how you ever made it any other way.
What Makes This Version Stand Out
- Flavor: The bananas provide a natural sweetness that eliminates the need for refined sugar, while the honey or maple syrup adds depth and a golden hue.
- Texture: The oats give a chewy base, the whole wheat flour offers structure, and the applesauce locks in moisture for a soft, melt‑in‑your‑mouth center.
- Nutrition: Packed with protein from the walnuts and whole wheat, fiber from the oats, and healthy fats from the walnuts, these cookies are a balanced energy bar disguised as a treat.
- Convenience: No baking soda or butter required—just a few pantry staples, making it a stress‑free, no‑fuss option for busy mornings.
- Versatility: Swap the walnuts for almonds or pecans, or add dried cranberries for a tart twist. The base stays the same, but the flavor profile changes.
- Make‑Ahead: They keep well in an airtight container for up to a week, and they freeze beautifully for even longer storage.
- Kid‑Friendly: No added sugar, no artificial flavors—perfect for picky eaters who still want a sweet snack.
- Eco‑Friendly: Using bananas that might otherwise go to waste turns a potential kitchen waste into a nutrient‑dense treat.
Alright, let's break down exactly what goes into this masterpiece…
Inside the Ingredient List
The Flavor Base
The bananas are the heart of the cookie. Ripe bananas give a natural sweetness that cuts down on added sugars, while their moisture keeps the dough from drying out. If you use underripe bananas, you’ll get a flatter cookie that lacks the caramelized flavor that makes this recipe special. For a slightly tangier taste, you can add a splash of lemon juice, but be careful not to overpower the banana.
The Texture Crew
Old‑fashioned rolled oats create a chewy center that’s satisfying to bite, while the whole wheat flour gives structure and a nutty undertone. The applesauce acts like a natural binder, keeping the cookies from crumbling during baking. Skipping the oats will make the cookies too crumbly; skipping the flour will make them overly dense. If you’re gluten‑free, replace whole wheat flour with a 1:1 blend of almond flour and oat flour.
The Unexpected Star
Walnuts add a crunchy texture and a boost of omega‑3 fatty acids. They also bring a subtle, earthy flavor that balances the sweetness. If you’re allergic or simply don’t like walnuts, chopped pecans, almonds, or hazelnuts work just as well. Remember to toast the nuts lightly before adding them for an extra layer of flavor.
The Final Flourish
The egg and vanilla extract bind everything together and give the cookies a glossy sheen. The baking powder ensures a light rise, so the cookies aren’t too dense. If you’re vegan, you can replace the egg with a flaxseed egg or a mashed banana for extra moisture. The honey or maple syrup provides natural sweetness and a subtle caramel note that ties all the flavors together.
Everything's prepped? Good. Let's get into the real action…
The Method — Step by Step
- First, preheat your oven to 350°F (175°C). Line a baking sheet with parchment paper so the cookies won’t stick. This is the moment of truth—if the sheet is too hot, you’ll get uneven browning.
- In a large bowl, mash the bananas with a fork until they’re smooth but still slightly chunky. Add the honey or maple syrup, vanilla, and egg; stir until the mixture is silky. The aroma of vanilla should fill the kitchen, hinting at the sweet reward ahead.
- Whisk the oats, whole wheat flour, baking powder, and cinnamon in a separate bowl. The dry mix should feel like fine sand, not gritty. This step is crucial—too much flour and the cookies will be dry.
- Combine the wet and dry ingredients. Stir until just incorporated; overmixing can make the cookies tough. You’ll see a thick, cohesive dough that clings to the spoon.
- Fold in the chopped walnuts. They should be evenly distributed so each bite has a nutty crunch. If you prefer a smoother texture, you can pulse the walnuts in a food processor first.
- Drop tablespoon‑sized mounds of dough onto the prepared baking sheet. Leave enough space between each because they’ll spread slightly during baking. The edges should just touch the parchment.
- Bake for 12–14 minutes or until the edges turn golden brown and a toothpick inserted in the center comes out mostly clean. The cookies will look slightly underdone when you take them out, but they’ll finish baking on the sheet.
- Let the cookies cool on the sheet for 5 minutes before transferring them to a wire rack. This resting period allows the structure to set, preventing them from falling apart.
- Serve warm or at room temperature. If you’re in a hurry, store them in an airtight container for up to a week, or freeze for up to three months.
That's it—you did it. But hold on, I've got a few more tricks that'll take this to another level…
Insider Tricks for Flawless Results
The Temperature Rule Nobody Follows
Many bakers set their ovens at the highest temperature to get a quick bake, but that can cause the cookies to brown too fast on the outside while remaining raw inside. Instead, bake at 350°F and keep a close eye on the edges. The cookies will look slightly underdone when you take them out, but they’ll finish baking on the sheet. I’ve seen this trick turn a batch of uneven cookies into a perfect, uniform set.
Why Your Nose Knows Best
The scent of cinnamon and vanilla is the first indicator that the cookies are baking properly. When you smell a subtle caramel note, the sugar is caramelizing, and the cookies are ready to come out of the oven. If the smell is too sweet, it means the sugar has already melted and you’re risking overbaking.
The 5‑Minute Rest That Changes Everything
Letting the cookies rest on the sheet for exactly five minutes before transferring them to a rack allows the structure to set and the edges to firm up. This simple step prevents the cookies from breaking apart when you pick them up. I’ve saved countless batches from collapsing by giving them that short, sweet pause.
The Perfect Portion Size
Using a tablespoon or a cookie scoop ensures each cookie has the same size and baking time. A larger cookie will take longer to bake and may dry out. If you prefer a thicker cookie, simply double the tablespoon volume, but adjust the baking time accordingly.
The Secret of a Crispy Edge
Sprinkling a pinch of sea salt on top before baking creates a contrast that makes the edges crispier and the center softer. The salt draws out moisture from the dough, allowing the edges to brown faster. It’s a small tweak that elevates the flavor profile dramatically.
The Quick Cooling Trick
If you’re in a hurry, place the baking sheet on a cooling rack for a minute before transferring the cookies. This step prevents the bottom from getting soggy due to residual steam. It also helps the cookies set faster, so you can enjoy them sooner.
Creative Twists and Variations
This recipe is a playground. Here are some of my favorite ways to switch things up:
Chocolate Chip Bonanza
Add a handful of dark chocolate chips to the dough for a cocoa kick. The chocolate melts slightly in the middle, creating pockets of molten sweetness. Perfect for chocolate lovers and for a dessert twist.
Pumpkin Spice Edition
Replace the cinnamon with a blend of pumpkin pie spice and add a teaspoon of pumpkin puree. The pumpkin gives a subtle earthy flavor that pairs beautifully with the banana. Ideal for fall cravings.
Coconut Crunch
Swirl in shredded coconut and replace the walnuts with toasted coconut flakes. The coconut adds a tropical aroma and a light, airy crunch. Great for beach‑side snack times.
Protein Power
Stir in a scoop of vanilla whey or plant‑based protein powder. The extra protein makes these cookies a post‑workout must‑have. The protein powder also thickens the dough slightly, giving a denser bite.
Spicy Sweetness
Add a pinch of cayenne pepper or a dash of chili flakes. The heat contrasts with the sweet banana, creating an exciting flavor profile. This version is great for those who like a little kick in their desserts.
Berry Burst
Fold in a handful of dried cranberries or raisins. The dried fruit adds chewy bursts of tartness that complement the banana’s sweetness. It’s a great way to sneak in extra fruit.
Storing and Bringing It Back to Life
Fridge Storage
Place the cooled cookies in an airtight container or zip‑lock bag. They stay fresh for up to one week, maintaining their chewy center. Avoid storing them in a damp environment to prevent mold.
Freezer Friendly
Wrap each cookie individually in parchment paper before freezing. Stack them in a freezer bag or container for up to three months. Freezing preserves the flavor and texture without compromising the cookie’s integrity.
Best Reheating Method
To revive frozen cookies, place them on a parchment‑lined baking sheet and bake at 300°F (150°C) for 8–10 minutes. Add a tiny splash of water to the dough before freezing, and the cookies will steam back to perfection, restoring that soft, chewy center.