
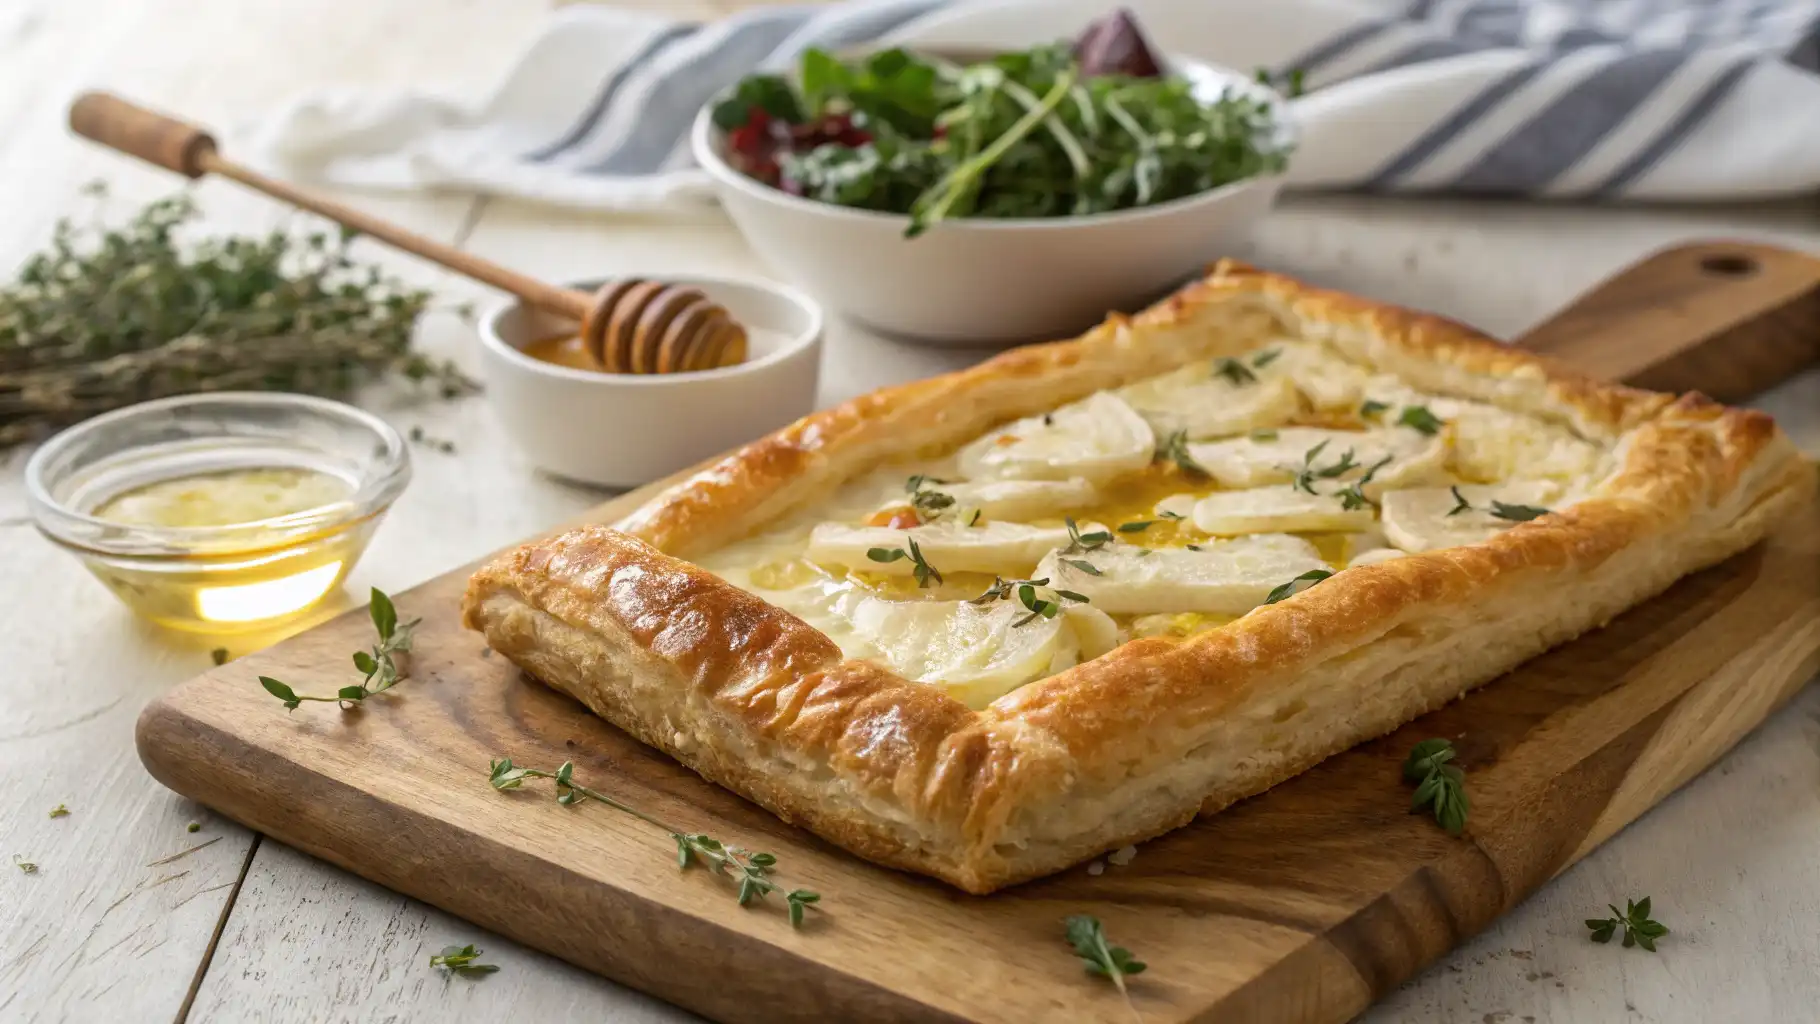
A goat cheese tart with flaky puff pastry is a simple yet elegant dish. It’s perfect as an appetizer, brunch item, or light meal. The combination of creamy goat cheese and crispy pastry creates a delicious balance of flavors.
This guide will show you how to make the perfect goat cheese tart. You’ll learn how to choose the right ingredients, bake it to perfection, and customize flavors. Whether you keep it classic or add caramelized onions, honey, or herbs, this recipe is easy to follow.
Let’s start baking a savory tart that’s crisp, cheesy, and absolutely delicious!
Goat Cheese Tart Ingredients & How to Choose the Best Ones
The Essential Ingredients for a Perfect Goat Cheese Tart
To create the perfect goat cheese tart, selecting the right ingredients is essential. Each component plays a role in achieving the best balance of flavor, texture, and presentation. Below, we’ll explore the key ingredients and how to choose the best ones for a deliciously crisp and creamy tart.
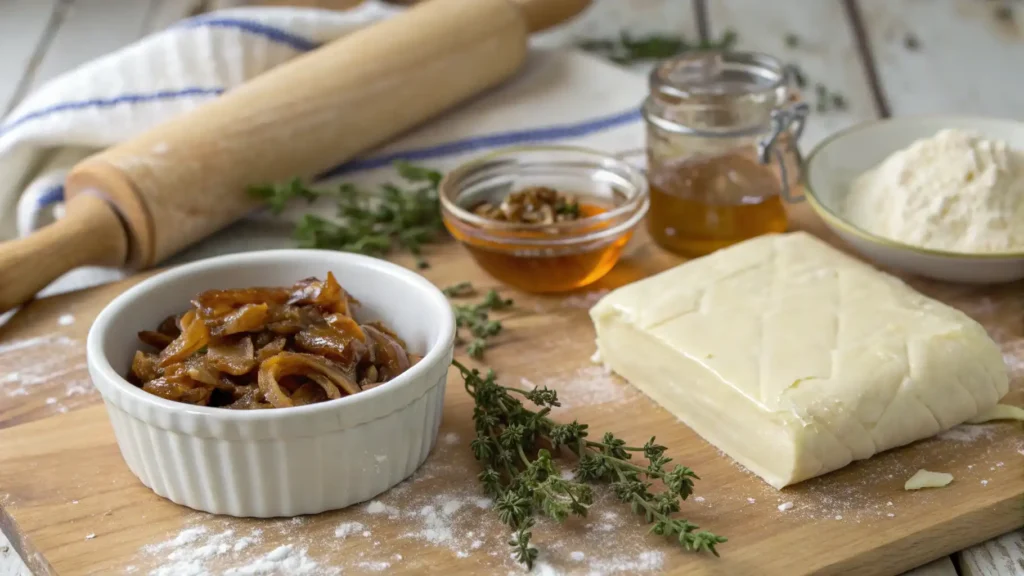
1. Puff Pastry – The Flaky Foundation
Puff pastry is the base of this tart, so choosing a high-quality one makes a big difference. While homemade puff pastry can be rewarding, store-bought versions save time without sacrificing quality.
- Store-bought puff pastry is a great option because it is easy to use and still delivers a flaky, golden crust. For the best results, look for all-butter puff pastry, as it offers a richer flavor.
- Homemade puff pastry, on the other hand, allows for complete control over the ingredients. However, it requires time and effort. If you enjoy baking from scratch, this option can elevate your tart to the next level.
Pro Tip: Always keep puff pastry cold before baking. This ensures that the butter remains solid, creating the signature flaky layers when it bakes. If the dough becomes too soft, place it in the fridge for 10–15 minutes before rolling it out.
2.Goat Cheese – A Creamy and Tangy Flavor Highlight
Goat cheese is the main ingredient in this tart, so selecting the right type is crucial.It offers a luxurious, creamy texture and a subtle tang that complements puff pastry perfectly.
- Soft goat cheese (chèvre) is the best choice for this recipe. It spreads easily and melts well, creating a smooth, creamy base for the tart.
- Aged goat cheese has a firmer texture and a stronger flavor. If you prefer a bolder taste, you can mix it with soft goat cheese for added depth.
- Goat cheese blends with herbs, honey, or truffle can add extra flavor. These are great if you want to enhance the tart effortlessly.
Pro Tip: If goat cheese is too strong for your taste, try mixing it with ricotta or cream cheese. This helps mellow the flavor while maintaining a creamy consistency.
3. Caramelized Onions – A Sweet & Savory Boost
Caramelized onions provide a rich, sweet contrast to the tangy goat cheese and buttery puff pastry. Since they take time to cook, you may want to prepare them in advance.
- Yellow and red onions work best because they have a natural sweetness that intensifies as they cook.
- Slow cooking is key—always cook them over low heat for about 30–40 minutes with butter or olive oil. This allows the natural sugars to develop, creating a deep caramel color and complex flavor.
- To enhance the taste, you can add a splash of balsamic vinegar or a pinch of brown sugar while cooking.
Pro Tip: Caramelized onions can be made ahead of time and stored in the fridge for up to one week.You can freeze them for extended storage.
4. Fresh Herbs – The Flavor Enhancers
Adding fresh herbs can elevate the tart by bringing in extra aroma and flavor. Since herbs are delicate, it’s important to know when to add them.
- Thyme is a perfect pairing with goat cheese because of its slightly lemony and earthy taste.
- Rosemary has a bold, woodsy aroma. However, since it’s quite strong, use it sparingly.
- Basil adds a fresh, slightly sweet note, making it a great choice for summer variations of this tart.
- Chives provide a mild onion-like taste that enhances the overall flavor without overpowering the other ingredients.
Pro Tip: Always add fresh herbs after baking to preserve their flavor. Baking them for too long can make them dry and less aromatic.
5. Additional Toppings – Customizing Your Tart
While a basic goat cheese tart is delicious on its own, adding extra toppings can make it even more flavorful. Here are a few ideas to help you get creative:
- For a sweet-savory contrast, drizzle honey or top with figs, pears, or caramelized apples.
- If you prefer a more savory option, add cherry tomatoes, sun-dried tomatoes, mushrooms, or prosciutto.
- For added crunch, sprinkle chopped walnuts, pecans, or pine nuts on top.
- To balance the richness, finish with a drizzle of balsamic glaze for a touch of acidity.
Pro Tip: Avoid overloading the tart with too many toppings, as excessive moisture can make the puff pastry soggy.
Final Thoughts
Choosing high-quality ingredients is essential for making a delicious goat cheese tart. By using flaky puff pastry, creamy goat cheese, and flavorful toppings, you’ll create a dish that’s simple yet gourmet. Now that you know which ingredients work best, let’s move on to the step-by-step guide to baking the perfect tart!
Choosing the Best Puff Pastry & Goat Cheese for Your Tart
Selecting the right puff pastry and goat cheese is essential for making a flaky, creamy, and flavorful goat cheese tart. The quality of these two key ingredients will determine the final taste and texture of your dish. Let’s dive into the best options and tips for choosing high-quality puff pastry and cheese for your tart.
1. Choosing the Best Puff Pastry – Store-Bought vs. Homemade
Puff pastry is the foundation of this tart, providing a light, airy, and crispy texture that complements the rich, tangy goat cheese. You can either buy store-bought puff pastry for convenience or make it from scratch for a more personalized touch. Here’s how they compare:FoodSafety.gov: Cold Food Storage Charts – Essential guidelines on how to store cheese and other dairy products safely for maximum freshness.
Store-Bought Puff Pastry – A Convenient Option
For most home cooks, store-bought puff pastry is the best option. It is easy to use, readily available, and still provides a flaky and golden-brown crust when baked properly.
- What to Look for:
- Choose all-butter puff pastry instead of varieties made with vegetable oils or shortening. Butter gives the pastry a richer flavor and better layering.
- Opt for pre-rolled sheets if you want to save time. They come in rectangular or circular shapes, making them easy to cut and shape as needed.
- Check the ingredients list—fewer ingredients usually mean a better-quality product.
- How to Handle Store-Bought Puff Pastry:
- Thaw it properly – If frozen, let it thaw in the refrigerator for a few hours or overnight. Avoid defrosting it at room temperature, as this can make the dough too soft and difficult to handle.
- Keep it cold – Puff pastry bakes best when it is chilled before going into the oven. If it becomes too soft while working with it, pop it back into the fridge for 10–15 minutes.
- Don’t stretch it – Stretching the dough weakens its layers and prevents it from puffing up properly during baking.
Pro Tip: If your store-bought puff pastry tends to shrink during baking, place it in the fridge for at least 30 minutes before putting it in the oven. This helps relax the gluten and ensures even baking.
Homemade Puff Pastry – A Rewarding Challenge
If you love baking from scratch, crafting homemade puff pastry can take your goat cheese tart to a whole new level.The process is time-consuming but gives you full control over the ingredients and ensures maximum flakiness.
- Pros of Homemade Puff Pastry:
Made with 100% butter, resulting in a richer flavor.
Allows for customization (e.g., adding herbs or spices to the dough).
No preservatives or artificial ingredients. - Cons of Homemade Puff Pastry:
Time-consuming – Requires multiple folding and resting steps.
More skill required – If not made properly, it may not puff up correctly.
Pro Tip: For the best homemade puff pastry, use European-style butter—its higher fat content delivers superior flakiness and flavor. The extra fat creates flakier layers and enhances the pastry’s richness.
2. Choosing the Best Goat Cheese – Soft vs. Aged Varieties
Goat cheese is the star of this tart, so choosing the right type is crucial. It adds a tangy, creamy texture that pairs beautifully with the crispy puff pastry. There are two main types of goat cheese to consider: soft goat cheese (chèvre) and aged goat cheese.
Soft Goat Cheese (Chèvre) – The Best Choice for a Creamy Texture
Soft goat cheese, also known as chèvre, is the most commonly used variety in this tart. It features a smooth, spreadable texture and a gentle tang that pairs beautifully with both sweet and savory elements.
- Why It’s Ideal for a Puff Pastry Tart:
Spreads easily over the pastry, ensuring even distribution.
Melts slightly when baked, creating a creamy, luscious layer.
Has a mild flavor that pairs well with caramelized onions, honey, and herbs.
Pro Tip: If your soft goat cheese is too firm to spread, let it sit at room temperature for 10–15 minutes or mix it with a little bit of cream or ricotta for a smoother consistency.
Aged Goat Cheese – A Stronger, More Intense Flavor
Aged goat cheese has a firmer, crumbly texture compared to the smooth creaminess of fresh goat cheese. It has a bolder, more complex flavor that can enhance your tart if used in small amounts.
- Best Ways to Use Aged Goat Cheese in a Tart:
- Grate or crumble it over the tart before baking to add depth of flavor.
- Mix it with soft goat cheese to create a balance between creamy and sharp textures.
- Use it as a garnish after baking for an extra layer of flavor.
Pro Tip: If you enjoy a more robust cheese flavor, try blending soft goat cheese with aged varieties like goat gouda or feta. This creates a richer, more complex tart without being overpowering.
3. Bonus: Alternative Cheeses for Variation
If you want to experiment with different flavors, consider these alternative cheeses:
- Ricotta – A mild, creamy cheese that blends well with goat cheese to soften its tanginess.
- Feta – Brings a salty, briny flavor that pairs perfectly with fresh herbs and caramelized onions.
- Gruyère – Melts smoothly and adds a rich, nutty, and savory depth to the tart.
- Blue Cheese – For a bold, tangy flavor twist. Best used in small amounts.
Pro Tip: If substituting another cheese, try combining it with soft goat cheese to maintain the signature creamy consistency of the tart.
Final Thoughts
The secret to a perfect goat cheese tart lies in choosing high-quality puff pastry and cheese. Whether you choose store-bought or homemade puff pastry, make sure it’s all-butter for the richest flavor and flakiest texture. Similarly, selecting soft goat cheese (chèvre) or a blend of cheeses can make all the difference in achieving the right balance of creaminess and tanginess.
Now that you know how to choose the best puff pastry and cheese, let’s move on to assembling and baking the perfect tart!
Goat Cheese Tart: Flavor Pairings and Variations
One of the greatest strengths of a goat cheese tart is its incredible versatility. The creamy, tangy goat cheese pairs beautifully with both sweet and savory ingredients, allowing you to create different variations to suit any occasion. Whether you want to keep it classic or experiment with unique flavors, there are plenty of ways to enhance your goat cheese tart with complementary ingredients.
Below, we’ll explore flavor pairings and delicious variations, so you can customize your tart to your taste.
1. Classic Flavor Pairings for Goat Cheese Tarts
Certain ingredients naturally complement the rich, tangy flavor of goat cheese. Adding any of these elements can elevate your tart and create a well-balanced dish.
Sweet & Savory Combinations
The contrast between sweet and savory flavors brings out the best in a goat cheese tart.These ingredients complement each other by balancing the cheese’s tangy flavor with natural sweetness.
- Caramelized onions – Adds a rich, sweet depth of flavor that enhances the creaminess of the goat cheese.
- Honey or balsamic glaze – A drizzle of honey or balsamic glaze provides a subtle sweetness and a hint of acidity.
- Figs, pears, or apples – Fresh or roasted fruits add natural sweetness and a delicate texture.
- Candied nuts – Walnuts, pecans, or almonds caramelized with a touch of honey bring both crunch and sweetness.
Pro Tip: If you love the sweet & savory contrast, try topping your tart with figs and honey, then adding a sprinkle of sea salt to enhance the flavors.
Herb & Spice Pairings
Fresh herbs and spices can brighten up the tart, adding aromatic depth to each bite.
- Thyme – A subtle, lemony herb that pairs beautifully with goat cheese.
- Rosemary – Offers a bold, earthy flavor, but should be used sparingly to avoid overpowering the dish.
- Basil – Adds a fresh, slightly sweet note that complements tomatoes and balsamic drizzle.
- Chili flakes or black pepper – Adds a gentle heat to contrast the creamy cheese.
Pro Tip: Add fresh herbs after baking to preserve their aroma and prevent them from burning in the oven.
Umami & Rich Ingredients
For a heartier, more savory tart, try adding umami-rich ingredients that enhance the cheese’s depth.
- Mushrooms – Sautéed mushrooms bring an earthy, meaty flavor that pairs well with goat cheese.
- Sundried tomatoes – Their intense, tangy-sweet taste adds a bold kick.
- Olives or capers – Provide a briny contrast that enhances the tart’s complexity.
- Caramelized garlic – Slow-roasted to perfection, it brings a mellow, buttery depth of flavor.
Pro Tip: If you love bold flavors, try a tart with goat cheese, mushrooms, caramelized onions, and fresh thyme for a deeply savory dish.
2. Goat Cheese Tart Variations
Once you understand classic flavor pairings, you can experiment with different variations to create unique goat cheese tarts for different occasions. Try these delicious variations to mix things up:
A. Caramelized Onion & Goat Cheese Tart (Classic & Elegant)
This classic tart pairs sweet caramelized onions with creamy goat cheese, creating a deliciously elegant appetizer or light entrée.
- Ingredients: Goat cheese, caramelized onions, fresh thyme, balsamic drizzle.
- Why It Works: The caramelized onions add natural sweetness, balancing the cheese’s tangy richness.
- Perfect Pairing: Serve with a light salad and a glass of Sauvignon Blanc.
B. Fig, Honey & Goat Cheese Tart (Sweet & Savory Twist)
For a sophisticated appetizer or brunch dish, this tart pairs sweet figs and honey with creamy goat cheese.
- Ingredients: Goat cheese, fresh figs (or dried figs), honey drizzle, crushed walnuts.
- Why It Works: The honey and figs provide natural sweetness, while the walnuts add crunch.
- Perfect Pairing: Serve with prosecco or a crisp white wine.
Pro Tip: For a fall-inspired version, swap figs for sliced pears or caramelized apples.
C. Tomato & Basil Goat Cheese Tart – Fresh, Vibrant, and Full of Flavor
This tart is light, fresh, and bursting with Mediterranean flavors, making it perfect for summer gatherings.
- Ingredients: Goat cheese, cherry tomatoes, fresh basil, balsamic glaze.
- Why It Works: The acidity of the tomatoes cuts through the creaminess of the cheese, while basil adds freshness.
- Perfect Pairing: Pair with a rosé wine or a light vinaigrette salad.
Pro Tip: Roast the cherry tomatoes ahead of time to enhance their natural sweetness and prevent sogginess in the tart.
D. Mushroom & Truffle Goat Cheese Tart (Rich & Earthy)
This indulgent tart is perfect for truffle lovers who enjoy deep, earthy flavors.
- Ingredients: Creamy goat cheese, savory sautéed mushrooms, a drizzle of truffle oil, and fragrant fresh thyme.
- Why It Works: Mushrooms provide umami, while truffle oil enhances the tart with a luxurious touch.
- Perfect Pairing: Serve with a full-bodied white wine, such as Chardonnay.
Pro Tip: Use a mix of mushrooms like shiitake, cremini, and oyster for a more complex flavor.
E. Mediterranean Goat Cheese Tart (Savory & Bold)
For a Mediterranean twist, try adding sundried tomatoes, olives, and roasted peppers for a tart bursting with bold flavors.
- Ingredients: Goat cheese, sundried tomatoes, Kalamata olives, roasted red peppers, oregano.
- Why It Works: The briny olives and tangy sundried tomatoes contrast beautifully with the creamy cheese.
- Perfect Pairing: Serve with a Greek salad and a glass of dry red wine.
Pro Tip: Sprinkle feta cheese crumbles on top for an extra Mediterranean touch.
3. Customizing Your Goat Cheese Tart
If you want to create your own signature tart, consider these simple modifications:
- For a gluten-free option, substitute with gluten-free puff pastry or try an almond flour crust for a nutty twist.
- For a protein boost: Add prosciutto, pancetta, or smoked salmon.
- For extra crunch: Sprinkle crushed nuts or toasted seeds on top.
- For a richer texture: Blend goat cheese with cream cheese or ricotta to make it extra creamy.
Pro Tip: Always pre-bake the puff pastry slightly before adding wet toppings to prevent sogginess.
Final Thoughts
The beauty of a goat cheese tart lies in its flexibility. Whether you prefer sweet and savory pairings, Mediterranean flavors, or earthy mushroom combinations, there’s a perfect variation for every occasion. With these flavor pairings and creative twists, you can easily customize your tart to match your taste.
Now that you know how to pair flavors, let’s move on to the step-by-step baking process to bring your perfect goat cheese tart to life!
How to Make the Perfect Goat Cheese Tart: Step-by-Step Guide
Preparing the Puff Pastry for Your Goat Cheese Tart
Properly preparing the puff pastry is crucial for achieving a light, flaky, and crispy crust in your goat cheese tart. Since puff pastry is delicate and composed of multiple buttery layers, handling it correctly ensures the perfect texture and prevents a soggy bottom.
Below, we’ll go through step-by-step techniques to prepare your puff pastry properly, including thawing, rolling, pre-baking, and troubleshooting common mistakes.
1. Thawing Puff Pastry the Right Way
If using store-bought frozen puff pastry, the first step is to thaw it properly. Puff pastry that is too cold may crack when unrolled, while over-thawed pastry becomes too soft and sticky, making it difficult to handle.
How to Thaw Puff Pastry Correctly
- Refrigerator Method (Best Method) – Place the frozen puff pastry in the fridge for 3 to 4 hours or overnight. This ensures a gradual thawing process, keeping the layers intact.
- Quick-Thaw Method – If you’re short on time, leave the puff pastry at room temperature for 20–30 minutes until it’s pliable but still cold. However, be careful not to let it sit out too long, or it will become too soft.
- Avoid Using a Microwave – Microwaving puff pastry to thaw it can melt the butter layers, leading to a dough that won’t puff properly when baked.
Pro Tip: If you thaw puff pastry and aren’t ready to use it immediately, keep it in the refrigerator to prevent it from softening too much.
2. Rolling Out the Puff Pastry
Once your puff pastry is properly thawed, the next step is to roll it out to the desired thickness. This step is especially important if you want a thin, crisp crust rather than an overly puffy base.
Rolling Tips for Perfect Puff Pastry
Use a lightly floured surface – Prevents the dough from sticking without drying it out.
Roll evenly and gently – Start from the center and roll outward with light, consistent pressure. Avoid pressing too hard, as it can crush the delicate layers.
Maintain a rectangular or circular shape – Depending on your tart shape, roll the pastry to fit your tart pan or baking sheet.
Trim the edges if needed – Clean edges help the pastry puff up evenly. A sharp knife or pizza cutter works well for this.
Pro Tip: If the pastry shrinks after rolling, let it rest in the refrigerator for 10–15 minutes before continuing. This relaxes the gluten and prevents excessive shrinking during baking.
3. Docking the Puff Pastry to Prevent Puffing
Puff pastry naturally rises when baked, but for a goat cheese tart, you want the base to remain relatively flat so that the toppings sit evenly. This is where docking the dough comes in.
How to Dock Puff Pastry:
- Prick the surface of the dough with a fork to prevent it from puffing unevenly during baking.
- This step helps keep the pastry flat and evenly shaped by preventing excessive puffing during baking.
- Be sure to leave the edges undocked so they can rise and create a crisp border around the tart.
Pro Tip: If you want to create an elegant border around your tart, use a sharp knife to score a 1/2-inch frame around the edges before baking. This helps the edges rise while ensuring the center remains level.
4.Pre-Baking (Blind Baking) the Puff Pastry to Ensure a Crisp, Flaky Crust
To ensure your goat cheese tart has a firm, golden crust, pre-baking (also called blind baking) is highly recommended. This step prevents a soggy bottom, especially if you’re using wet ingredients like caramelized onions, honey, or fresh tomatoes.
How to Pre-Bake Puff Pastry for a Goat Cheese Tart:
- Preheat the oven to 375°F (190°C).
- Use a fork to prick the dough, allowing steam to release and preventing excessive puffing.
- Line the pastry with parchment paper, then fill with baking weights, dry beans, or rice to keep it from puffing up. This helps prevent excessive puffing in the center.
- Bake for 10–15 minutes, or until the pastry turns a light golden brown.
- Remove the weights and parchment, then bake for another 5 minutes to ensure a crisp texture before adding toppings.
Pro Tip: If your tart has juicy toppings (like tomatoes), brush the pre-baked crust with a thin layer of egg wash before adding ingredients. This creates a barrier that repels moisture and keeps the pastry crispy.
5. Troubleshooting Common Puff Pastry Problems
Even when following the steps correctly, puff pastry can sometimes be tricky.Below are some common issues you may encounter and their solutions:
| Problem | Cause | Solution |
|---|---|---|
| Puff pastry is too soft/sticky | Over-thawed or warm dough | Chill in the fridge for 10–15 minutes before handling |
| Dough shrinks in the oven | Overworked gluten or not rested before baking | Let it rest in the fridge before baking |
| Pastry doesn’t puff properly | Butter layers melted before baking | Keep pastry cold and preheat the oven fully before baking |
| Bottom of the tart is soggy | Too much moisture from toppings | Pre-bake the crust and use an egg wash barrier |
| Pastry is too thick or too thin | Rolled unevenly | Roll evenly and trim to the desired thickness |
Pro Tip: For the best rise and flakiness, always bake puff pastry at a high temperature—between 375–400°F (190–200°C). This ensures the butter steams quickly, creating crisp, flaky layers.
Final Thoughts
Preparing puff pastry correctly is essential for making a crispy, golden goat cheese tart. By properly thawing, rolling, docking, and pre-baking, you ensure that your pastry stays flaky and light, providing the perfect base for your toppings.
Now that your puff pastry is ready, it’s time to assemble your tart and bake it to perfection!
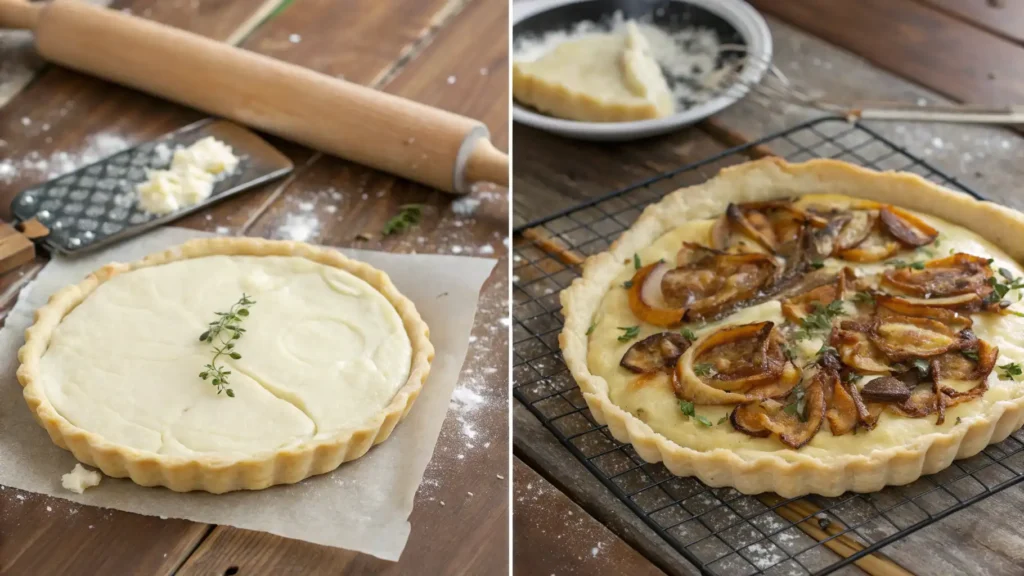
Assembling the Goat Cheese Tart
Once your puff pastry is properly prepared, it’s time to assemble the goat cheese tart. This step is crucial for ensuring that every bite has a perfect balance of flavors and textures. Proper layering and ingredient placement will help you achieve a beautifully baked tart with a crispy crust and creamy, flavorful toppings.
In this section, we’ll go through step-by-step instructions on assembling your tart, including spreading the goat cheese, layering additional ingredients, and adding final touches before baking.
1. Spreading the Goat Cheese Evenly
The goat cheese is the star ingredient of this tart, so it’s important to spread it evenly to ensure a consistent, creamy texture throughout. However, goat cheese can sometimes be firm, making it difficult to spread directly onto the pastry.
Tips for Spreading Goat Cheese Smoothly:
Soften the goat cheese first – Let it rest at room temperature for 10–15 minutes to make spreading easier and smoother.
Mix with a little cream or ricotta – If the cheese is too crumbly, blend it with a splash of heavy cream, ricotta, or olive oil for a smoother consistency.
Use an offset spatula or spoon to evenly spread the goat cheese over the pre-baked puff pastry, leaving a small border around the edges so the crust can rise and turn golden.
Crumble instead of spreading – If you prefer a rustic texture, simply crumble the goat cheese over the tart instead of spreading it.
Pro Tip: For an extra depth of flavor, mix the goat cheese with herbs, honey, or black pepper before spreading it onto the tart.
2. Layering Additional Ingredients for Maximum Flavor
Once the goat cheese is evenly distributed, you can start layering additional toppings to enhance the flavor and texture of your tart. These ingredients should complement the creamy cheese and crispy pastry without overwhelming them.
Best Ingredients to Layer Over Goat Cheese:
- Caramelized onions – Bring a deep, savory richness and natural sweetness to every bite.
- Fresh or roasted tomatoes – Enhances acidity and balances the tanginess of the cheese.
- Sautéed mushrooms – Provides an earthy, umami taste.
- Thinly sliced figs, pears, or apples – Adds a touch of natural sweetness.
- Sundried tomatoes or roasted peppers – Intensifies the tart with bold Mediterranean flavors.
- Olives or capers – Adds a salty, briny contrast.
- Crushed nuts (walnuts, pecans, or pine nuts) – Introduces a crunchy texture.
How to Layer Ingredients Properly:
Start with the cheese base – Spread or crumble the goat cheese first.
Add moist ingredients next – Ingredients like tomatoes, caramelized onions, or fruit should go directly on top of the cheese to keep them from making the pastry soggy.
Finish with dry ingredients – Sprinkle toppings like nuts, olives, or fresh herbs last, as they don’t release moisture during baking.
Pro Tip: Avoid overloading the tart with too many wet ingredients, as excess moisture can make the pastry soggy instead of crisp.
3. Creating a Border and Final Touches
To achieve a professional, bakery-style tart, creating a crispy, raised border around the edges is key. This helps contain the toppings while adding extra texture and structure to the tart.
How to Create a Beautiful Tart Border:
- Leave a ½-inch border – When spreading goat cheese and toppings, make sure to leave a small border without toppings to allow the crust to rise.
- Score the edges – Lightly run a knife around the tart, about ½ inch from the edge, to create a raised border during baking. This will create a natural puffed-up edge when baked.
- Brush with egg wash – Lightly brush the edges of the puff pastry with beaten egg to achieve a golden, glossy crust.
- Sprinkle with seasoning – For extra flavor, sprinkle the edges with a pinch of sea salt, black pepper, or sesame seeds before baking.
Pro Tip: If you want to add a sweet glaze to the tart, drizzle honey or balsamic glaze after baking to avoid burning the sugar during cooking.
4. Preparing for Baking
Once your tart is fully assembled, the final step before baking is checking the oven temperature and ensuring even distribution of ingredients for consistent baking.
Before Placing in the Oven:
Ensure the oven is fully preheated – Bake at 375–400°F (190–200°C) for best results.
Distribute toppings evenly – Avoid overcrowding one section to prevent uneven cooking.
Use parchment paper or a baking mat – This prevents sticking and helps with even browning.
Chill the tart before baking (optional) – If your kitchen is warm, placing the assembled tart in the fridge for 10 minutes before baking helps maintain the structure of the puff pastry.
Pro Tip: If you notice puff pastry edges browning too quickly, cover them lightly with foil halfway through baking to prevent burning.
Final Thoughts
Properly assembling your goat cheese tart ensures that every bite is flavorful, crisp, and balanced. By spreading the goat cheese smoothly, layering the right ingredients, and creating a structured border, you’ll achieve a beautifully baked tart that looks as good as it tastes.
Now that your tart is fully assembled, it’s time to move on to baking and adding the final touches for a perfect finish!
Baking & Final Touches
Now that you’ve assembled your goat cheese tart, it’s time for the final step: baking. This stage brings all your carefully chosen ingredients together, transforming them into a golden, aromatic masterpiece. Below, we’ll explore the optimal baking process, how to check for doneness, and ways to finish your tart so it looks as impressive as it tastes.
1. Setting the Right Temperature & Timing
A properly heated oven is crucial for achieving a crisp, flaky crust while ensuring the goat cheese melts and browns to perfection.
- Preheat the oven to 375–400°F (190–200°C). This high temperature helps the butter in the puff pastry create steam, resulting in distinct, flaky layers.
- Bake the tart on the middle rack for 20–25 minutes, until the pastry is golden and the cheese is melted with gentle bubbles on top.
- Keep an eye on the edges. If they begin to brown too quickly, cover them loosely with aluminum foil to avoid overcooking.
Pro Tip: Placing the tart on a preheated baking sheet can help crisp the bottom crust, preventing a soggy texture.
2. Checking for Doneness
Knowing when your goat cheese tart is ready can sometimes be tricky. However, a few key indicators will ensure you remove it from the oven at the perfect moment.
- Golden pastry – The puff pastry edges should be puffed and lightly browned, indicating it’s fully baked.
- Melted cheese – The goat cheese should appear slightly golden on top, with no visible raw spots.
- Firm but not stiff – Gently press the center with a fork or spatula; it should feel set but still soft underneath.
Pro Tip: If the pastry edges look done but the center needs more time, reduce the oven temperature to 350°F (175°C) and continue baking for a few extra minutes.
3. Adding the Final Touches
Once your tart finishes baking, it’s time to elevate its presentation and flavor with a few simple finishing touches.
- Drizzle with honey or balsamic glaze – This adds a sweet, tangy contrast to the rich goat cheese.
- Sprinkle fresh herbs (such as basil, thyme, or chives) – Always add these after baking to preserve their bright color and flavor.
- Add texture – Top with chopped nuts, toasted seeds, or crumbled aged goat cheese for extra crunch and depth.
- Season lightly – A pinch of flaky sea salt or freshly ground pepper can amplify flavors without overwhelming the dish.
Pro Tip: Let the tart cool for 5–10 minutes before slicing. This resting period allows the cheese to set slightly, making it easier to cut cleanly.
4. Serving & Storing Your Goat Cheese Tart
After adding your final touches, you can serve the tart immediately or save it for later. Here’s how to handle leftovers and reheat them without compromising quality:
- Serve Warm: A freshly baked goat cheese tart is best enjoyed warm, allowing the puff pastry to stay crisp and the cheese to remain velvety.
- Leftover Storage: If you have leftovers, store them in an airtight container in the fridge for up to two days.
- Reheating: To maintain crispness, reheat in a preheated oven at 350°F (175°C) for about 10 minutes.Avoid using the microwave, as it may make the pastry soggy.
Pro Tip: Consider pairing your tart with a light salad, a sparkling wine, or a dry white wine to complement the tanginess of the goat cheese.
Final Thoughts
Baking your goat cheese tart is the exciting last step that brings all of your hard work together. By keeping a close eye on the oven temperature, baking time, and final garnishes, you’ll ensure a perfect blend of flaky pastry and creamy goat cheese every single time.
Now, you’re ready to enjoy a truly impressive dish—one that’s perfect for brunch, dinner parties, or a simple weeknight treat. Bon appétit.
Goat Cheese Tart: Serving, Storing, and Expert Tips
How to Serve Your Tart (Non-Alcoholic Focus)
A goat cheese tart can stand out as a star dish at any gathering or casual meal. Although it pairs well with many beverages, you might prefer non-alcoholic options that still complement the tangy creaminess of goat cheese. Below are tips on presentation, accompaniments, and creative drink ideas—all without alcohol.
1. Timing and Temperature
- Serve Warm: A freshly baked goat cheese tart tastes best when it’s warm. The puff pastry stays crisp, and the goat cheese keeps a velvety texture.
- Room Temperature Option: If you’re juggling multiple dishes or serving buffet-style, letting the tart cool slightly is perfectly fine. It will remain delicious and be easier to slice.
- Reheating Leftovers: Lightly reheat slices in a 350°F (175°C) oven for 5–10 minutes to preserve the crisp pastry.
Pro Tip: Steer clear of microwaving your tart to avoid a soggy crust and changes to the cheese’s consistency.
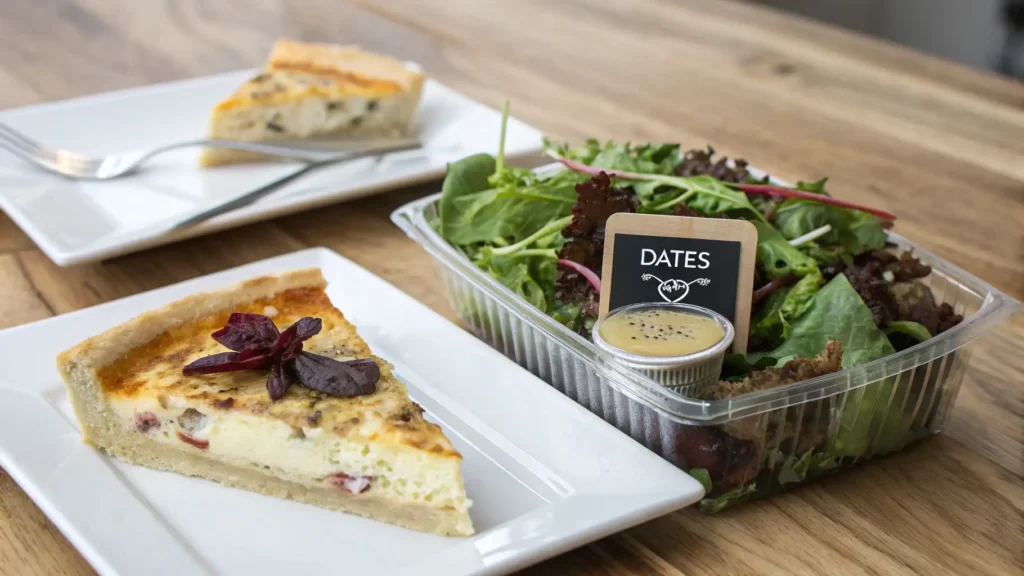
2. Choosing the Perfect Accompaniments
The right sides can elevate your goat cheese tart, adding freshness and complementary flavors.
- Light Salads: A mixed greens salad with a zesty vinaigrette cuts through the richness of goat cheese. Arugula with a lemon dressing is especially good, as its peppery bite offsets the creamy tang.
- Vegetable Sides: Roasted or grilled asparagus, zucchini, or bell peppers add color and balance.
- Soup Pairings: If you’re serving it as part of a larger meal, a light vegetable soup (like tomato bisque or a simple broccoli soup) pairs nicely.
- Bread & Dips: Offer crusty bread or breadsticks with olive oil and herbs for guests seeking extra carbs.
Pro Tip: If you want a more substantial meal, serve your tart alongside a grain-based salad (quinoa, farro, or couscous) for added texture and nutrients.
3. Non-Alcoholic Drink Suggestions
A goat cheese tart is quite versatile in terms of beverage pairings. Here are some satisfying non-alcoholic options:
- Sparkling Water with Fruit Infusions: Try cucumber-lime or berry-lemon infusions. The light fizz and subtle fruit flavors balance the tartness of the goat cheese.
- Herbal Iced Teas: A mint or hibiscus iced tea can refresh your palate, while a chamomile or lavender blend adds a delicate floral note.
- Fresh Juices & Spritzers: Citrus-based juices like orange or grapefruit can cut through the richness. For a spritzer, mix juice with sparkling water.
- Kombucha (Non-Alcoholic): Many kombucha brands keep the alcohol content at negligible levels (<0.5%), offering a tangy, effervescent drink that pairs well with goat cheese.
- Light Lemonades & Punches: A homemade basil lemonade or a ginger-infused punch adds zest without overpowering the tart’s flavors.
Pro Tip: Keep a pitcher of plain chilled water on hand with slices of lemon, cucumber, or mint to keep guests hydrated and cleanse their palates.
4. Presentation & Plating Tips
The way you plate and present your goat cheese tart can make the dining experience even more special.
- Slice with Care: Use a sharp knife or pizza cutter for clean, even slices. Gently saw through the pastry to avoid crushing the layers.
- Fresh Garnishes: Add fresh herbs (like thyme, basil, or chives) or a drizzle of balsamic glaze or honey on each slice for both aroma and visual appeal.
- Individual Portions: If you’re entertaining, consider mini tarts or tartlets for easy, utensil-free servings.
- Rustic Charm: Serve your tart on a wooden board or a simple white platter. Surround it with small bowls of dips, extra herbs, or toppings for a buffet-style arrangement.
- Pro Tip: If you made multiple tart variations (e.g., caramelized onions vs. figs), label them or garnish each differently to help guests choose their favorite.
5. Creative Ways to Serve Leftovers
If any slices remain, they can easily become a meal the next day or part of a quick snack.
- Brunch Upgrade: Warm a slice and top it with a poached or sunny-side-up egg for an indulgent morning treat.
- Salad Topping: Chop the leftover tart into strips and serve over mixed greens for a hearty lunch.
- Lunch Box Staple: Pack a slice in an airtight container with fresh fruit or veggies for a satisfying midday meal.
Pro Tip: Keep sauces and garnishes separate from leftover slices to maintain the tart’s crispness until you’re ready to enjoy it again.
Final Thoughts
Serving your goat cheese tart without alcohol doesn’t mean compromising on flavor or enjoyment. With the right non-alcoholic beverages, fresh sides, and artful presentation, you can create a memorable dining experience for guests and family alike.
Remember, a goat cheese tart is as versatile as it is delicious. Experiment with flavors, garnishes, and serving styles to find the perfect combination for your taste buds. Bon appétit!
Storing & Reheating Tips
Properly storing and reheating your goat cheese tart ensures that every slice remains delicious, even after it has cooled. By following a few key steps, you’ll preserve the flaky texture of the puff pastry and the tangy creaminess of the goat cheese. Below, we’ll guide you through the best methods for cooling, refrigerating, freezing, and reheating your tart.
1. Cooling & Short-Term Storage
- Cool Completely: Allow your goat cheese tart to rest at room temperature for about 15–20 minutes before storing. This brief waiting period prevents condensation from forming in the container.
- Use an Airtight Container: Once cooled, transfer the tart to a sealed container or wrap it tightly in foil or plastic wrap. Properly sealing the tart helps preserve its freshness and prevents the pastry from absorbing any unwanted odors in the refrigerator.
- Store in the Refrigerator: Place the tart in an airtight container and refrigerate for up to 2 days. If you need to stack slices, place a piece of parchment or wax paper between them to preserve the flaky layers.
Pro Tip: Slice the tart before storing so you can easily reheat individual portions without exposing the rest of the tart to air and temperature changes.
2. Freezing for Longer Shelf Life
- Wrap Individual Portions: If you’d like to freeze leftover slices of your goat cheese tart, wrap each piece in plastic wrap and then place them in a freezer-safe bag or container. Removing excess air helps prevent freezer burn.
- Label and Date: Always label your freezer container with the date. This way, you’ll know how long the tart has been stored.
- Freeze for Up to One Month: For the best flavor and texture, use the frozen slices within one month. After two days, the pastry may begin to lose its crisp texture and become slightly soft.
Pro Tip: Thaw frozen slices in the refrigerator overnight or on the counter for about 30 minutes before reheating. This gentle thawing process preserves the tart’s delicate texture.
3. Reheating Your Goat Cheese Tart
Reheating correctly is essential to restore the tart’s crisp crust and creamy cheese without overcooking or drying it out.
- Oven Method (Best Option):
- Preheat your oven to 350°F (175°C).
- Place the tart slices on a baking sheet lined with parchment paper or foil.
- Reheat for 5–10 minutes, or until the pastry is crisp and the cheese is warmed through and melty.
- Keep an eye on the edges to prevent burning; you can lightly cover them with foil if they brown too quickly.
- Toaster Oven Alternative:
- Preheat the toaster oven to 350°F (175°C).
- Reheat smaller portions for about 5–7 minutes, checking halfway to ensure even warming.
- Microwave (Not Recommended):
- While it’s convenient, using a microwave can make the puff pastry soggy and alter the cheese’s texture.
- If you must use a microwave, use short intervals (10–15 seconds) at a lower power setting, then finish in a hot oven or toaster oven for a quick crisp.
Pro Tip: If the pastry seems too dry after reheating, drizzle a little olive oil or honey on top to restore moisture and enhance flavor.
Final Thoughts
By following these storage and reheating tips, you can enjoy your goat cheese tart just as much on day two (or even day three) as you did when it was fresh from the oven. With the proper techniques, your puff pastry will stay crisp, and your goat cheese will remain creamy, ensuring a delicious meal or snack any time you crave it.
Expert Baking Tips for a Flawless Goat Cheese Tart
Achieving a flaky puff pastry and a perfectly balanced filling requires more than just a good recipe. By following a few expert baking tips, you’ll increase your chances of producing a goat cheese tart that’s crispy on the outside, creamy on the inside, and bursting with flavor. Below, we’ll dive into pro-level advice on temperature control, layering techniques, and ingredient preparation that help you master your tart every time.
1. Keep It Cold: Temperature Control
- Chill Your Puff Pastry: Puff pastry relies on solid butter layers to create its signature flakiness. Keep it cool in the fridge until just before rolling or shaping. If the dough becomes soft or sticky, pop it back in the fridge for 10–15 minutes.
- Cool Ingredients Can Help: If you’re working in a warm kitchen, consider cooling your caramelized onions or other cooked ingredients before assembling. This step helps maintain the pastry’s cold temperature.
- Preheated Oven Is Key: Always fully preheat your oven before baking. That initial blast of heat causes the butter to create steam, which lifts and separates the dough layers.
Pro Tip: When placing the tart in the oven, make sure you don’t leave the door open for too long. This can drop the oven temperature and affect how well your tart rises.
2. Precision in Rolling & Shaping
- Roll Gently & Evenly: An even thickness helps the pastry bake uniformly. Use a rolling pin with steady, even pressure—start from the center and roll outward to maintain an even thickness.
- Don’t Over-Stretch: Stretching the pastry can break the delicate butter layers, preventing it from puffing properly. If you notice the dough shrinking or snapping back, let it rest for a few minutes.
- Create a Border: Gently score a ½-inch (1 cm) border around the edges using a knife or pizza cutter to help the crust rise and frame the filling. This easy technique lets the edges rise beautifully while keeping the center flat to hold the toppings in place.
Pro Tip: For a neat finish, use a sharp knife or pastry wheel to trim the edges. This ensures the layers are cleanly cut, which encourages better rise.
3. Managing Moisture in Your Filling
- Pre-Bake (Blind Bake) for Wet Toppings: If you’re adding juicy ingredients like tomatoes or fruit, pre-bake the pastry for 10–15 minutes to prevent sogginess.
- Balance Cheese & Toppings: Goat cheese is tangy and creamy on its own. If you add other cheeses or sauces, do so sparingly so they don’t overwhelm the delicate pastry.
- Drain Excess Liquids: If you’re using cooked vegetables, fruits, or caramelized onions, drain off any extra juices before layering. Excess moisture can lead to a soggy crust, so it’s important to keep ingredients as dry as possible.
Pro Tip: For maximum crispness, brush a thin layer of egg wash on the bottom crust after partially pre-baking. This creates a moisture barrier between the toppings and pastry.
4. Flavor Enhancement Through Seasoning & Garnishes
- Season Layer by Layer: A pinch of salt and pepper over the goat cheese, plus any herbs or spices in the filling, ensures you don’t end up with bland pockets.
- Use Fresh Herbs Wisely: Herbs like thyme, rosemary, or basil should be added near the end of baking or after baking to keep their flavors bright.
- Add a Sweet Note (Optional): A light drizzle of honey or balsamic glaze contrasts beautifully with goat cheese’s tangy profile.
Pro Tip: If you’re feeling adventurous, experiment with infused oils (like garlic or truffle oil) brushed lightly on the crust’s edges before baking for an extra layer of complexity.
5. Ensuring Even Heat Distribution
- Bake on the Middle Rack: This allows for consistent heat circulation around the tart, promoting even browning of both the top and bottom crust.
- Rotate Halfway Through: If your oven has hot spots, rotate the baking sheet 180 degrees about midway through baking. This helps the pastry brown uniformly.
- Use a Baking Stone or Preheated Tray: For an extra crisp bottom crust, you can place your tart (on its baking sheet or parchment) directly on a preheated baking stone or an upside-down preheated baking sheet.
Pro Tip: If you notice the edges browning faster than the center, loosely cover them with aluminum foil to prevent burning while the rest of the tart finishes baking.
6. Resting & Presentation
- Cool Briefly Before Slicing: Let the tart rest for 5–10 minutes once it’s out of the oven. This short resting period allows the cheese to set, making slicing neater.
- Slice Cleanly: Use a sharp knife or a pizza cutter to create clean cuts. Wipe off the blade between slices to avoid smearing goat cheese across the crust.
- Finish Strong: Sprinkle fresh herbs, nuts, or a drizzle of honey on each slice just before serving. Not only does it enhance appearance, but it also adds an extra burst of flavor.
Pro Tip: For a dramatic presentation, serve your goat cheese tart on a rustic wooden board or a simple white platter. The color contrast draws the eye to your beautifully golden crust.
Final Thoughts
By focusing on temperature control, moisture management, and precise techniques, you’ll bring out the best in your goat cheese tart—ensuring it’s delightfully crisp, flavorful, and perfectly puffed. These expert baking tips will help transform a simple recipe into a culinary showstopper, ready to impress at brunches, parties, or cozy family dinners. Bon appétit!
Conclusion
Crafting the perfect goat cheese tart is all about attention to detail—from selecting high-quality ingredients and preparing flaky puff pastry to layering complementary flavors and mastering precise baking techniques. By following the expert tips provided in this guide, you can create a tart that’s crispy on the outside, creamy on the inside, and brimming with flavor. Whether you choose to serve it for brunch, a celebratory dinner, or as a quick yet impressive appetizer, a well-made goat cheese tart is sure to delight everyone at the table. So roll out that dough, spread on the cheese, and enjoy the savory goodness of a perfectly baked goat cheese tart!
FAQ: Goat Cheese Tart
1. Can I use a different type of cheese instead of goat cheese?
Absolutely. While goat cheese offers a distinct tangy flavor, you can substitute it with cream cheese, feta, ricotta, or even a blend of these. Keep in mind that the overall taste and texture will change slightly depending on the cheese you choose.
2. What if my puff pastry becomes too soft to handle?
If your puff pastry becomes too soft or sticky, chill it in the refrigerator for 10–15 minutes to help it firm up and become easier to handle.. This will help maintain its structure and ensure that the pastry puffs up correctly in the oven.
3. How do I prevent my tart from getting a soggy bottom?
Pre-bake (blind bake) the puff pastry for 10–15 minutes before adding toppings.Brushing a thin layer of beaten egg (egg wash) on the crust helps create a moisture barrier and gives it a golden, glossy finish. Finally, make sure any wet ingredients (such as caramelized onions or tomatoes) are well-drained before adding them to the tart.
4. Can I freeze my goat cheese tart?
Yes. To freeze, let the tart cool completely, slice it, and wrap each piece tightly in plastic wrap or foil. Place the wrapped slices in a freezer-safe bag or container. When you’re ready to enjoy them, thaw in the refrigerator or on the counter for 30 minutes, then reheat in the oven at 350°F (175°C) until warm and crisp.
5. What are the best flavor pairings for a goat cheese tart?
Goat cheese complements both sweet and savory ingredients, making it incredibly versatile in a variety of dishes. Popular choices include caramelized onions, sundried tomatoes, honey, figs, pears, and fresh herbs like thyme or basil. Feel free to experiment with different combinations to find your perfect flavor match.
6. How should I store leftover slices?
Allow the tart to cool completely before placing it in an airtight container. Store it in the refrigerator for up to two days.When reheating, use an oven or toaster oven at 350°F (175°C) for about 5–10 minutes to keep the pastry crisp.
7. Is it necessary to use an egg wash on the puff pastry edges?
Using an egg wash helps give the pastry a shiny, golden-brown finish. It’s not strictly necessary, but it does improve both the appearance and texture of the crust. If you prefer to skip it, you can still achieve good results without the added gloss.
8. Can I make individual tartlets instead of one large tart?
Absolutely. You can cut the puff pastry into smaller rounds or squares for individual servings. Just keep an eye on the baking time, as smaller tartlets may cook faster than a full-size tart.
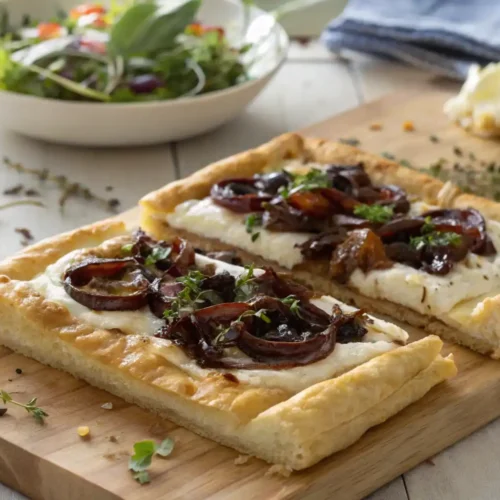
Goat Cheese Tart with Caramelized Onions & Fresh Herbs
Ingredients
- 1 sheet of all-butter puff pastry, thawed
- 6 oz (170 g) goat cheese, softened
- 2 medium onions, thinly sliced
- 1 tbsp olive oil or butter (for caramelizing)
- 1 tsp fresh thyme leaves (or rosemary)
- Salt and pepper, to taste
- 1 egg, beaten (for egg wash)
Additional Toppings – Customize Your Tart:
- Sliced cherry tomatoes
- Arugula or baby spinach
- Balsamic glaze drizzle
- Sautéed mushrooms
- Crumbled feta or Gruyère
- Roasted red peppers
Instructions
- -Caramelize the Onions: In a skillet, heat olive oil or butter over medium-low heat. Add sliced onions and cook slowly, stirring often, until golden and caramelized (about 20–25 minutes).-Preheat & Prep the Pastry: Preheat oven to 400°F (200°C). Roll out the puff pastry on a lightly floured surface and transfer to a parchment-lined baking sheet.-Create a Border: Score a ½-inch (1 cm) border around the edge with a knife or pizza cutter. Use a fork to prick the center to prevent puffing.-Blind Bake: Line the center with parchment and add baking weights. Bake for 10–15 minutes until lightly golden. Remove weights and parchment.-Assemble the Tart: Spread softened goat cheese evenly within the scored border. Top with caramelized onions and sprinkle with fresh herbs.-Add Optional Toppings: Customize with any of your selected additions before baking.-Bake Again: Return to the oven and bake for another 20–25 minutes, or until the cheese is melted and the pastry is golden and crisp.-Cool Slightly & Serve: Let it cool for a few minutes, slice, and serve warm or at room temperature.
Notes
- Make-Ahead Tip: You can caramelize the onions up to 3 days in advance and store them in an airtight container in the refrigerator.
- Homemade Puff Pastry Option: If you’re making puff pastry from scratch, use European-style butter for extra flakiness.
- Preventing Sogginess: Pre-baking the pastry (blind baking) is essential to keep the base crisp—especially when using moist toppings.
- Flavor Boost: Try mixing the goat cheese with a bit of lemon zest or honey for a sweet-savory twist.
- Serving Ideas: Pairs wonderfully with a green salad for a light lunch or can be sliced into smaller squares as a party appetizer.
- Storage & Reheating: Store leftovers in the fridge for up to 2 days. Reheat in a 375°F (190°C) oven for 5–10 minutes to restore crispness.
- Gluten-Free Option: Use a gluten-free puff pastry or swap the crust with an almond flour base for a nutty variation.