

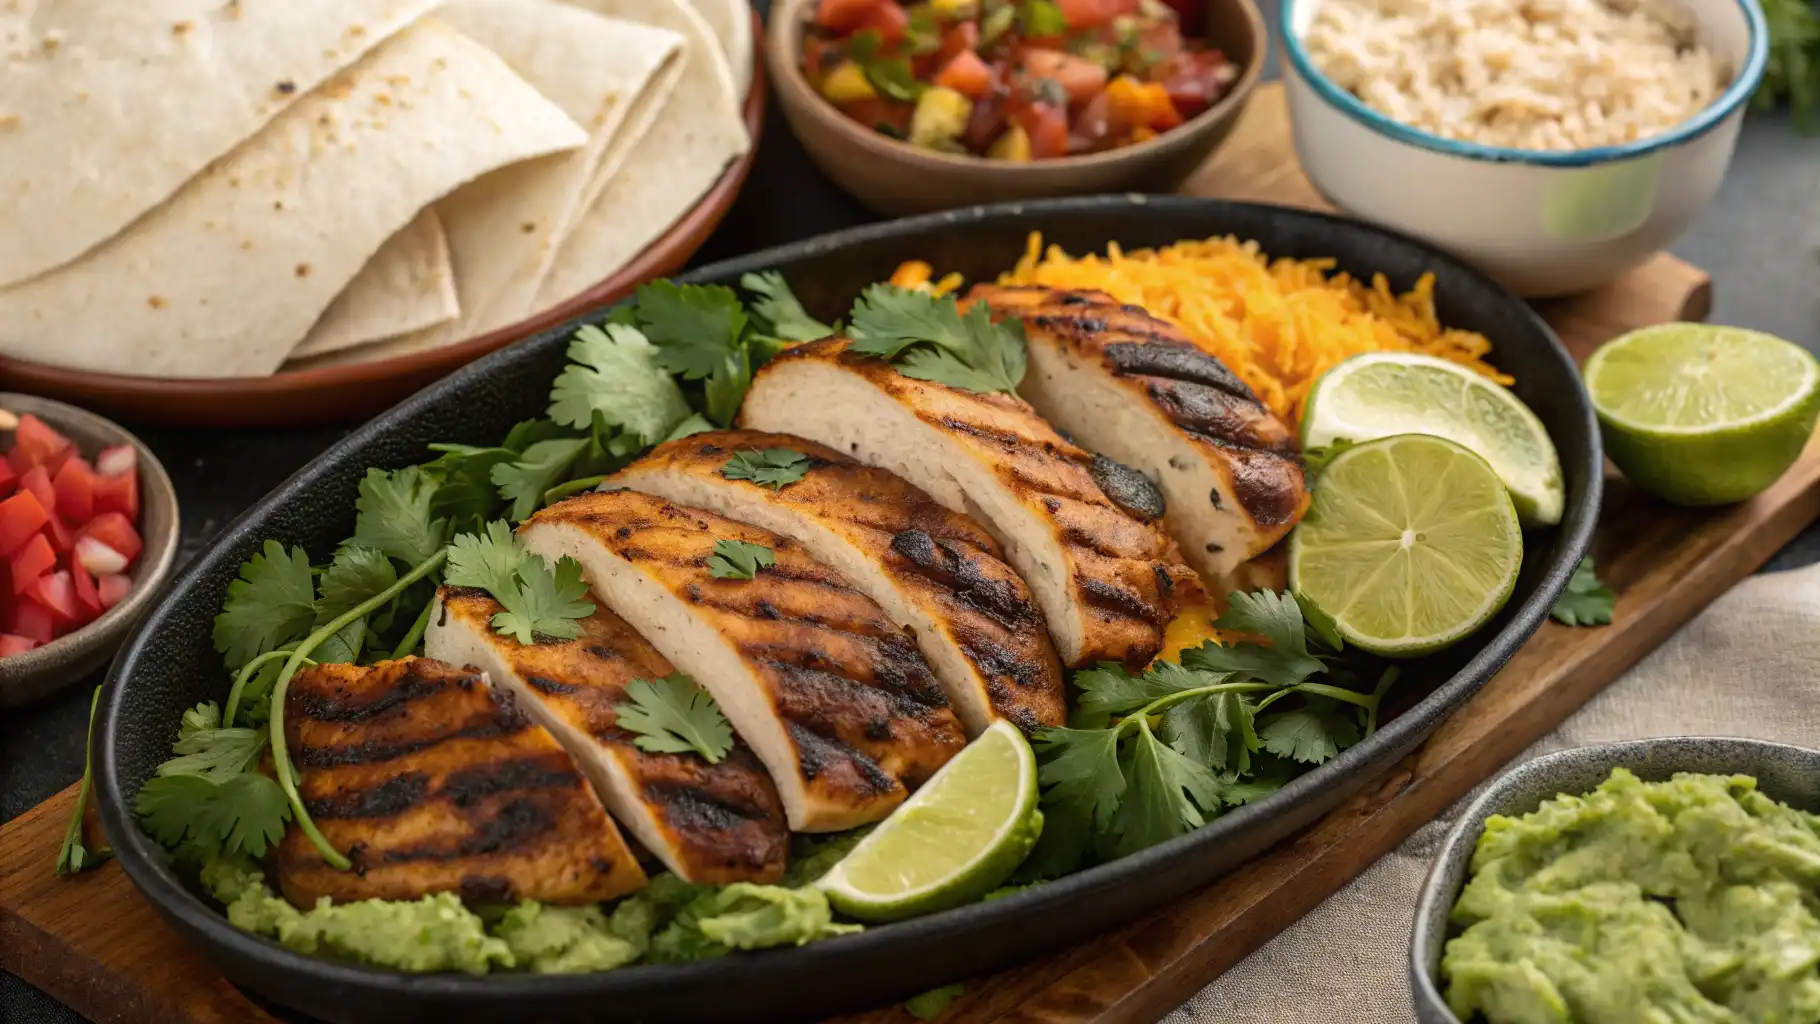
Ready to take your grilled chicken to the next level? Create bold San Antonio-inspired flavors with this Grilled Mexican Chicken Marinade. Smoky spices, fresh citrus, and garlic transform every bite into a flavorful delight. Use this marinade for a backyard barbecue or a quick family dinner. This easy recipe adds a Tex-Mex twist to your meals. Let’s dive in and make your new favorite marinade!
What Makes This San Antonio Grilled Mexican Chicken Marinade Special?
The Bold Flavors
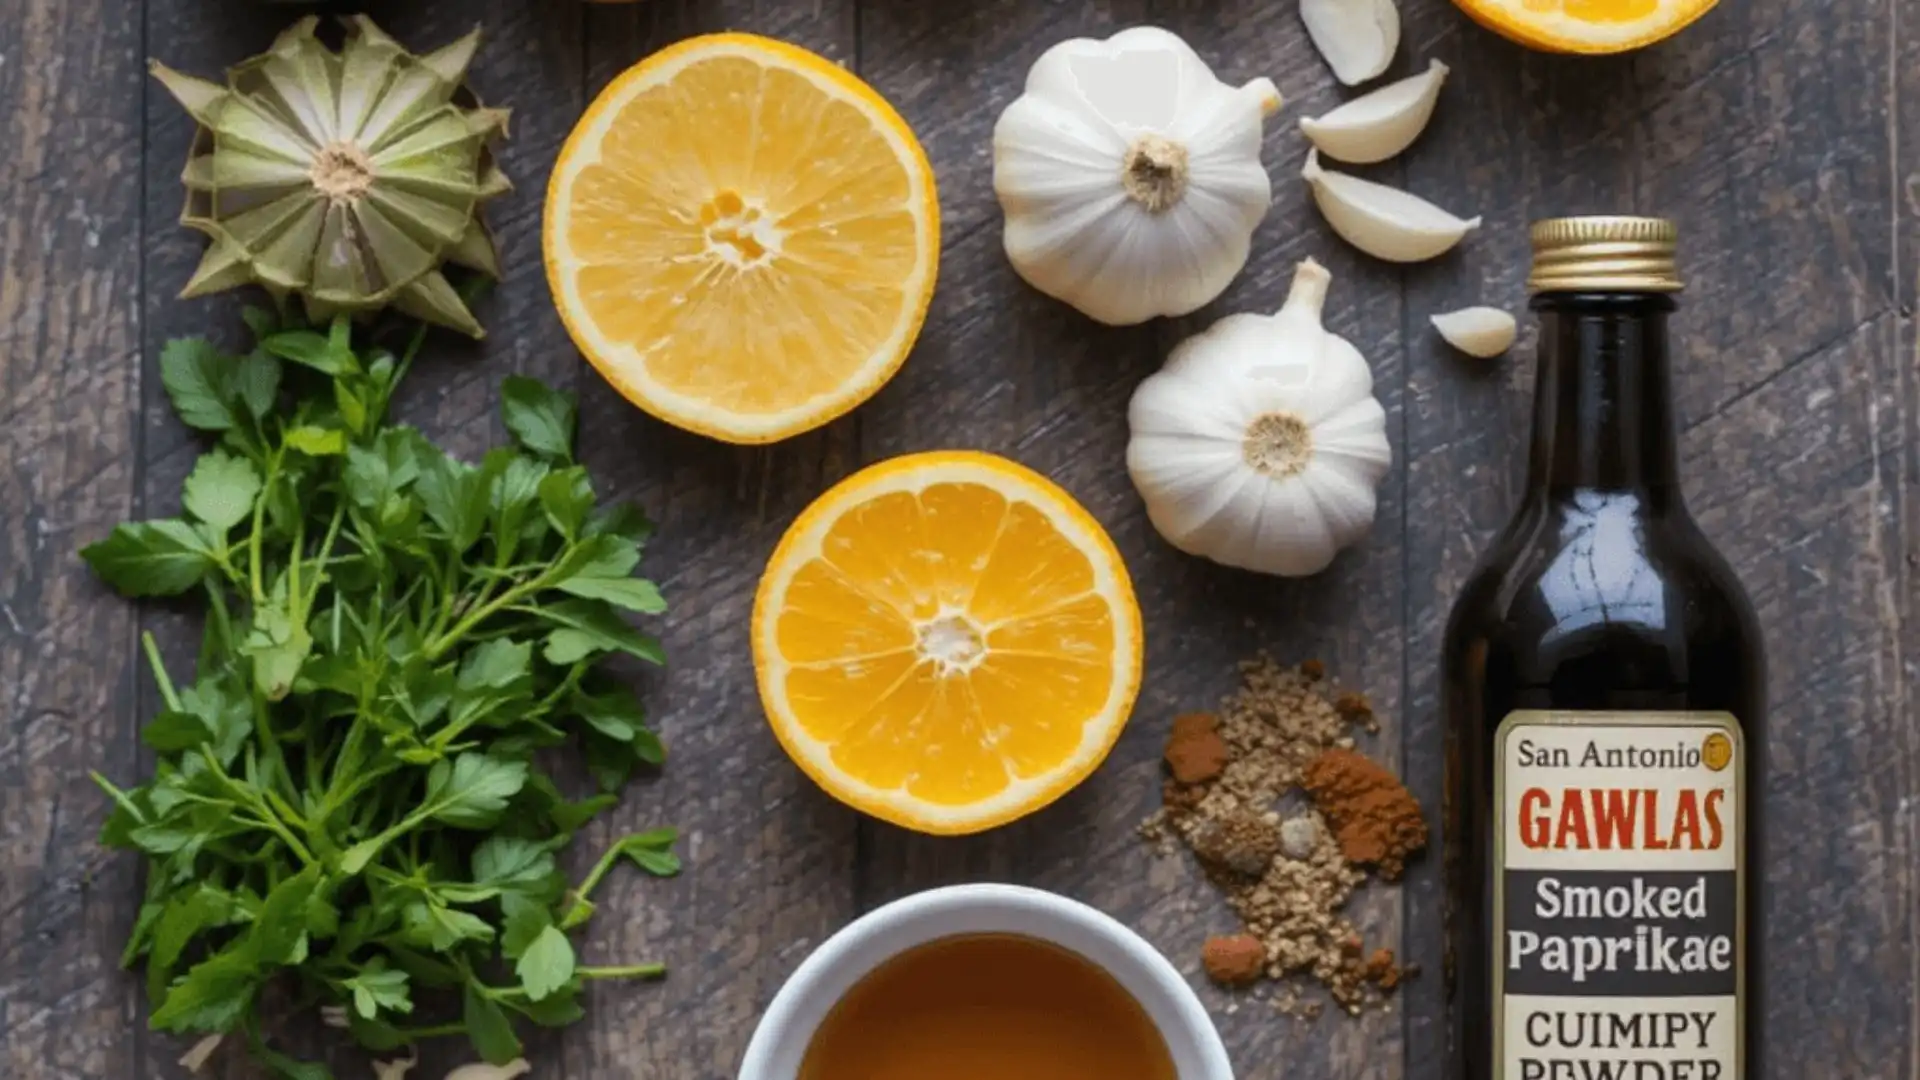
The magic of this San Antonio Grilled Mexican Chicken Marinade lies in its bold and vibrant flavors. Each ingredient is carefully chosen to create a symphony of taste that elevates your chicken to restaurant-quality perfection. Let’s break down the key components that make this marinade unforgettable:
1. Smoky Spices
First, the foundation of bold flavor comes from a combination of smoked paprika and chili powder. Smoked paprika infuses the chicken with a subtle smokiness that reminds you of traditional barbecue. Meanwhile, chili powder adds warmth and depth, creating a perfect balance of earthy and spicy notes.
2. Tangy Citrus
Next, lime and orange juice play a dual role in this marinade. On one hand, they tenderize the chicken, ensuring every bite is juicy and flavorful. On the other hand, they add a bright, tangy punch that cuts through the richness of the spices. Together, the citrus elements enhance the taste and give the dish a refreshing twist, which pairs beautifully with grilled flavors.
3. Aromatic Garlic
Of course, fresh minced garlic is a must for this recipe. Its pungent, slightly sweet aroma permeates the chicken as it marinates. Additionally, garlic complements the citrus and spices, tying all the ingredients together seamlessly.
4. Earthy Cumin
Cumin, another essential ingredient, is a classic spice in Mexican cuisine. Not only does it add a nutty, earthy flavor, but it also enhances the overall depth and complexity of the marinade. Moreover, cumin works harmoniously with chili powder and paprika, ensuring a well-rounded flavor profile.
5. Balanced Sweetness (Optional)
Finally, for those who enjoy a touch of sweetness, a teaspoon of honey or brown sugar can be added to the marinade. This subtle sweetness contrasts with the spices and citrus. As a result, it creates a more balanced flavor profile that will please all palates.
In conclusion, these bold flavors are what make this marinade distinctly San Antonio-style. They transform a simple grilled chicken into a memorable dish that’s perfect for any occasion. Whether you’re serving it with tortillas, rice, or vegetables, the flavors will shine and leave everyone asking for seconds!
Versatility
One of the greatest strengths of this Grilled Mexican Chicken Marinade is its incredible versatility. It’s not just a marinade—it’s a flavorful foundation that can transform a variety of dishes and adapt to different occasions. Whether you’re hosting a casual barbecue, preparing for a weeknight dinner, or meal-prepping for the week, this recipe is a go-to solution. Let’s explore how this marinade can elevate your cooking in various ways:
1. Perfect for Any Protein
To start, while chicken is the star of this recipe, the marinade works beautifully with other proteins. For instance, you can use it to flavor beef, pork, or even seafood like shrimp or salmon. The smoky spices and citrus elements pair well with a range of meats, giving you endless options for experimentation. Additionally, it’s an excellent way to bring variety to your meals without much extra effort.
2. A Base for Different Cuisines
Furthermore, this marinade isn’t just limited to Mexican or Tex-Mex cuisine. You can easily adapt it to suit different styles of cooking. For example:
- Add fresh herbs like oregano or cilantro to enhance Mediterranean flavors.
- Mix in a dash of soy sauce and ginger to give it an Asian-inspired twist.
- Use it as a base for Caribbean-style jerk chicken by adding allspice and thyme.
With just a few tweaks, this versatile recipe can take on entirely new profiles, making it suitable for any culinary adventure.
3. Suitable for Grilling, Baking, or Pan-Frying
Moreover, another fantastic aspect of this marinade is that it works well with different cooking methods. Grill the chicken for a smoky, charred finish, bake it in the oven for a fuss-free option, or pan-fry it for a quick, golden crust. No matter the method, the marinade ensures juicy, flavorful results every time.
4. Ideal for Meal Prep
In addition, this marinade is a meal prep enthusiast’s dream. You can marinate the chicken in advance, store it in the fridge or freezer, and cook it whenever needed. The marinated chicken can also be pre-cooked and used in a variety of dishes throughout the week, such as:
- Tacos: Shred the chicken and add it to warm tortillas with fresh toppings.
- Salads: Slice it and layer it over greens for a quick, protein-packed meal.
- Rice Bowls: Combine with rice, beans, and vegetables for a hearty, balanced dish.
Not only does it save time, but it also makes your meals more flavorful and convenient.
5. Crowd-Pleasing Flexibility
Finally, if you’re hosting guests, this marinade makes entertaining easy. Its universally loved flavors appeal to a wide audience, and it’s simple to scale up for large gatherings. Moreover, you can pair the chicken with customizable sides like guacamole, salsa, or grilled vegetables, and let guests build their own tacos or bowls. This flexibility makes it a hit for any occasion.
In conclusion, the versatility of this Grilled Mexican Chicken Marinade makes it a must-have recipe in your culinary repertoire. Whether you’re cooking for one, feeding a family, or hosting a party, this marinade adapts effortlessly to your needs while delivering bold, delicious flavors every time.
Cultural Inspiration Behind San Antonio’s Grilled Mexican Chicken Marinade
The San Antonio Grilled Mexican Chicken Marinade isn’t just a recipe—it’s a celebration of rich culinary traditions and the vibrant cultural heritage of San Antonio, Texas. Known for its unique blend of Mexican and Tex-Mex cuisine, San Antonio draws influence from generations of cultural exchange between Mexico and the United States. This marinade captures the essence of those flavors, bringing an authentic taste of the region to your table.
1. The Roots of Tex-Mex Cuisine
San Antonio is often regarded as the heart of Tex-Mex cuisine. This style of cooking combines traditional Mexican flavors with American influences, creating a unique and beloved culinary identity. The use of bold spices like cumin, chili powder, and paprika in this marinade reflects the hallmark seasonings of Tex-Mex dishes. These ingredients, while rooted in Mexican cooking, became staples in Texas kitchens as part of this flavorful fusion.
2. Mexican Culinary Traditions
At its core, this marinade also pays homage to authentic Mexican cuisine. Mexican cooking emphasizes fresh, vibrant flavors achieved through ingredients like citrus, garlic, and smoky peppers. Lime and orange juice in the marinade are classic components of Mexican marinades, used not only for their tangy flavor but also for their ability to tenderize meat. Garlic, a staple in Mexican kitchens, brings an aromatic depth that enhances the overall profile of the dish.
3. San Antonio’s Influence
San Antonio’s rich cultural landscape has been shaped by centuries of Mexican and Spanish heritage. From bustling food markets to family-owned taquerias, the city is a hub of culinary inspiration. This marinade draws from that vibrant food culture, reflecting the smoky, zesty, and bold flavors you’d expect to find in a San Antonio backyard barbecue or a festive gathering.
4. A Celebration of Tradition and Innovation
What makes this marinade truly special is its ability to honor tradition while remaining versatile for modern kitchens. It brings together time-honored techniques and ingredients while allowing home cooks to adapt it to their preferences. Whether you’re preparing a meal for a casual dinner or experimenting with new recipes, the marinade stays true to its cultural roots while embracing innovation.
5. A Dish That Brings People Together
In Mexican and Tex-Mex culture, food is more than just sustenance—it’s a way of bringing people together. This marinade is perfect for family gatherings, celebrations, or simply sharing a delicious meal with loved ones. It embodies the spirit of togetherness and the joy of sharing a dish that tells a story of cultural heritage and flavor.
In summary, the San Antonio Grilled Mexican Chicken Marinade is more than a recipe; it’s a tribute to the vibrant traditions and bold flavors of San Antonio’s culinary heritage. Every ingredient and spice reflects the cultural inspiration behind the dish, offering a delicious way to celebrate the rich history of Tex-Mex and Mexican cuisine.
Ingredients for the Best San Antonio Grilled Chicken Marinade
Essential Ingredients
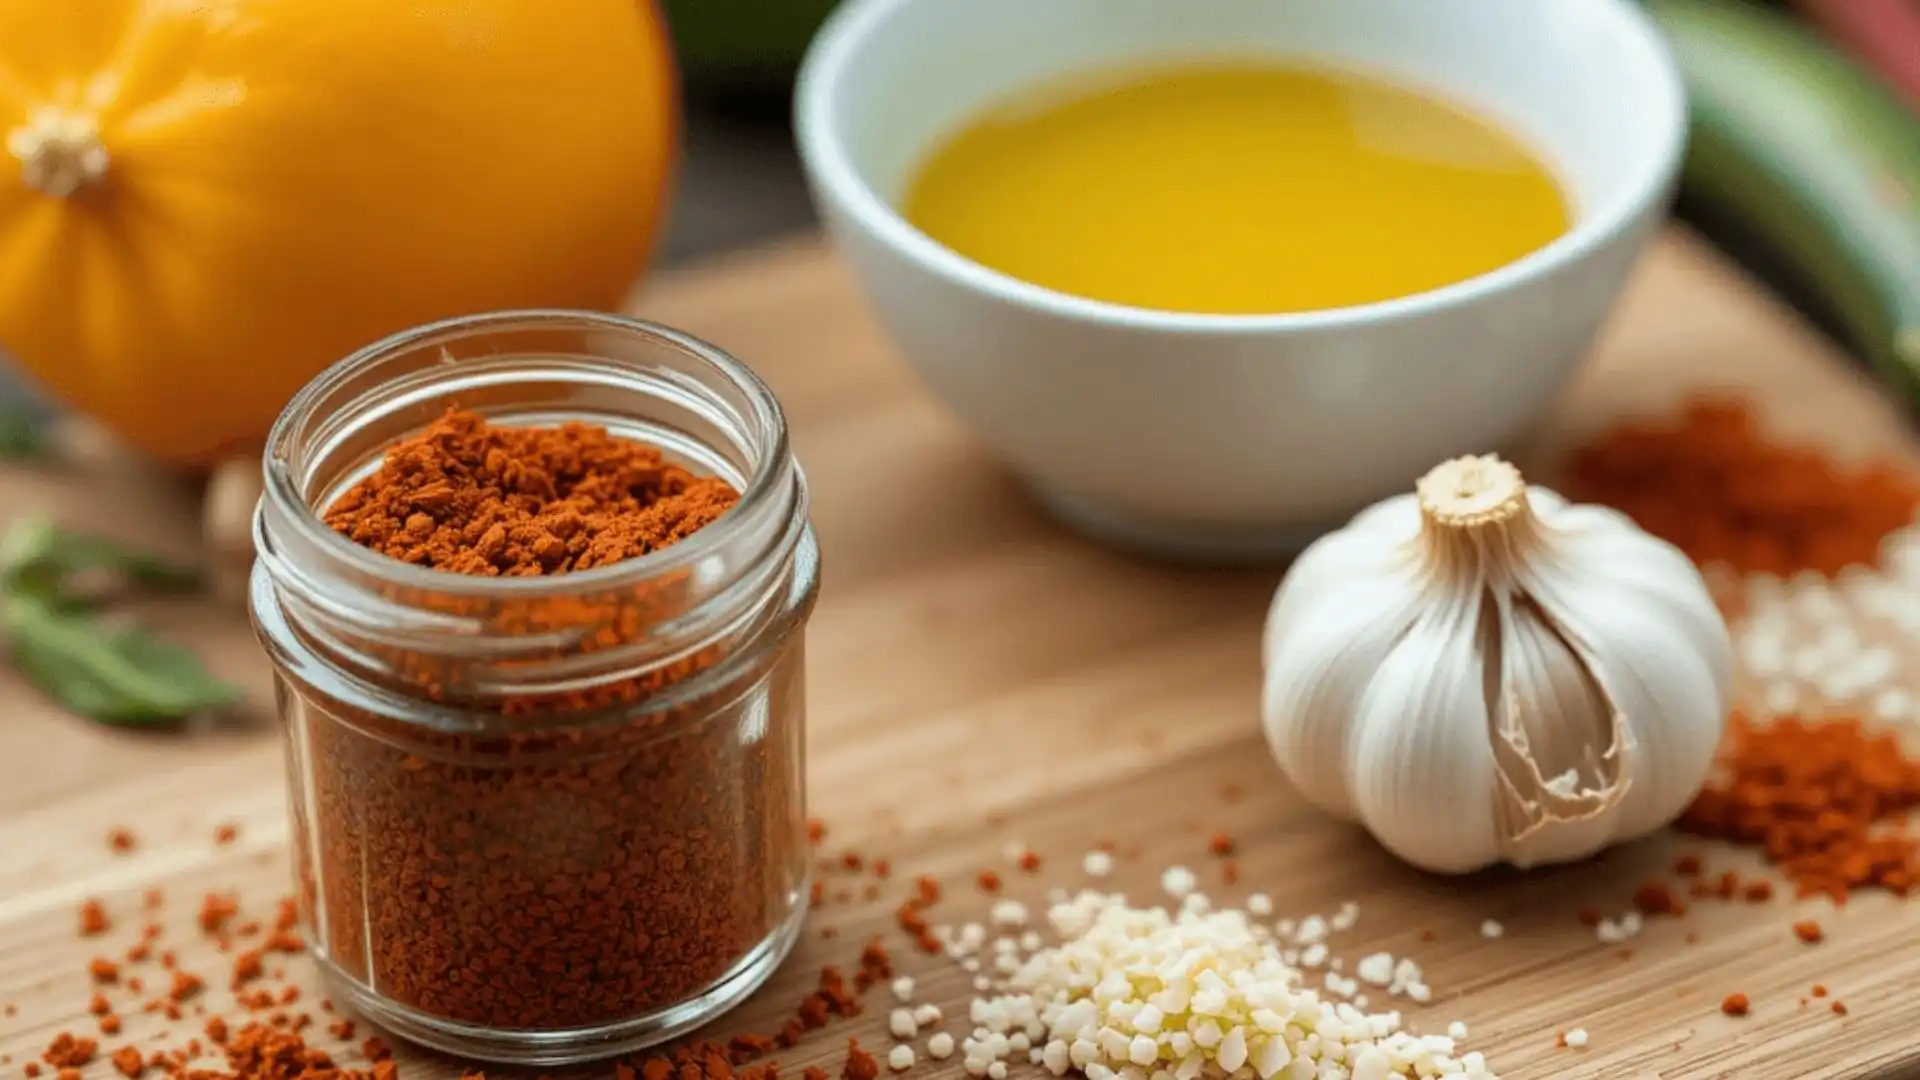
The key to creating the perfect San Antonio Grilled Mexican Chicken Marinade lies in using the right combination of ingredients. Each element in this marinade contributes to the bold, smoky, and tangy flavors that make it so distinctive. Let’s break down the essential ingredients and their roles in transforming ordinary chicken into a flavorful masterpiece:
1. Lime Juice: The Tangy Tenderizer
First and foremost, freshly squeezed lime juice is a cornerstone of this marinade. Not only does it add a tangy brightness to the flavor, but it also helps tenderize the chicken. The natural acidity of lime juice breaks down proteins in the meat, making it juicy and succulent. Always use fresh limes for the best results, as bottled lime juice lacks the same vibrant flavor.
2. Orange Juice: Sweet and Citrusy Balance
While lime juice provides sharp acidity, orange juice, on the other hand, adds a touch of natural sweetness and a mild citrus flavor. Together, these two citrus fruits create a perfect balance of sweet and tangy, which is a hallmark of Tex-Mex and Mexican marinades. Additionally, the orange juice enhances caramelization on the chicken when it’s grilled, giving it a beautiful golden-brown color.
3. Garlic: Aromatic Depth
Of course, garlic is essential for adding an aromatic, savory depth to the marinade. Its bold, slightly spicy flavor permeates the chicken as it marinates, ensuring every bite is packed with taste. Whether you finely mince it or use a garlic press, fresh garlic is key to achieving the full flavor profile.
4. Smoked Paprika: A Smoky Kick
Moreover, smoked paprika brings a subtle smokiness to the marinade, reminiscent of traditional barbecue flavors. This spice also adds a warm, rich red color that enhances the visual appeal of the grilled chicken. Its smoky undertones work in harmony with the citrus and garlic to create a well-rounded flavor.
5. Chili Powder: Bold Heat
Another essential ingredient is chili powder, which defines the Tex-Mex influence in this marinade. It adds a layer of warmth and mild heat without overpowering the other flavors. For a deeper, richer taste, you can use ancho chili powder, which has a slightly sweet and earthy profile. As a result, the marinade develops a complex, satisfying heat.
6. Ground Cumin: Earthy and Nutty
In addition to the spices above, cumin is a staple in Mexican cuisine and plays a vital role in this marinade. Its earthy, nutty flavor adds complexity to the dish, blending seamlessly with the other spices. Furthermore, cumin enhances the savory elements, making it a key player in achieving that authentic Tex-Mex taste.
7. Olive Oil: A Flavor Carrier
Olive oil isn’t just a base for the marinade—it’s also a flavor carrier. Specifically, it helps distribute the spices and seasonings evenly over the chicken, ensuring consistent flavor in every bite. Additionally, the oil creates a barrier that locks in moisture during cooking, preventing the chicken from drying out.
8. Optional Sweeteners: Honey or Brown Sugar
For those who enjoy a touch of sweetness, honey or brown sugar can also be added to the marinade. This optional ingredient creates a perfect balance against the smoky and tangy flavors. Moreover, it enhances caramelization, giving the chicken an irresistible glaze as it grills.
9. Salt and Pepper: The Seasoning Staples
Finally, no marinade is complete without salt and pepper. Salt amplifies the flavors of the other ingredients and helps the chicken retain moisture. Meanwhile, black pepper adds a mild spiciness that complements the smoky and citrusy notes in the marinade.
Tips for Ingredient Selection
- To begin with, use fresh citrus juices instead of bottled for the best flavor.
- Additionally, opt for high-quality smoked paprika and chili powder to enhance the marinade’s depth.
- Finally, customize the level of heat by adjusting the amount of chili powder or adding crushed red pepper flakes.
By combining these essential ingredients, you create a marinade that is not only packed with bold flavors but also perfectly balanced. Each element works together to ensure your chicken is juicy, flavorful, and worthy of the San Antonio Tex-Mex tradition.
Optional Add-Ons
The beauty of the San Antonio Grilled Mexican Chicken Marinade lies in its versatility, and adding optional ingredients is a great way to personalize the recipe. While the essential ingredients provide a solid foundation, these optional add-ons allow you to enhance or tweak the flavors to suit your preferences. Let’s dive into some exciting options and their potential impact on the dish:
1. Honey or Brown Sugar for Sweetness
For those who enjoy a hint of sweetness, a tablespoon of honey or brown sugar can elevate the marinade. This subtle sweetness balances the tangy and smoky flavors, making the chicken more appealing to those who prefer a milder taste. Additionally, the sugars in these ingredients caramelize beautifully when grilled, giving the chicken a glossy, golden finish.
2. Fresh Herbs for Brightness
Incorporating fresh herbs like cilantro, parsley, or oregano can add a burst of freshness to the marinade. Cilantro, for example, brings a distinctly Mexican flavor that pairs wonderfully with lime and garlic. Oregano, often used in Mexican cooking, adds an earthy note that complements the spices. For a Mediterranean twist, you could even experiment with fresh parsley.
3. Jalapeño or Serrano Peppers for Heat
If you love a little spice, finely chopped jalapeño or serrano peppers can bring heat to the marinade. These peppers not only add spice but also infuse the chicken with a bright, zesty flavor. To control the heat level, remove the seeds and membranes before adding the peppers. Alternatively, for a smoky heat, you can include a small amount of chipotle peppers in adobo sauce.
4. Zest for Extra Citrus Flavor
For an added punch of citrus flavor, consider using lime or orange zest. The zest contains essential oils that intensify the citrusy aroma and taste of the marinade. This is especially effective if you want to highlight the bright, tangy elements of the dish.
5. Soy Sauce for Depth
Soy sauce is an unexpected but excellent addition to this marinade. Its umami flavor deepens the overall profile of the dish and complements the smoky spices. Use this add-on sparingly, as its saltiness can quickly overpower the other ingredients.
6. Smoked Chipotle Powder or Liquid Smoke
To amplify the smoky flavors, try adding a pinch of smoked chipotle powder or a few drops of liquid smoke. These ingredients can give the chicken an authentic barbecue essence, even if you’re cooking indoors or without a grill.
7. Tequila or Beer for a Unique Twist
For a fun and unique flavor, consider adding a splash of tequila or beer to the marinade. Tequila enhances the citrus and smoky flavors, giving the dish a distinct Mexican flair. Beer, on the other hand, tenderizes the chicken while adding a subtle malty sweetness. These additions are particularly great for festive gatherings or summer cookouts.
8. Crushed Red Pepper Flakes for Extra Spice
If you prefer a more consistent level of heat throughout the dish, crushed red pepper flakes are a great option. They distribute evenly in the marinade and add a slow-building warmth that enhances the overall flavor.
9. Ground Coriander for Warm, Citrusy Notes
Ground coriander, which comes from the seeds of the cilantro plant, has a warm, slightly citrusy flavor. Adding a pinch of this spice can enhance the citrus elements of the marinade while adding depth and complexity.
How to Use Optional Add-Ons
When incorporating optional ingredients, keep these tips in mind:
- Start Small: Add a little at a time and adjust to taste. Some ingredients, like soy sauce or chipotle powder, can be potent.
- Balance the Flavors: Consider the overall flavor profile and ensure the add-ons complement the existing ingredients.
- Experiment with Combinations: Mix and match add-ons to create your signature marinade. For example, combine honey, jalapeño, and lime zest for a sweet and spicy twist.
These optional add-ons allow you to customize the marinade to suit your taste, making it even more versatile. Whether you want more heat, sweetness, or smoky depth, these ingredients open the door to endless possibilities. Get creative and make this marinade your own while keeping the bold, San Antonio-inspired flavors at its heart!
Ingredient Substitutions for San Antonio Grilled Mexican Chicken Marinade
One of the best things about the San Antonio Grilled Mexican Chicken Marinade is its flexibility. Even if you don’t have all the ingredients on hand, you can easily make substitutions without sacrificing flavor. Here’s a detailed guide to ingredient substitutions that will allow you to customize the marinade or adapt it based on what you have available in your kitchen:
1. Lime Juice Substitutions: Lemon Juice or Vinegar Options
Lime juice is a key ingredient, providing tanginess and tenderizing the chicken. However, if you’re out of limes, you can use fresh lemon juice as a substitute. While lemon juice has a slightly sharper taste, it still works well in balancing the marinade’s flavors. Alternatively, a splash of apple cider vinegar or white vinegar can mimic the acidity, though it may lack the citrusy brightness.
2. Orange Juice Alternatives: Pineapple Juice or Grapefruit Juice
If orange juice isn’t available, you can use pineapple juice for a tropical sweetness that complements the smoky spices. Grapefruit juice is another great option, as it offers a slightly bitter tang that pairs beautifully with savory marinades. If you prefer, you can also combine a bit of lemon or lime juice with a touch of honey to mimic the sweet-tangy balance of orange juice.
3. Garlic Substitutes: Garlic Powder or Shallots
Fresh garlic is preferred for its bold, aromatic flavor, but garlic powder can work in a pinch. Use about 1 teaspoon of garlic powder for every clove of garlic the recipe calls for. If you have shallots on hand, finely minced shallots can also add a mild, sweet garlic-like flavor.
4.Smoked Paprika Replacements: Regular Paprika or Chipotle Powder
Smoked paprika provides the marinade with its signature smoky flavor. If you don’t have it, regular paprika will still add color and a mild sweetness. For a bolder, spicier kick, substitute with chipotle powder, which brings both heat and smokiness to the dish.
5. Chili Powder Alternatives: Cayenne Pepper or Ancho Chili Powder
Chili powder is a blend of spices that adds warmth and a hint of heat. If you’re out of chili powder, a small amount of cayenne pepper can provide heat, but use it sparingly as it’s much spicier. Ancho chili powder is another excellent option, offering a rich, smoky, and slightly sweet flavor.
6. Cumin Substitutions: Coriander or Garam Masala
Cumin is essential for its earthy, nutty flavor, but if you don’t have it, ground coriander can serve as a mild substitute. For a more complex flavor, you can use garam masala, which contains cumin along with other warming spices like cinnamon and cloves. Keep in mind that garam masala has a stronger, sweeter profile.
7. Olive Oil Replacements: Vegetable Oil or Avocado Oil
Olive oil is used to bind the marinade and keep the chicken moist. If you don’t have olive oil, you can substitute it with vegetable oil, which has a neutral flavor. Avocado oil is another excellent option, as it has a high smoke point and a subtle, buttery taste.
8. Sweeteners: Swap Honey or Brown Sugar with Maple Syrup or Agave Nectar
For a touch of sweetness, honey or brown sugar is often added. If you’re looking for alternatives, maple syrup or agave nectar work wonderfully and bring their own unique flavors to the marinade. These substitutes also caramelize nicely when grilled, adding a rich glaze to the chicken.
9. Salt and Pepper Variations: Sea Salt, Kosher Salt, or White Pepper
While basic table salt and black pepper work perfectly, you can experiment with sea salt or kosher salt for a different texture and flavor. White pepper can be used for a milder, slightly earthy taste, especially if you want to keep the marinade visually smooth.
Tips for Making Substitutions
- Test in Small Batches: When trying a new substitution, make a small portion of the marinade first to ensure the flavors work well together.
- Balance the Flavors: Adjust other ingredients as needed to maintain the overall flavor profile. For instance, if using a sweeter juice like pineapple, you may want to add a pinch of extra chili powder for balance.
- Stay Creative: Don’t be afraid to experiment with combinations of substitutions to create a marinade that suits your personal taste.
By using these ingredient substitutions, you can adapt the San Antonio Grilled Mexican Chicken Marinade to fit your pantry or dietary preferences while still delivering the bold, smoky, and tangy flavors that make it so special. With a little creativity, this recipe can remain your go-to marinade for any occasion!
Step-by-Step Guide: How to Make the Marinade
Step 1: Gather and Prepare Your Ingredients
The first step in making the San Antonio Grilled Mexican Chicken Marinade is to gather and prepare all your ingredients. Proper preparation not only ensures a smoother cooking process but also helps you achieve the best possible flavor from your marinade. Here’s a detailed breakdown of what to do in this crucial step:
1. Collect Fresh, High-Quality Ingredients
Using fresh and high-quality ingredients is key to creating a flavorful marinade. For instance:
- Choose fresh citrus fruits (limes and oranges) over bottled juice for a brighter, more vibrant flavor.
- Opt for fresh garlic cloves instead of pre-minced or powdered garlic to get that bold, aromatic depth.
- Select fresh herbs, such as cilantro or parsley, if you plan to use them as optional add-ons.
When your ingredients are fresh, the flavors of the marinade will shine, and your chicken will taste more vibrant and authentic.
2. Measure the Ingredients Precisely
To achieve the perfect balance of flavors, measure each ingredient carefully. While the recipe is forgiving and allows for adjustments, starting with the recommended amounts ensures a consistent result. Use measuring spoons and cups for dry and liquid ingredients to maintain accuracy. For example:
- Measure the citrus juices to balance acidity and sweetness.
- Use a teaspoon for spices like cumin, smoked paprika, and chili powder to avoid overpowering the dish.
3. Prep the Citrus Fruits
Citrus is a star ingredient in this marinade, so proper preparation is essential. Follow these tips:
- Juice the Fruits: Roll the limes and oranges on a flat surface before cutting them. This helps release more juice. Use a juicer or manually squeeze to extract the juice
- Zest for Extra Flavor (Optional): If you want to enhance the citrusy notes, use a microplane or fine grater to collect zest from the lime or orange before juicing. The zest contains essential oils that add an extra layer of flavor.
4. Prepare the Garlic
Fresh garlic is a must for this marinade. Here’s how to prep it:
- Peel the cloves and finely mince them with a knife.
- Alternatively, use a garlic press for quicker results.
- If you prefer a smoother texture, you can mash the garlic into a paste with a pinch of salt using the flat side of your knife.
Freshly prepared garlic releases its oils and intensifies the flavor, making your marinade more aromatic.
5. Gather the Spices
Combine all your spices—smoked paprika, chili powder, cumin, and any optional add-ons like chipotle powder—into a small bowl. This makes it easier to mix them into the marinade evenly. Be sure to:
- Check the freshness of your spices; old spices lose potency over time.
- Adjust the quantities slightly if you prefer more heat or smokiness.
6. Set Up Your Workstation
Before mixing everything, set up a clean and organized workstation. Place all ingredients within reach to make the process efficient. You’ll also need:
- A medium-sized mixing bowl for the marinade.
- A whisk or fork for blending the ingredients.
- A cutting board and knife for chopping and slicing.
Why Proper Preparation Matters
Taking the time to gather and prepare your ingredients ensures the marinade comes together seamlessly. Additionally, it allows you to focus on mixing and adjusting the flavors without rushing or forgetting any steps. Good preparation also minimizes cleanup and keeps your cooking process enjoyable.
Once your ingredients are ready, you’ll be well-prepared to move on to the next step: mixing and combining them to create the perfect San Antonio Grilled Mexican Chicken Marinade!
Step 2: Mix and Combine the Ingredients
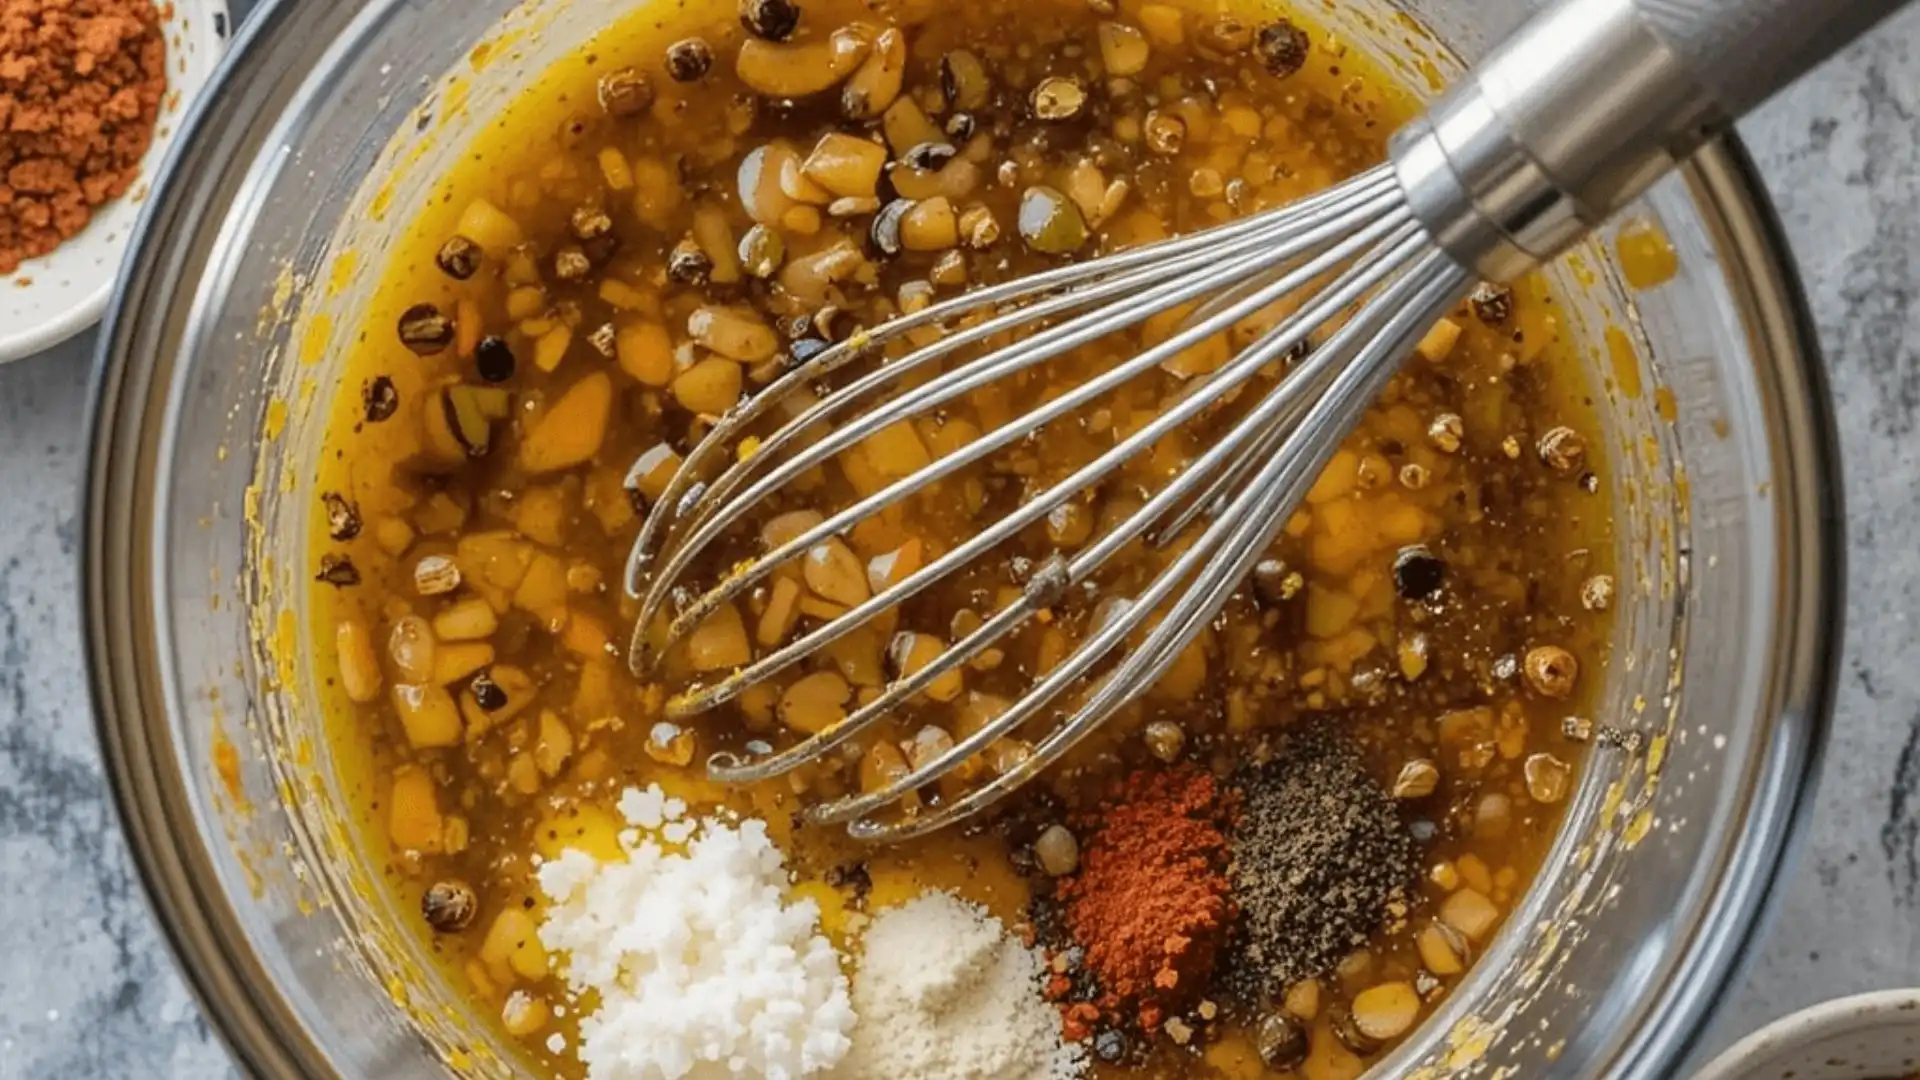
Once you’ve prepared your ingredients in Step 1, it’s time to mix and combine them to create the perfect San Antonio Grilled Mexican Chicken Marinade. This step is where the magic happens, as the bold and vibrant flavors of the marinade come together. Here’s how to ensure your marinade is perfectly blended and packed with flavor:
1. Start with the Citrus Juices
Begin by pouring the freshly squeezed lime juice and orange juice into a medium-sized mixing bowl. These citrus juices are the foundation of the marinade, providing both tanginess and sweetness. If you’ve chosen to include lime or orange zest, add it to the bowl at this stage for an extra burst of citrusy aroma and flavor.
2. Add the Garlic
Next, incorporate the minced garlic into the bowl. Fresh garlic adds an aromatic depth that enhances the other ingredients. Make sure the garlic is finely minced or crushed to ensure it distributes evenly throughout the marinade. If you’ve prepared a garlic paste for a smoother texture, stir it in at this point.
3. Incorporate the Spices
Now, it’s time to add the spices that give the marinade its bold Tex-Mex character. Sprinkle in the smoked paprika, chili powder, ground cumin, salt, and black pepper. For an extra smoky kick, consider adding a pinch of chipotle powder or a few drops of liquid smoke. Whisk the mixture thoroughly to combine the spices with the citrus base.
4. Drizzle in the Olive Oil
Slowly drizzle the olive oil into the mixture while whisking continuously. Olive oil not only helps bind the ingredients together but also ensures the marinade clings to the chicken evenly. The oil also locks in moisture, keeping the chicken juicy and tender as it cooks. If you’re using an alternative oil like avocado oil or vegetable oil, add it in the same manner.
5. Balance the Flavors with Sweeteners
If you’re adding a touch of sweetness, such as honey or brown sugar, now is the time to mix it in. Whisk until the sweetener dissolves completely into the liquid. This step is especially important if you’ve chosen to substitute orange juice with a less sweet alternative like grapefruit juice, as it ensures the marinade maintains a balanced flavor profile.
6. Taste and Adjust
Once all the ingredients are combined, give the marinade a taste. This step is crucial to ensure that the flavors are balanced before you marinate the chicken. Adjust as needed:
- Add a bit more lime juice or vinegar for extra tang.
- Increase the smoked paprika or chipotle powder for more smokiness.
- Stir in a small amount of honey or brown sugar for additional sweetness.
Remember, the marinade should have a strong flavor since it will mellow slightly during cooking.
7. Ensure a Smooth Consistency
Use a whisk or a fork to thoroughly mix the marinade until all the ingredients are well combined. The mixture should have a smooth consistency with no lumps of garlic or undissolved spices. If you prefer a finer texture, you can blend the marinade in a food processor or with an immersion blender.
Tips for Success
- Layer the Ingredients Gradually: Adding the ingredients in stages helps ensure they blend evenly.
- Don’t Rush: Take your time to whisk thoroughly, as this ensures the flavors meld together perfectly.
- Customize to Taste: Remember, this is your marinade—adjust the ingredients to suit your preferences!
By the end of Step 2, you’ll have a vibrant, flavorful marinade that’s ready to take your chicken to the next level. The next step will involve marinating the chicken to allow these bold San Antonio-inspired flavors to infuse deeply into the meat.
Step 3: Marinate the Chicken
In this crucial step, you’ll allow the chicken to soak up all the bold and vibrant flavors of the San Antonio Grilled Mexican Chicken Marinade. Proper marination ensures that every bite is infused with the tangy, smoky, and savory elements of this Tex-Mex-inspired recipe. Follow these steps to marinate the chicken effectively for maximum flavor and juiciness:
1. Choose the Right Container
Start by selecting a suitable container for marinating the chicken. The right container ensures the marinade evenly coats the meat and prevents spills. Consider the following options:
- Resealable Plastic Bags: A large zip-top bag is ideal for easy mixing and even coating. Squeeze out excess air before sealing to ensure the chicken stays submerged.
- Glass or Plastic Bowls: Use a bowl with a tight-fitting lid to prevent any leakage. Avoid metal bowls, as acidic ingredients like citrus can react with the metal, altering the flavor.
- Marinating Trays: A flat, shallow dish works well for larger chicken cuts, ensuring they lay in a single layer for even marination.
2. Add the Chicken to the Marinade
Place the chicken into your chosen container. Ensure that the pieces are evenly spaced and not overlapping too much. Pour the prepared marinade over the chicken, making sure it coats all sides. If you’re using a resealable bag, seal it tightly and gently massage the marinade into the chicken to help distribute the flavors evenly.
3. Allow Adequate Marinating Time
The length of time you marinate the chicken plays a significant role in the final flavor and tenderness. Here are some general guidelines:
- For Chicken Breasts or Thighs: Marinate for at least 2 hours, but for the best flavor, aim for 6–8 hours or overnight.
- For Bone-In Chicken Cuts: Longer marinating times, such as 8–12 hours, are ideal to allow the flavors to penetrate deeply.
- For Quick Marination: If you’re short on time, even 30 minutes can impart noticeable flavor, although longer is better.
4. Refrigerate While Marinating
Always marinate chicken in the refrigerator to maintain a safe temperature and prevent bacterial growth. Place the container on a stable shelf, ensuring it’s sealed or covered to avoid cross-contamination with other foods. Avoid marinating chicken at room temperature, as this can compromise food safety.
5. Flip or Mix the Chicken for Even Flavoring
During the marination process, occasionally flip or stir the chicken to ensure every part is coated with the marinade. If you’re using a resealable bag, gently turn it over every couple of hours. For bowls or trays, use tongs or clean hands to reposition the chicken.
6. Avoid Over-Marinating
While marinating is essential for flavor, over-marinating can cause the chicken to become mushy, especially if the marinade contains acidic ingredients like lime or orange juice. Stick to the recommended marination times to achieve the best texture and taste.
Tips for Marinating Success
- Use Boneless or Bone-In Cuts: Both work well, but bone-in cuts benefit from longer marination for deeper flavor.
- Don’t Reuse Marinade: Once the chicken has been marinated, discard the marinade. If you want to use it as a sauce, boil it thoroughly for several minutes to kill any bacteria.
- Experiment with Cuts: Try marinating chicken drumsticks, wings, or even whole chickens for variety.
By the end of Step 3, your chicken will be fully infused with the bold flavors of the San Antonio-inspired marinade, ready to be cooked to perfection. The marination process is where the flavors truly come to life, ensuring a tender and flavorful result. Now, you’re ready to move on to cooking the chicken and enjoying the fruits of your preparation!
Step 4: Cook the Marinated Chicken
After marinating your chicken, it’s time to bring out the bold, smoky flavors of the San Antonio Grilled Mexican Chicken Marinade by cooking it to perfection. Cooking the marinated chicken correctly ensures that it remains juicy, tender, and bursting with flavor. This step focuses on grilling, but you can also adapt the instructions for other cooking methods like baking or pan-frying. Follow these steps for the best results:
1. Prepare Your Grill or Cooking Surface
The first step in cooking the marinated chicken is to prepare your grill or preferred cooking surface:
- For Grilling: Preheat your grill to medium-high heat (about 375–400°F or 190–204°C). Clean the grates thoroughly to prevent sticking, then lightly oil them with a high-smoke-point oil like vegetable or avocado oil.
- For Baking: Preheat your oven to 400°F (204°C) and line a baking sheet with parchment paper or aluminum foil for easy cleanup.
- For Pan-Frying: Heat a heavy-bottomed skillet or grill pan over medium heat. Add a small amount of oil to the pan to create a non-stick surface.
2. Remove Excess Marinade
Before cooking, remove the chicken from the marinade. Let any excess marinade drip off to prevent it from burning during cooking. For a cleaner presentation, gently pat the chicken dry with paper towels. However, don’t remove too much marinade, as it contributes to the flavor and caramelization.
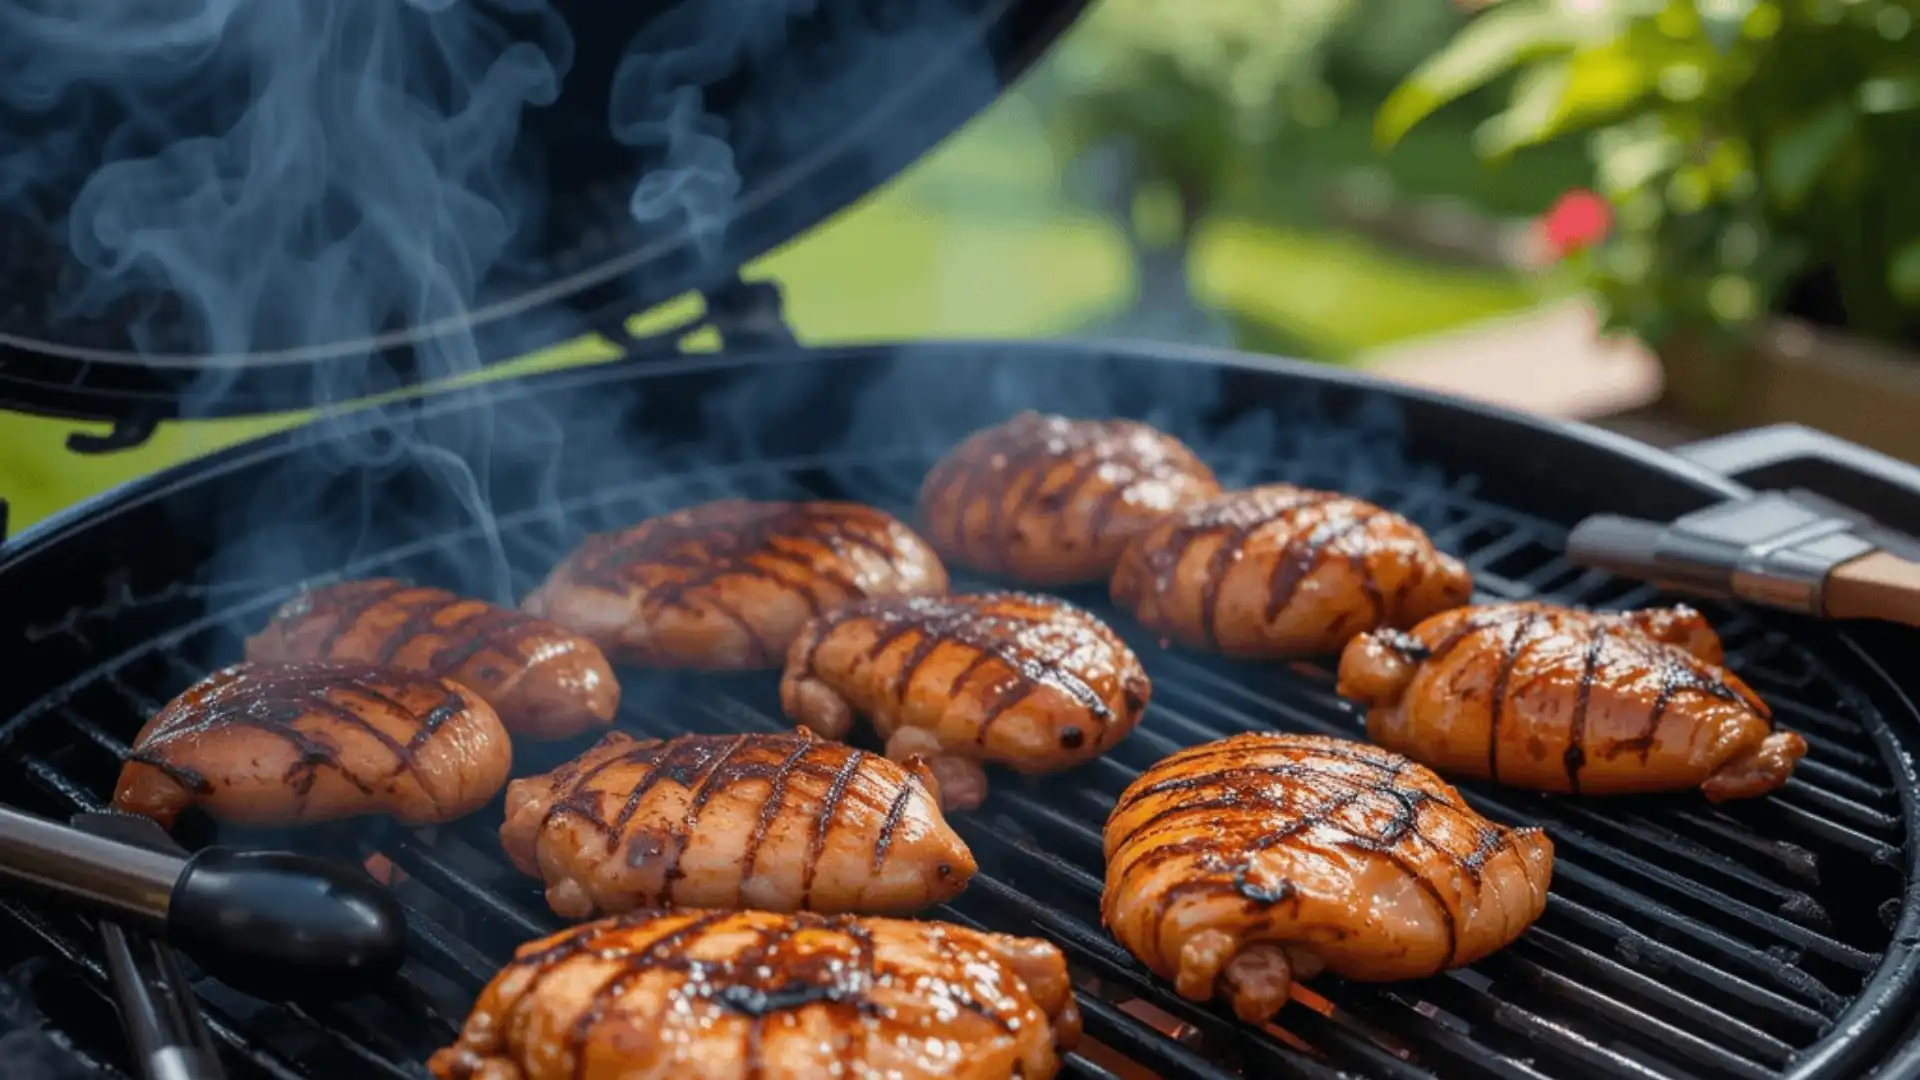
3. Grill the Chicken for a Smoky Finish
Grilling is the best way to achieve the smoky, charred flavor that enhances the marinade’s bold spices. Follow these tips for perfect grilling:
- Place the Chicken on the Grill: Arrange the chicken pieces on the grill grates, leaving space between each piece to allow for even cooking.
- Cook on One Side: Grill the chicken for 5–7 minutes on one side without flipping. This allows beautiful grill marks to form and prevents sticking.
- Flip and Finish Cooking: Turn the chicken over and grill for another 5–7 minutes, or until the internal temperature reaches 165°F (74°C) for boneless cuts or 175°F (79°C) for bone-in pieces.
- Monitor the Heat: Avoid flare-ups by keeping the grill temperature consistent and moving the chicken away from direct flames if necessary.
4. Alternative Cooking Methods
If grilling isn’t an option, you can achieve equally delicious results with these methods:
- Baking: Arrange the chicken on the prepared baking sheet and bake for 20–25 minutes, flipping halfway through. Want more caramelization? Pop it under the broiler for the last 2–3 minutes.
- Pan-Frying: Cook the chicken in a preheated skillet for 6–8 minutes per side over medium heat. Press lightly with a spatula to ensure even searing.
- Make sure the chicken reaches 165°F (74°C) so it’s safe to eat.Cook the chicken in a single layer for 15–18 minutes, flipping halfway through for even cooking.
5. Check for Doneness
For perfectly cooked chicken:
- Use a Meat Thermometer: Check the internal temperature with a thermometer inserted into the thickest part of the chicken. Make sure the chicken reaches 165°F (74°C) so it’s safe to eat.
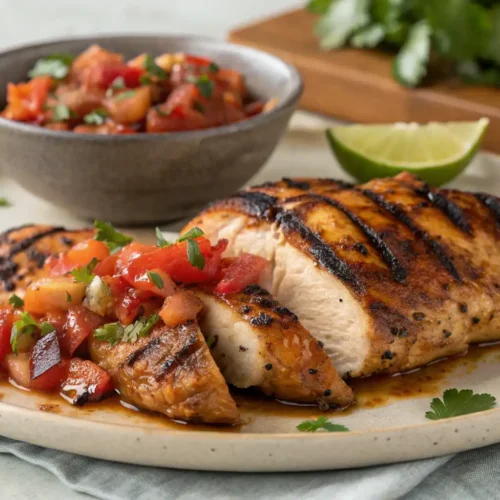
- Visual Cues: The chicken should have a golden-brown, slightly charred exterior, and the juices should run clear when pierced.
6. Let the Chicken Rest
After cooking, transfer the chicken to a plate or cutting board and let it rest for 5–10 minutes.Letting the meat rest helps the juices settle back in, so it stays juicy and tender when you cut into it Tent the chicken loosely with foil while it rests to keep it warm without trapping steam.
Serving the Cooked Chicken
Once the chicken is cooked and rested, it’s ready to serve. Here are some serving suggestions:
- Tacos: Slice the chicken and serve it in warm tortillas with salsa, guacamole, and fresh cilantro.
- Rice Bowls: Pair the chicken with Mexican rice, beans, and a drizzle of lime crema.
- Salads: Chop the chicken and add it to a fresh salad with greens, avocado, and a tangy vinaigrette.
- Side Pairings: Serve alongside grilled vegetables, corn on the cob, or a zesty slaw for a complete meal.
Tips for Perfectly Cooked Chicken
- Avoid Overcooking: Use a thermometer to prevent overcooking, which can dry out the chicken.
- Maintain Consistent Heat: Whether grilling or baking, steady heat ensures even cooking.
- Experiment with Cuts: Try this marinade with wings, drumsticks, or even a whole spatchcocked chicken for variety.
By the end of Step 4, your San Antonio Grilled Mexican Chicken will be cooked to perfection, infused with bold flavors, and ready to impress your family or guests. Enjoy the fruits of your labor with this delicious, Tex-Mex-inspired dish!
Tips for Grilling and Serving San Antonio-Style Chicken
Grilling Tips for Perfect San Antonio Grilled Mexican Chicken
Grilling your marinated chicken is the final step in achieving bold, smoky, and flavorful results that celebrate the essence of San Antonio cuisine. To make sure your chicken turns out perfectly juicy with a delicious char, follow these expert grilling tips:
1. Preheat the Grill
Before placing your chicken on the grill, it is important to preheat it to medium-high heat, approximately 375–400°F (190–204°C). Proper preheating not only ensures even cooking but also helps create those beautiful grill marks. Here’s how to prepare your grill:
- For Gas Grills: Turn on the burners to medium-high and close the lid to preheat for 10–15 minutes.
- For Charcoal Grills: Light the charcoal and let it burn until it’s covered with a thin layer of white ash. Then, spread the coals evenly for direct grilling.
- For Pellet Grills: Preheat according to the manufacturer’s instructions to reach the desired temperature.
2. Clean and Oil the Grill Grates
Next, ensure the grill grates are clean and oiled. A clean grill is essential for preventing sticking and ensuring the chicken cooks evenly. Use a grill brush to clean off any residue from previous use. After cleaning, lightly oil the grates with a paper towel dipped in vegetable or avocado oil. This step helps create a non-stick surface and enhances the chicken’s sear.
3. Use Direct and Indirect Heat Zones
To grill like a pro, create two heat zones on your grill:
- Direct Heat: Start the chicken here to achieve a nice char and those classic grill marks.
- Indirect Heat: Move the chicken to this area to finish cooking without burning the exterior. This method ensures that the chicken cooks thoroughly while staying juicy.
4. Monitor the Grill Temperature
Maintaining a consistent grill temperature is critical for preventing overcooking or undercooking. Use a grill thermometer if your grill doesn’t have a built-in one. Additionally, avoid opening the lid too often, as this can cause temperature fluctuations.
5. Place the Chicken Correctly
When placing the chicken on the grill, ensure the smooth side is facing down. This technique not only ensures the best grill marks but also prevents sticking. Furthermore, leave enough space between pieces to allow for proper air circulation and even cooking.
6. Avoid Constant Flipping
To achieve a good sear, let the chicken cook on one side for 5–7 minutes before flipping it. Constant flipping not only prevents proper caramelization but also interrupts the cooking process. Once the first side is done, gently flip the chicken using tongs to avoid tearing the meat.
7. Check for Doneness with a Meat Thermometer
To ensure the chicken is fully cooked, check the internal temperature with a meat thermometer. According to the USDA, the following temperatures are safe:
- Boneless Chicken Breasts or Thighs: 165°F (74°C).
- Bone-In Chicken Pieces: 175°F (79°C).
Make sure to insert the thermometer into the thickest part of the chicken, avoiding bones, for an accurate reading.
8. Prevent Flare-Ups
Marinades containing oil or sugar can drip onto the flames, causing flare-ups that might burn the chicken. To minimize this:
- Use a drip tray beneath the chicken when grilling over charcoal.
- If flare-ups occur, move the chicken to indirect heat to prevent burning.
- Trim any excess fat from the chicken before marinating to reduce drippings.
9. Rest the Chicken After Grilling
Once the chicken is fully cooked, transfer it to a clean plate or cutting board. Afterward, cover it loosely with foil and let it rest for 5–10 minutes.Resting allows the juices to redistribute evenly throughout the meat, resulting in a moist and tender texture.
Bonus Tips for Grilling Success
- Use Wood Chips for Added Smoke: For an extra smoky flavor, add soaked wood chips (like mesquite or hickory) to your charcoal or gas grill.
- Marinade as a Basting Sauce: If you want additional flavor, boil the leftover marinade for a few minutes to make a safe basting sauce. Brush it onto the chicken during grilling for added moisture and flavor.
- Experiment with Grill Accessories: Use grill mats or skewers for smaller chicken pieces or to make kabobs.
Why These Tips Matter
Grilling is more than just cooking—it’s an art that brings out the best in your ingredients. By following these tips, you’ll create chicken that’s not only perfectly cooked but also infused with the bold and vibrant flavors of the San Antonio Grilled Mexican Chicken Marinade.
What to Serve with San Antonio Grilled Mexican Chicken
The San Antonio Grilled Mexican Chicken Marinade infuses bold, smoky, and tangy flavors into your chicken, making it an incredibly versatile dish. Once your chicken is perfectly cooked, it’s time to serve it in a way that complements its Tex-Mex roots while satisfying your taste buds.Consider these flavorful and imaginative serving options:
1. Classic Tacos
To begin with, transform your grilled chicken into a taco feast:
- Warm Tortillas: Use soft corn or flour tortillas as a base. Warm them on the grill or stovetop for a slightly charred edge.
- Toppings: Add fresh salsa, guacamole, diced onions, and chopped cilantro for a burst of flavor and texture.
- Extras: Include a sprinkle of queso fresco or shredded cheese and a squeeze of fresh lime for the perfect finishing touch.
As a result, you’ll have a flavorful and satisfying meal that’s great for casual dinners, Taco Tuesdays, or festive gatherings.
2. Hearty Rice Bowls
Next, create a satisfying rice bowl with your grilled chicken as the star:
- Base Options: Use fluffy Mexican rice, cilantro-lime rice, or even quinoa for a healthier twist.
- Toppings: Add black beans, roasted corn, diced avocado, and a dollop of sour cream.
- Drizzle: Finish with a tangy chipotle crema or a squeeze of lime for added zest.
Consequently, this option is perfect for meal prep or a quick, balanced meal.
3. Fresh and Flavorful Salads
For a lighter meal, serve the grilled chicken over a bed of fresh greens:
- Greens: Use romaine lettuce, mixed greens, or baby spinach as your base.
- Additions: Toss in cherry tomatoes, sliced cucumbers, radishes, and red onions for crunch and color.
- Dressing: Drizzle with a zesty lime vinaigrette or creamy avocado dressing.
Additionally, this salad is a refreshing option for lunch or dinner, especially on warm days.
4. Family-Style Platters
For gatherings, serve your grilled chicken family-style for a casual yet impressive presentation:
- Sliced Chicken: Slice the chicken into strips and arrange it on a large platter.
- Accompaniments: Add sides like Mexican rice, refried beans, and grilled vegetables.
- Garnishes: Include lime wedges, chopped cilantro, and salsa for a complete Tex-Mex spread.
This setup not only makes serving easier but also creates a visually appealing centerpiece for your meal.
5. Sandwiches and Wraps
For a quick handheld option, turn your grilled chicken into a sandwich or wrap:
- Sandwich Option: Layer the chicken on a toasted bun with lettuce, tomato, and chipotle mayo.
- Wrap Option: Use a large tortilla to wrap the chicken with shredded lettuce, diced tomatoes, cheese, and ranch or spicy sauce.
Thus, these options are ideal for quick lunches, picnics, or meals on the go.
6. Party-Ready Appetizers
For parties or gatherings, use the grilled chicken to create delicious appetizers:
- Mini Tacos: Use small tortillas to make bite-sized tacos topped with pico de gallo.
- Chicken Skewers: Cut the chicken into chunks and serve on skewers with dipping sauces like salsa verde or chipotle mayo.
- Nachos: Shred the chicken and layer it over tortilla chips with melted cheese, jalapeños, and sour cream.
As a result, these appetizers are sure to impress your guests.
7. Side Dish Pairings
In addition to being a star on its own, pair your grilled chicken with Tex-Mex-inspired sides:
- Corn on the Cob: Grill corn and slather it with butter, chili powder, and cotija cheese for elote-style corn.
- Grilled Vegetables: Pair the chicken with smoky grilled zucchini, bell peppers, and onions.
- Mexican Street Potatoes: Roast potatoes with chili powder, cumin, and lime juice for a flavorful side.
Together, these sides elevate your meal into a complete Tex-Mex feast.
8. Leftovers Made Delicious
Lastly, if you have leftovers, use the grilled chicken creatively:
- Chicken Enchiladas: Roll the chicken in tortillas, cover with enchilada sauce, and bake with cheese.
- Quesadillas: Layer the chicken with cheese between two tortillas and grill until crispy.
- Soups and Stews: Shred the chicken and add it to a hearty tortilla soup or spicy chili.
In doing so, you can enjoy the flavors of this dish for days to come.
Tips for Serving
- Presentation Matters: Garnish your dishes with fresh herbs, lime wedges, or colorful toppings for an eye-catching appeal.
- Offer Customization: Let guests build their own tacos or rice bowls for a fun, interactive meal.
- Pair with Drinks: Serve with refreshing beverages like margaritas, Mexican sodas, or iced horchata to complete the experience.
With these serving suggestions, you can enjoy the San Antonio Grilled Mexican Chicken in a variety of creative and delicious ways. No matter the occasion, this flavorful dish is sure to impress and satisfy everyone at the table.
Storage Tips for San Antonio Grilled Mexican Chicken
Proper storage of your San Antonio Grilled Mexican Chicken ensures that you can savor its bold, smoky, and tangy flavors long after cooking. Whether you’re saving leftovers or preparing in advance, these tips will help maintain the dish’s freshness, flavor, and safety.
1. Cooling the San Antonio Grilled Mexican Chicken Before Storage
First, it’s important to let your San Antonio Grilled Mexican Chicken cool completely before storing it. Placing hot chicken into a container can create condensation, which may affect the texture and quality. Follow these steps for best results:
- Rest the Chicken: Let the chicken sit for 10–15 minutes after grilling to allow it to cool gradually.
- Avoid Excess Heat in Containers: Always ensure the chicken has reached room temperature before sealing it in a storage container. This simple step prevents unnecessary moisture buildup.
2. Refrigerating San Antonio Grilled Mexican Chicken
For short-term storage, refrigerating your San Antonio Grilled Mexican Chicken is the easiest and most efficient option. To preserve its freshness:
- Use Airtight Containers: Store the chicken in a tightly sealed, airtight container or wrap it securely with plastic wrap or foil.
- Label and Date: Additionally, mark the storage date on the container to track its freshness.
- Refrigeration Timeline: For the best flavor and safety, consume your San Antonio Grilled Mexican Chicken within 3–4 days.
3. Freezing San Antonio Grilled Mexican Chicken for Long-Term Storage
If you want to enjoy your San Antonio Grilled Mexican Chicken later, freezing is an excellent choice. Not only does it preserve the flavor, but it also extends the shelf life significantly. Follow these simple steps to freeze your chicken and keep it fresh longer:
- Divide into Portions: Slice or shred the chicken into serving-sized portions before freezing. This allows you to thaw only the amount you need.
- Wrap Properly: Wrap each portion in plastic wrap, then place them in a freezer-safe bag or container to protect against freezer burn.
- Remove Excess Air: Squeeze out as much air as possible from the freezer bag to ensure the chicken stays fresh.
- Label and Date: Clearly write the date and label it as San Antonio Grilled Mexican Chicken for easy identification.
- For the best taste and texture, try to enjoy your frozen chicken within 3 months.
4. Thawing San Antonio Grilled Mexican Chicken Safely
When it’s time to enjoy your frozen San Antonio Grilled Mexican Chicken, thawing it properly is essential to maintain its texture and flavor. Never thaw at room temperature to prevent bacteria. Instead, try one of these methods:
- Refrigerator Thawing: For the safest option, transfer the chicken to the refrigerator and let it thaw overnight.
- Cold Water Thawing: If you’re short on time, place the chicken (sealed in a bag) in a bowl of cold water. Remember to change the water every 30 minutes to keep it fresh.
- Microwave Thawing: Alternatively, use your microwave’s defrost setting, but make sure to cook the chicken immediately after thawing to prevent uneven heating.
5. Reheating San Antonio Grilled Mexican Chicken Properly
To enjoy your stored San Antonio Grilled Mexican Chicken as if it were freshly made, reheating it properly is crucial. Here’s how to do it:
- In the Oven: Preheat your oven to 350°F (175°C). Place the chicken in an oven-safe dish, cover it with foil to lock in moisture, and reheat for 10–15 minutes.
- On the Stovetop: Warm the chicken in a skillet over medium heat with a splash of water or broth to keep it moist.
- In the Microwave: Use a microwave-safe dish and cover the chicken with a damp paper towel to prevent it from drying out. Microwave in 30-second bursts, stirring in between, until heated through.
6. Storing Leftover Marinade from San Antonio Grilled Mexican Chicken
If you have leftover marinade that hasn’t been used on raw chicken, you can save it for later use:
- Refrigerate: Keep the marinade in a tightly sealed container in the refrigerator for up to 5 days.
- Freeze: Pour the leftover marinade into an ice cube tray and freeze it. Once frozen, transfer the cubes to a freezer bag for convenient portioning in future recipes.
By repurposing the marinade, you can recreate the flavors of San Antonio Grilled Mexican Chicken with ease.
Tips for Preserving San Antonio Grilled Mexican Chicken
- Avoid Cross-Contamination: Always use clean utensils and containers when storing cooked chicken to maintain food safety.
- Check Freshness: Before eating, inspect the chicken for any off smells, slimy texture, or discoloration. If you notice these signs, it’s best not to eat it.
- Repurpose Leftovers: Finally, if you’re nearing the storage time limit, consider using the chicken in soups, casseroles, or salads to extend its usability.
Proper storage of your San Antonio Grilled Mexican Chicken allows you to savor its bold flavors at your convenience. Whether you’re refrigerating for the week or freezing for future meals, these tips ensure that the dish retains its quality, taste, and versatility.
Conclusion: Savor the Best San Antonio Grilled Mexican Chicken
The San Antonio Grilled Mexican Chicken Marinade is more than just a recipe—it’s a journey into the bold, smoky, and vibrant flavors that define Tex-Mex cuisine. With its perfect balance of tangy citrus, savory spices, and smoky undertones, this marinade transforms ordinary chicken into an extraordinary dish that’s versatile and crowd-pleasing.
Why San Antonio Grilled Mexican Chicken Stands Out
From its easy preparation to its adaptability in various dishes, San Antonio Grilled Mexican Chicken offers something for everyone. Whether you’re making tacos, rice bowls, or hearty salads, this recipe is guaranteed to elevate your meals. By mastering the steps to marinate, grill, and serve, you can recreate the authentic taste of San Antonio in your own kitchen.
Your Turn to Try San Antonio Grilled Mexican Chicken
Now that you’ve explored the process and tips for crafting this flavorful chicken, it’s time to fire up the grill and make it yourself. Share it with friends and family, or customize it to fit your preferences. The possibilities are endless when you start with the bold and irresistible flavors of San Antonio Grilled Mexican Chicken.
Grilled Mexican chicken marinade
Ingredients
- 1½ lbs boneless, skinless chicken breasts or thighs
- 3 tbsp olive oil
- 2 tbsp lime juice (freshly squeeze
- 1 tbsp orange juice (or pineapple juice)
- 2 cloves garlic, minced
- 1 tsp ground cumin
- 1 tsp smoked paprika
- 1 tsp chili powder
- ½ tsp ground coriander
- ½ tsp dried oregano
- ½ tsp salt
- ¼ tsp black pepper
- 1 tbsp chopped cilantro or a pinch of crushed red pepper flakes
Instructions
- -In a bowl or zip-top bag, combine all marinade ingredients and whisk well.-Add chicken and toss to coat thoroughly.-Cover or seal and marinate in the refrigerator for at least 1 hour (or up to 8 hours for deeper flavor).-Preheat grill to medium-high heat.-Grill chicken for 5–7 minutes per side, or until internal temperature reaches 165°F (74°C).-Let rest for 5 minutes before slicing and serving.
Notes
- For deeper flavor, marinate the chicken for at least 4–8 hours. Avoid marinating for more than 24 hours, as the citrus can break down the meat texture.
- Always marinate chicken in the refrigerator to keep it at a safe temperature and prevent bacterial growth.
- Use a meat thermometer to ensure the chicken reaches an internal temperature of 165°F (74°C) before serving.
- Let the chicken rest for 5 minutes after grilling to lock in juices and keep it tender.
- Add a touch of honey or brown sugar to the marinade if you prefer a slightly sweet glaze when grilled.
- Use boneless thighs for extra juicy results, or try this marinade with shrimp, tofu, or veggies for variation.
- If using a grill pan indoors, make sure it’s preheated and lightly oiled to avoid sticking.
- For extra char and caramelization, broil the chicken for 2–3 minutes at the end of cooking.