I was staring at a ruined pot of chicken, the broth turned into a sad, watery mess, and I swore I’d never again trust a recipe that promised “simple chicken and gravy.” The heat had turned the pan into a blackened battlefield, the aroma of burnt onions clinging to the air like a stubborn memory, and my kitchen felt like a battlefield after a storm. I had a craving for comfort food that felt like a warm hug, not a culinary disaster. That night, I decided to rewrite the rules of chicken and gravy, turning a kitchen catastrophe into a triumph of flavor and texture.
Picture this: the sizzling sound of olive oil meeting a hot pan, the scent of butter melting into a golden elixir, the gentle hiss as flour turns into a roux, and the first spoonful of broth that tastes like the sky on a clear day. The taste is a symphony of savory, creamy, and a hint of umami that lingers on the tongue. The texture is silky, coating the chicken like velvet, while the edges of the meat stay tender and juicy. It’s the kind of dish that makes your mouth water before you even take the first bite.
What makes this version stand out? It’s the balance of simplicity and depth. I dare you to taste this and not go back for seconds. The sauce coats the chicken like a blanket of comfort, and the heavy cream adds a luxurious finish that feels like a hug from the inside out. Most recipes get this completely wrong, using too much flour or too much stock, but here every ingredient sings in perfect harmony. I’ll be honest— I ate half the batch before anyone else got to try it, and that’s a confession you can’t ignore.
If you’ve ever struggled with chicken and gravy, you’re not alone—and I’ve got the fix. Picture yourself pulling this out of the oven, the whole kitchen smelling incredible, the sound of a bubbling gravy that’s just right. And now the fun part: the method is so simple that even a novice can master it, while the flavors are so rich that even seasoned chefs will applaud. Let me walk you through every single step—by the end, you’ll wonder how you ever made it any other way.
What Makes This Version Stand Out
- Flavor Depth: The combination of Chicken Base, onion powder, and garlic powder creates a savory backbone that elevates the dish beyond basic comfort food. The broth’s umami notes linger, making each bite unforgettable.
- Texture Harmony: A classic roux thickens the gravy to silky perfection, while the chicken remains tender and juicy. The cream adds a velvety finish that coats the palate like a gentle caress.
- Simplicity: Only eleven ingredients, all common pantry staples, make this recipe a quick go-to for busy nights. No exotic spices, no complicated steps—just pure flavor.
- Versatility: Whether you’re feeding a family, a dinner party, or a solo feast, the recipe scales effortlessly. The dish can be served over rice, mashed potatoes, or even pasta.
- Make‑Ahead Potential: The gravy keeps well in the refrigerator and can be reheated with a splash of water, making it ideal for meal prep enthusiasts.
- Visual Appeal: The golden, glossy sauce contrasts beautifully with the pale chicken, creating an Instagram-worthy plate that’s as pleasing to the eye as it is to the taste buds.
Inside the Ingredient List
The Flavor Base
Chicken Breasts: The primary protein, chosen for its lean quality and ability to absorb flavors. If you prefer a richer taste, swap for thighs or use bone‑in chicken. The breasts stay juicy because the gravy locks in moisture.
Chicken Base (Better Than Bouillon): This concentrated paste adds depth of flavor that stock alone can’t provide. A tablespoon is enough to give the dish that savory punch without overpowering the other ingredients.
Chicken Stock: The liquid foundation that carries the sauce’s body. Use a homemade stock for maximum flavor or a low‑sodium store‑bought version to control saltiness.
The Texture Crew
All‑Purpose Flour: The secret to a silky gravy. A quarter cup is all you need to create a smooth, lump‑free sauce. If you’re gluten‑free, try cornstarch or a gluten‑free flour blend.
Butter: Adds richness and helps develop a glossy finish. Swapping butter for a neutral oil will lighten the flavor but reduce the depth.
Olive Oil: Provides a subtle fruity note that balances the richness of the butter. A light olive oil works best; avoid extra‑virgin for a smoother taste.
The Unexpected Star
Heavy Cream: The splash that turns a simple gravy into a decadent sauce. A half cup is enough to coat the chicken in a luxurious sheen. If you’re watching calories, use half‑fat milk or a dairy‑free alternative.
The Final Flourish
Onion Powder & Garlic Powder: These dry spices give the sauce an instant depth of flavor without the moisture of fresh aromatics. They’re perfect for a quick, no‑mess approach. If you’re a fan of fresh garlic, a clove minced and sautéed at the start can replace the powder.
Water: Balances the thickness of the gravy, ensuring it’s pourable but still rich. A cup of water is the sweet spot for this recipe’s consistency.
Everything's prepped? Good. Let's get into the real action...
The Method — Step by Step
- Heat the olive oil in a large skillet over medium heat until shimmering. Add the chicken breasts, seasoning them with salt and pepper, and sear them until golden brown on both sides—about 4 minutes per side. This creates a caramelized crust that locks in juices. Watch the sizzle; it’s the first hint that this dish is about to become amazing.
- Transfer the chicken to a plate and set aside. In the same skillet, melt the butter over medium heat. Sprinkle the flour evenly over the butter, stirring constantly to form a roux. The mixture should turn a light golden color and emit a nutty aroma. This step is crucial for a smooth gravy.
- Gradually whisk in the chicken stock, stirring continuously to avoid lumps. The sauce should thicken into a glossy base. Add the onion powder, garlic powder, and Chicken Base, whisking until fully incorporated. The broth’s flavor will deepen, and the sauce will look like liquid velvet.
- Return the chicken breasts to the skillet, spooning some gravy over them. Reduce the heat to low, cover, and let them simmer for 10 minutes. The chicken will finish cooking, absorbing the flavors of the sauce. The aroma will fill the kitchen, making everyone’s mouths water.
- Stir in the heavy cream, whisking until the mixture is smooth and glossy. The cream should swirl into the sauce like a river of silk. If the gravy starts to separate, whisk vigorously to re‑emulsify. This is the trickiest step—watch out for over‑cooking the cream, which can curdle.
- Taste the gravy and adjust seasoning with additional salt or pepper if needed. The final sauce should be silky, rich, and flavorful. Let it simmer for another 2 minutes to meld the flavors. The chicken should be perfectly tender.
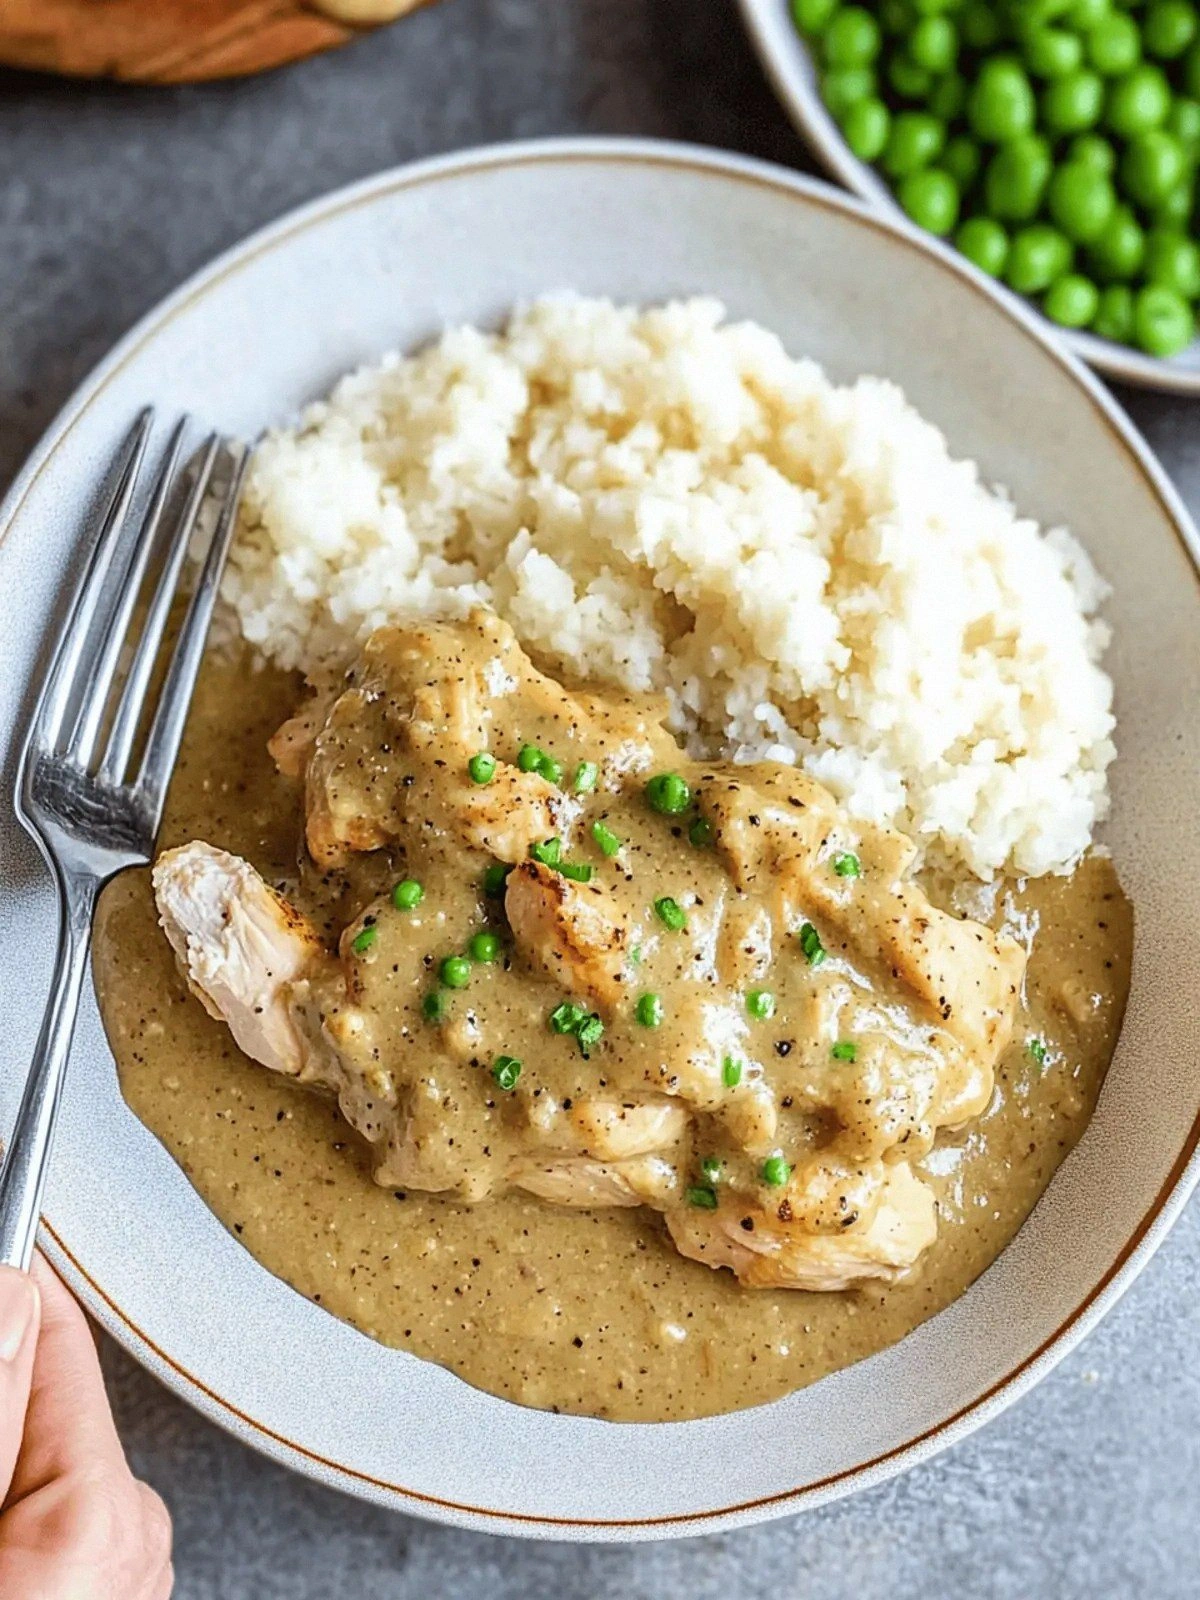
- Serve immediately over your favorite side—rice, mashed potatoes, or crusty bread. The gravy will cling to each bite, delivering a comforting hug in every mouthful. Remember the micro‑challenge: try this and see if you can resist a second plate.
That's it — you did it. But hold on, I've got a few more tricks that'll take this to another level. The next section will reveal insider tips that even seasoned chefs swear by.
Insider Tricks for Flawless Results
The Temperature Rule Nobody Follows
Keep the skillet on medium to medium‑low heat throughout the process. High heat can scorch the flour, leading to a bitter taste, while low heat can cause the sauce to thicken too quickly and become grainy. A steady, moderate temperature ensures a silky finish.
Why Your Nose Knows Best
Smell the sauce as it simmers; a pleasant, buttery aroma indicates that the roux has cooked properly. If you notice a raw flour smell, it’s time to let it cook a bit longer. Trust your nose to guide you to the perfect texture.
The 5‑Minute Rest That Changes Everything
After removing the chicken from the skillet, let it rest for five minutes before slicing. This allows the juices to redistribute, keeping the meat moist and flavorful. A common mistake is cutting straight away, which results in dry, unappetizing chicken.
The Creamy Finish Hack
Whisk the cream into the sauce slowly, adding it in small increments. This gradual introduction prevents the sauce from curdling and ensures a smooth, glossy finish. If the sauce does separate, whisk in a teaspoon of cold water to bring it back together.
The Right Pan Matters
Use a heavy‑bottomed skillet to distribute heat evenly and avoid hot spots that can scorch the gravy. A non‑stick pan works well for quick cleanup, but a stainless steel pan adds depth to the caramelization process.
Creative Twists and Variations
This recipe is a playground. Here are some of my favorite ways to switch things up:
Spicy Cajun Chicken
Add a teaspoon of Cajun seasoning to the chicken before searing. The smoky heat pairs beautifully with the creamy gravy, creating a bold, comforting dish. Perfect for those who love a kick.
Herb‑Infused Cream
Stir in a handful of fresh thyme and rosemary when you add the cream. The herbs bring a fragrant, earthy note that elevates the sauce. Great for a spring or summer meal.
Mushroom Medley
Sauté sliced mushrooms with the onions before adding the stock. The earthy flavor of mushrooms complements the richness of the gravy, turning the dish into a hearty, vegetarian‑friendly option.
Lemon‑Garlic Twist
Finish the gravy with a squeeze of fresh lemon juice and a pinch of garlic powder. The citrus brightens the sauce, cutting through the richness for a balanced flavor profile.
Pasta Pairing
Serve the chicken and gravy over wide fettuccine or pappardelle. The pasta acts like a sponge, soaking up the silky sauce for a comforting pasta dinner.
Slow‑Cooked Version
Place the seared chicken and gravy in a slow cooker on low for 4 hours. The slow cooking breaks down the meat fibers, creating a melt‑in‑your‑mouth texture. Ideal for busy weekdays.
Storing and Bringing It Back to Life
Fridge Storage
Cool the gravy completely before transferring it to an airtight container. Store in the refrigerator for up to 4 days. The sauce thickens slightly; reheat gently on the stove with a splash of water to restore its silky consistency.
Freezer Friendly
Divide the chicken and gravy into freezer‑safe portions. Freeze for up to 3 months. Thaw overnight in the refrigerator, then reheat on the stovetop with a small amount of water or broth to loosen the sauce.
Best Reheating Method
Reheat on low heat, stirring frequently, and add a splash of water or stock to keep the gravy from drying out. A gentle simmer will bring the dish back to its original richness without overcooking the chicken.