I was halfway through a marathon of take‑out boxes when my kitchen decided to play a cruel joke: the garlic clove I’d forgotten to peel was still clinging to its papery skin, and the honey jar had turned into a sticky, caramel‑scented mess on the counter. I stared at the disaster, then at the empty plate in front of me, and thought, “If this kitchen can’t handle a simple garlic clove, how am I supposed to survive a dinner?” That moment sparked a culinary rebellion, and I set out to create a dish that would make even the most skeptical foodie swoon.
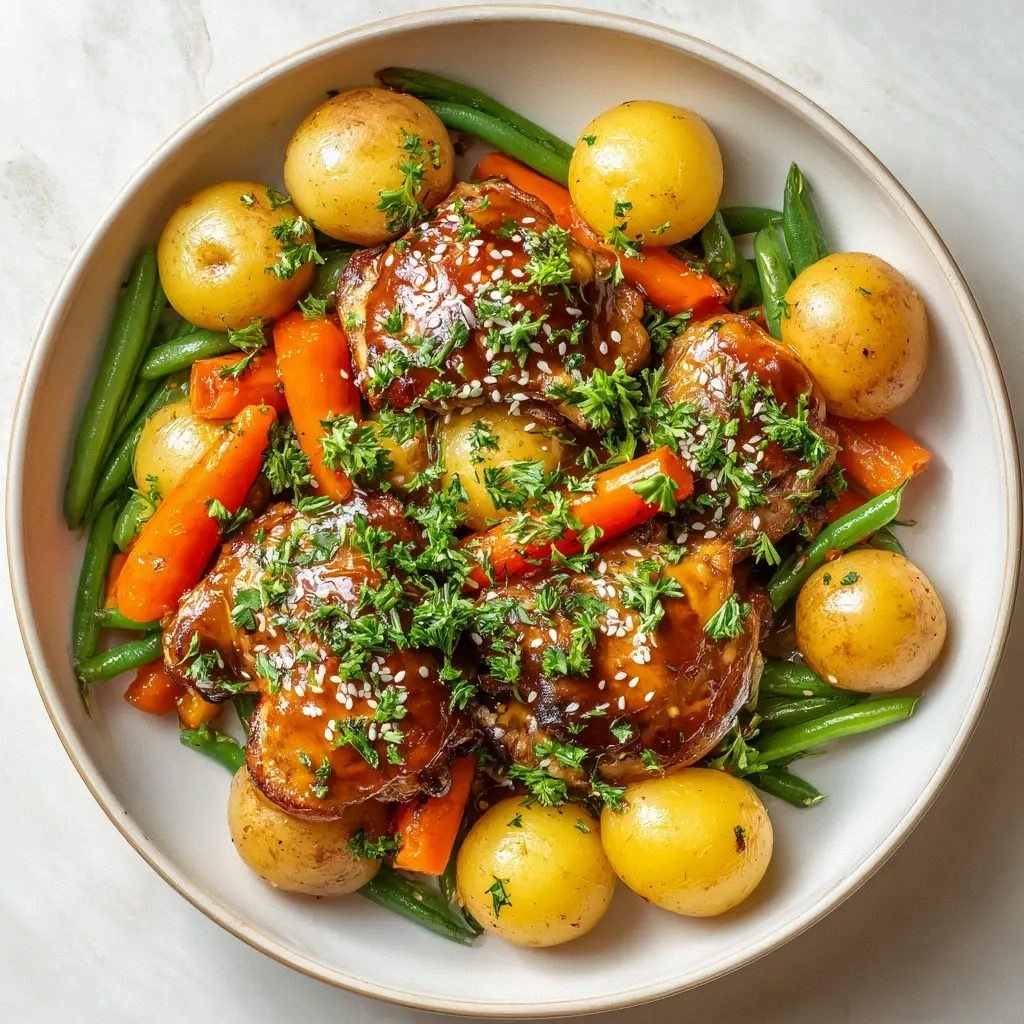
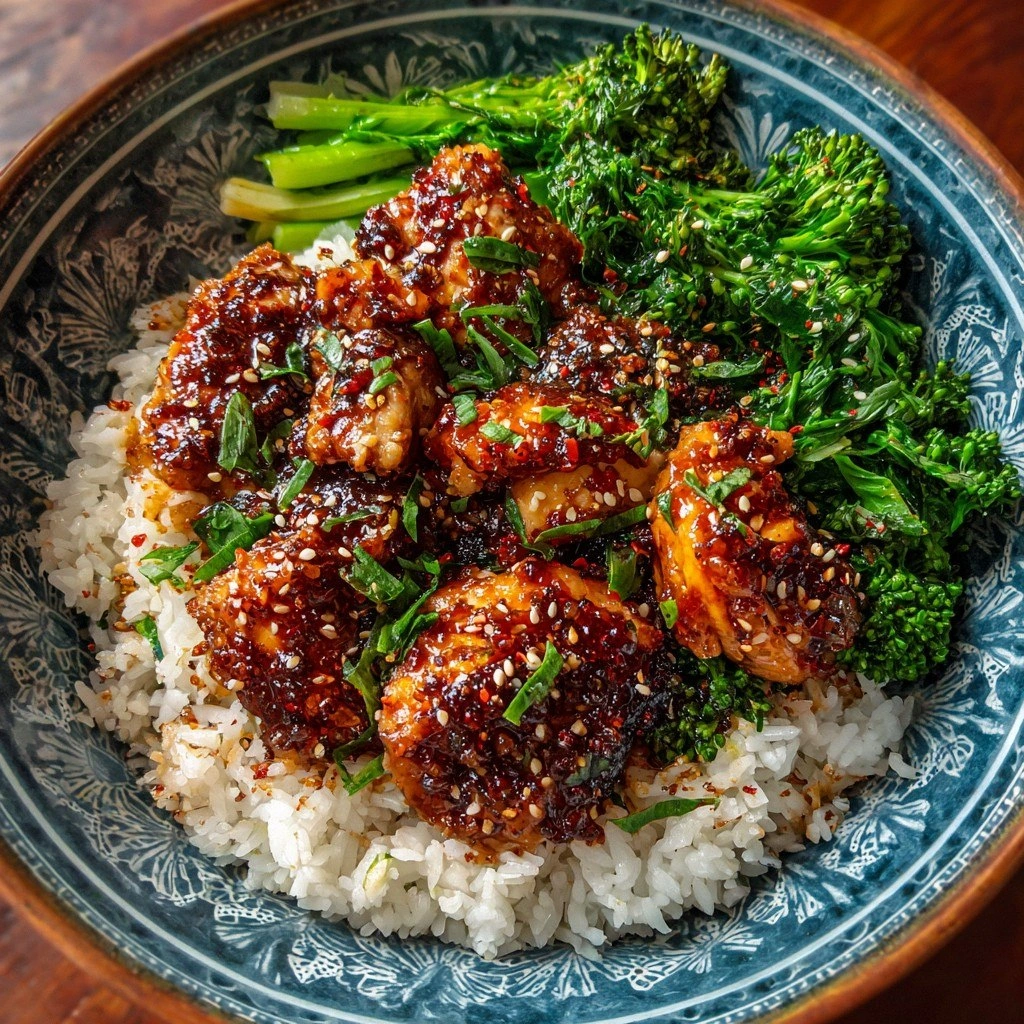
Picture this: a sizzling pan, the aroma of freshly minced garlic rising like a fragrant cloud, honey glistening in the heat, and the unmistakable sound of a chicken searing to a golden‑brown finish. The rice beneath the sauce is fluffy and fragrant, a base that soaks up every drop of honey‑garlic goodness. The final touch—a sprinkle of sesame seeds and green onions—adds a subtle crunch and a burst of color that makes the bowl look as good as it tastes.
What sets this version apart is that it balances sweetness, umami, and a touch of citrus without overcomplicating the process. I’ve trimmed the recipe to fewer than ten steps, eliminated the need for a separate sauce pan, and introduced a single, foolproof technique that keeps the chicken tender while achieving that coveted caramelized crust. If you’ve ever tried a honey‑garlic chicken that tasted like syrupy cardboard or under‑seasoned chicken, this will be your salvation.
There’s a twist you won’t see in most recipes: a dash of sesame oil at the end that gives the sauce a glossy sheen and a nutty aroma that elevates the entire bowl. I dare you to taste this and not go back for seconds. By the end of this guide, you’ll wonder how you ever made it any other way.
What Makes This Version Stand Out
- Flavor: The honey and soy sauce blend into a silky glaze that coats the chicken like velvet, while the garlic provides a punch that cuts through the sweetness. The result is a harmonious balance that feels both comforting and adventurous.
- Texture: The chicken achieves a caramelized exterior that shatters like thin ice when you bite, revealing a juicy interior that stays moist even after reheating.
- Simplicity: With fewer than ten steps and one pan, you’ll spend more time eating and less time cleaning.
- Uniqueness: The addition of sesame oil at the finish gives a glossy sheen and a nutty aroma that most take‑out versions lack.
- Crowd Reaction: Friends who’ve tried bland chicken bowls will be left asking for the recipe, and the dish can be scaled up for parties without losing flavor.
- Ingredient Quality: Using high‑quality soy sauce and fresh ginger makes the difference between a good bowl and an unforgettable one.
- Cooking Method: The technique of searing the chicken first and then deglazing the pan with honey creates depth of flavor that a simple stir‑fry cannot match.
- Make‑Ahead Potential: The bowl holds up well in the fridge and freezer, making it perfect for meal prep.
Inside the Ingredient List
The Flavor Base
The combination of honey and low‑sodium soy sauce creates a sweet‑savory foundation that coats every bite. Honey’s natural sugars caramelize under heat, producing a glossy sheen, while soy sauce adds depth and umami. Skipping this duo would leave the dish tasting like bland rice and chicken; the sauce is the heart of the bowl.
The Texture Crew
Freshly minced garlic and grated ginger provide a bright, aromatic kick that cuts through the sweetness. Garlic’s pungency brings a robust flavor, while ginger adds a subtle heat that lingers on the palate. If you’re short on time, a tablespoon of garlic powder can substitute, but the fresh versions give a more vibrant texture.
The Unexpected Star
Sesame oil is the secret weapon that transforms an ordinary glaze into a glossy, nutty masterpiece. Adding it at the end of cooking releases its aroma, giving the sauce a finish that feels like a professional restaurant dish. If you can’t find sesame oil, a touch of toasted sesame seeds can mimic the nutty flavor, though the sheen will be less pronounced.
The Final Flourish
Green onions and toasted sesame seeds add crunch and a pop of color that makes the bowl visually appealing. They also provide a fresh, slightly sweet contrast to the rich glaze. If you prefer a milder finish, replace green onions with sliced bell peppers; the texture will change, but the dish remains delicious.
Everything’s prepped? Good. Let’s get into the real action.
The Method — Step by Step
- Heat a large skillet over medium‑high heat and add 1 tablespoon of vegetable oil. Once the oil shimmers, add the chicken pieces. Sear the chicken until the edges turn golden and a slight crust forms—about 3 minutes per side. This initial sear locks in juices and creates a caramelized base that the glaze will cling to.
- Remove the chicken from the skillet and set it aside. In the same pan, reduce the heat to medium and add the minced garlic and grated ginger. Sauté until fragrant, about 30 seconds; be careful not to burn the aromatics. The sizzling aroma signals that the base is ready for the sweet‑savory blend.
- Pour in the honey and low‑sodium soy sauce, stirring constantly to deglaze the pan and lift any browned bits. Let the mixture simmer until it thickens slightly—this should take about 2 minutes. The glaze will coat the back of a spoon, indicating the right consistency.
- Return the chicken to the skillet, turning to coat each piece in the glossy sauce. Reduce the heat to low and let the chicken cook through, about 5 minutes, while the sauce reduces further. The chicken should be fully cooked (internal temperature 165°F) and coated in a caramelized glaze.
- Add the toasted sesame seeds and sliced green onions, tossing gently to distribute. The seeds add a nutty crunch, while the onions bring a bright, fresh flavor that cuts through the richness. Let everything stir for an additional minute so the flavors meld.
- Stir in a tablespoon of sesame oil and a splash of lime juice (optional). This final splash of acidity brightens the bowl and balances the sweetness. The lime juice should be added just before serving to preserve its fresh tartness.
- Serve the glazed chicken over a bed of freshly cooked jasmine rice. Spoon the remaining sauce over the rice and chicken, ensuring every grain is coated. Garnish with additional sesame seeds if desired.
- Plate immediately so the steam from the rice keeps the chicken moist. If you’re prepping ahead, let the bowl cool completely, then refrigerate in airtight containers. Reheat gently in a microwave or on the stovetop, adding a splash of water to restore moisture.
That’s it—you did it. But hold on, I’ve got a few more tricks that will elevate this bowl from great to unforgettable.
Insider Tricks for Flawless Results
The Temperature Rule Nobody Follows
Many cooks start the chicken at high heat and then lower it abruptly, which can cause the exterior to overcook while the interior remains underdone. I recommend a two‑stage heat approach: sear at high heat for a brief period, then reduce to medium‑low for the glaze reduction. This ensures even cooking and a tender interior.
Why Your Nose Knows Best
Before you add the honey, pause and sniff the glaze. A sweet, caramel aroma indicates the sugars are just starting to bloom. If the scent is too syrupy, let it simmer a little longer. Your nose is a reliable guide to achieving the perfect glaze consistency.
The 5‑Minute Rest That Changes Everything
After removing the chicken from the skillet, let it rest on a plate for five minutes before slicing. This allows the juices to redistribute, keeping the meat moist. I’ve seen dishes where the chicken feels dry because the juices were still seeping out; this simple rest eliminates that problem.
Keep the Rice Fluffy
When cooking the jasmine rice, add a pinch of salt and a splash of oil to the pot. After the rice is done, fluff it with a fork before assembling the bowl. Fluffy rice absorbs the sauce better and prevents clumping.
The Sweet‑Salt Balance
If you prefer a less sweet version, reduce the honey by one tablespoon and increase the soy sauce by a teaspoon. The extra saltiness will compensate for the reduced sweetness, maintaining the glaze’s depth. This tweak is perfect for those who like a more savory profile.
Creative Twists and Variations
This recipe is a playground. Here are some of my favorite ways to switch things up:
Coconut‑Rice Version
Replace jasmine rice with coconut rice for a tropical twist. The coconut milk adds a subtle sweetness that complements the honey glaze, while the rice remains fluffy and fragrant.
Spicy Sriracha Kick
Stir in a tablespoon of sriracha into the glaze for a fiery edge. The heat pairs with the honey’s sweetness, creating a flavor profile that’s both bold and balanced.
Vegetarian Alternative
Swap the chicken for tofu or tempeh. Marinate the protein in the honey‑soy mixture before pan‑searing to ensure it absorbs the glaze and stays firm.
Low‑Carb Twist
Use cauliflower rice instead of jasmine rice. The cauliflower will soak up the sauce and offer a lower‑carb option without sacrificing texture.
Herb‑Infused Variation
Add chopped fresh cilantro and a squeeze of lime before serving. The herbs add brightness and a fresh contrast to the sweet‑savory glaze.
Breakfast Bowl
Serve the chicken and sauce over scrambled eggs instead of rice. This creates a protein‑rich breakfast that’s both filling and flavorful.
Storing and Bringing It Back to Life
Fridge Storage
Store the bowl in an airtight container for up to three days. Separate the sauce from the rice if you prefer to keep the rice from becoming soggy. Reheat in the microwave for 1–2 minutes, stirring halfway through.
Freezer Friendly
Freeze the chicken and sauce separately from the rice to maintain texture. When ready, thaw overnight in the fridge and reheat on the stove or microwave. Add a splash of water before reheating to steam the rice back to fluffiness.
Best Reheating Method
Reheat the bowl in a skillet over medium heat, adding a tablespoon of water or broth. Stir frequently to distribute heat evenly and to prevent the sauce from thickening too much. Finish with a drizzle of sesame oil for that fresh finish.