I still remember the night I tried to make a simple chocolate dessert and ended up with a kitchen that looked like a cocoa disaster zone. The counter was slick with melted chocolate, the air smelled like burnt sugar, and my phone buzzed with a friend’s text: “You’re going to need a fire extinguisher.” I stared at the mess, then at the handful of chocolate chips that were still intact, and thought, “What if I could turn this into something delicious?”
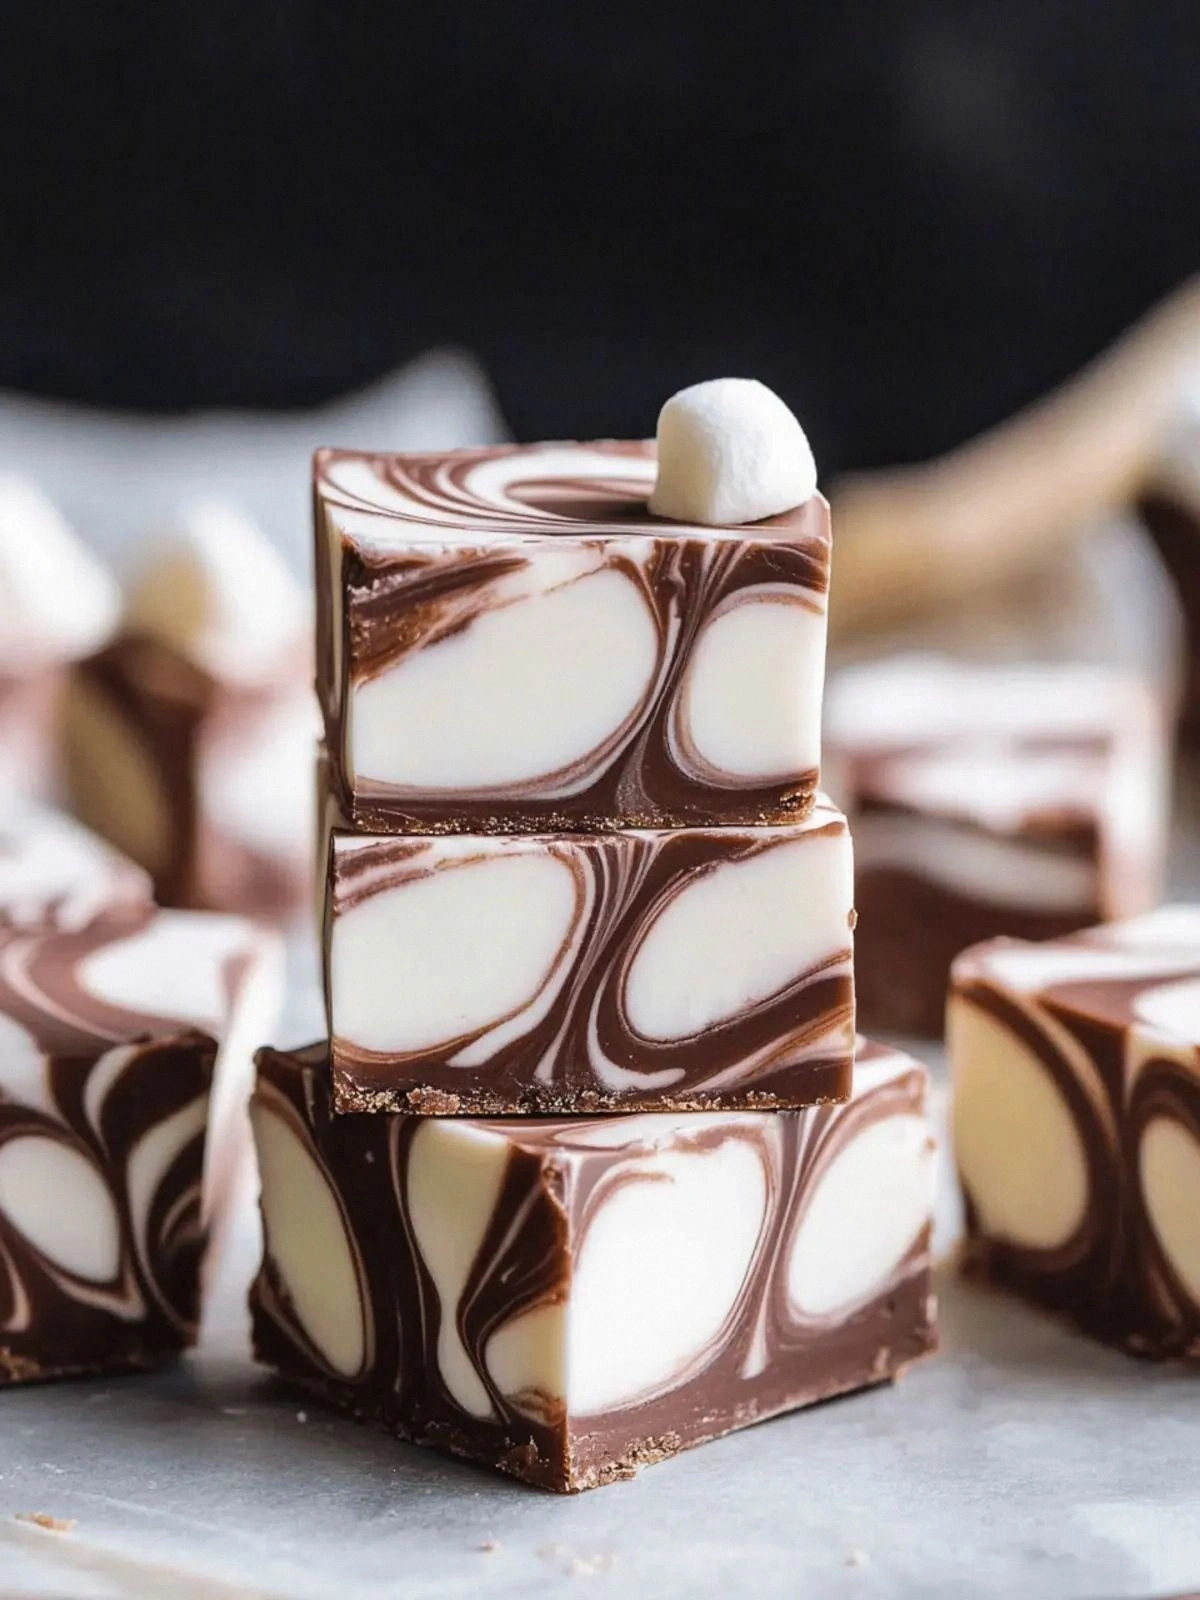
Picture this: a glossy, dark chocolate base that glistens like midnight, a creamy swirl of marshmallow that looks like a cloud caught in a glass jar, and a buttery finish that lingers on your tongue. The aroma hits you first—rich, velvety chocolate, a hint of vanilla, and that unmistakable sweet smell of marshmallow fluff that makes your mouth water even before you taste it. The texture is a playful contrast: a silky smooth center that melts in your mouth, surrounded by a slightly firmer outer layer that gives a satisfying snap when you bite. The sound of the first bite is almost a sigh, a gentle exhale of joy. The feel of the fudge as you lift it from the pan is warm, comforting, and oddly comforting, like a hug in a bowl.
What makes this version stand out from the countless chocolate fudge recipes out there is that it’s a no-bake, no-fuss masterpiece that still feels like a gourmet treat. The key is the combination of semi-sweet chocolate chips with sweetened condensed milk, which creates a silky base that’s both sweet and slightly tangy. Adding a pinch of salt balances the sweetness and brings out the chocolate’s depth. The marshmallow fluff is folded in just enough to create a gentle swirl without overpowering the chocolate. And the final touch—a splash of vanilla—adds an aromatic lift that makes each bite feel like a little indulgent secret.
I dare you to taste this and not go back for seconds. Most people think fudge is only for the oven, but this version proves that a pan and a heat source are all you need for a decadent dessert. The technique I’ll reveal involves a precise heat control that keeps the mixture from scorching while allowing the chocolate to melt smoothly. And the twist? I’ll show you how to create a visual swirl that looks like a work of art, not just a lump of chocolate.
If you’ve ever struggled to get a smooth chocolate base, you’re not alone—and I’ve got the fix. I’ll walk you through every single step, from the moment you open the can of condensed milk to the last swirl of marshmallow, so by the end of this post you’ll wonder how you ever made it any other way. Picture yourself pulling this out of the pan, the whole kitchen smelling incredible, and friends lining up for a taste.
Let me walk you through every single step—by the end, you’ll wonder how you ever made it any other way. I’ll keep the instructions clear, the tips sharp, and the humor flowing. Ready? Let’s dive in.
What Makes This Version Stand Out
Here are the core reasons this fudge feels like a revelation, not just another chocolate treat.
- Texture: The base is silky yet slightly firm, offering a satisfying bite that doesn’t melt too quickly. The marshmallow swirl adds a playful contrast that melts into the chocolate like a gentle wave. The result is a dessert that feels indulgent without being cloying.
- Flavor Balance: The pinch of salt and splash of vanilla work together to lift the chocolate’s natural bitterness, creating a well-rounded profile that isn’t over-sweet. This balance makes it perfect for both sweet-tooth enthusiasts and those who prefer a more nuanced flavor.
- Convenience: No oven, no baking sheet, no waiting for the oven to preheat. All you need is a saucepan, a spatula, and a bit of patience. This makes it ideal for quick weekday treats or last-minute dessert surprises.
- Visual Appeal: The swirl of marshmallow creates a stunning visual effect that looks almost like a piece of modern art. It’s a conversation starter at any gathering.
- Versatility: Swap in dark chocolate chips for a richer bite, or use sugar-free condensed milk for a lower-carb version. The base is adaptable to many dietary preferences.
- Make‑Ahead Potential: Once set, the fudge stays firm for up to a week in the fridge, making it a perfect make‑ahead dessert for busy days.
- Ingredient Quality: Using high‑quality semi-sweet chocolate chips and real marshmallow fluff ensures a premium taste that’s hard to beat.
- Crowd Reaction: Friends who have tried this version say it’s “hands down the best version you'll ever make at home.” It’s the kind of dessert that turns a casual gathering into a memorable event.
Inside the Ingredient List
Let’s break down the components that make this fudge a culinary triumph.
The Flavor Base
Semi-sweet chocolate chips are the heart of the fudge, providing depth and richness. They melt into a glossy sauce that coats the other ingredients like velvet. The chocolate’s cocoa content gives a slight bitterness that balances the sweetness of the condensed milk. If you skip the chocolate, the fudge will taste flat and lack the luxurious mouthfeel. For an extra kick, consider adding a pinch of cayenne pepper for a subtle heat.
The Sweetness Engine
Sweetened condensed milk is the sweetener and binder that keeps everything together. It’s thick, creamy, and adds a caramelized flavor that’s hard to replicate with simple sugar. Condensed milk also helps the chocolate set into a firm yet chewy texture. If you don’t have a can, you can make your own by simmering milk and sugar until it thickens, but the canned version saves time and guarantees consistency. A small amount of extra sugar can be added if you prefer a sweeter fudge, but be careful not to overpower the chocolate.
The Butter Boost
Unsalted butter adds richness and a silky finish that smooths the chocolate’s edge. It also helps the fudge set properly by preventing it from becoming too brittle. Butter’s milk solids contribute to the creamy texture, making each bite feel indulgent. If you’re looking for a dairy-free version, coconut oil can be a suitable substitute, though it will alter the flavor slightly. A tablespoon more butter will make the fudge creamier, while less will give a firmer bite.
The Secret Swirl
Marshmallow fluff is the star that creates the signature swirl. It’s light, airy, and has a natural sweetness that complements the chocolate. When folded into the chocolate mixture, it forms a gentle ribbon that adds a playful texture. If you prefer a less sweet option, try using a plain marshmallow or a low‑sugar version. The fluff also gives the fudge a glossy sheen that looks as good as it tastes.
The Final Flourish
Vanilla extract is the finishing touch that rounds out the flavor profile. It brings a fragrant aroma and a subtle sweetness that ties all the ingredients together. A teaspoon is enough to lift the chocolate’s depth without overpowering it. If you’re vegan, you can use a plant‑based vanilla flavoring. For an extra pop, try a splash of espresso or almond extract instead of vanilla.
Everything’s prepped? Good. Let’s get into the real action.
Before you start, make sure your saucepan is clean and dry; any leftover oil or water can cause the chocolate to seize. Use a medium‑sized saucepan to avoid overheating the mixture. Have a heat‑proof spatula ready because you’ll be whisking constantly. Keep the marshmallow fluff and condensed milk at room temperature so they integrate smoothly. And remember, patience is key; rushing the process can lead to a gritty texture.
If you’re curious about where these ingredients come from, the chocolate chips are usually made from a blend of cocoa solids, cocoa butter, and sugar. The condensed milk is produced by removing most of the water from milk, leaving a thick, sweet product that’s a staple in many desserts. Marshmallow fluff is made from sugar, corn syrup, egg whites, and vanilla, giving it that signature lightness.
Now that the ingredients are clear, the next step is to combine them in the right order and with the right technique. A small mistake in the sequence can throw off the entire fudge’s texture. But don’t worry—this guide will keep you on track.
The Method — Step by Step
- Heat a medium saucepan over medium-low heat. Add the butter and let it melt completely, watching for the butter to foam. This step is crucial because the butter’s fat content helps the chocolate melt evenly. The pan should be hot enough that the butter starts to bubble slightly. Keep the heat steady to avoid scorching.
- Add the chocolate chips to the pan. Stir continuously with a heat‑proof spatula until the chocolate is fully melted and the mixture is glossy. The chocolate should coat the bottom of the pan like a fine glaze. If it starts to brown, lower the heat immediately. This ensures a silky base that won’t have a bitter edge.
- Pour in the sweetened condensed milk, stirring constantly. The mixture should thicken into a thick, glossy sauce. Watch for the first signs of thickening—when it pulls back from the sides of the pan. The aroma will shift from raw chocolate to a caramelized sweet scent. This is the moment of truth; don’t rush.
- Add the vanilla extract and pinch of salt. Stir until the salt dissolves completely, creating a subtle lift in flavor. The salt should be distributed evenly to avoid any pockets of sweetness. The mixture should feel slightly thicker and more cohesive. The scent should become richer and more complex.
- Lower the heat to low and let the mixture sit for 5 minutes. This resting period allows the chocolate to settle and the flavors to meld. The mixture will thicken slightly during this time. Don’t stir during this period; let the chocolate fibers settle. The result is a smoother texture.
- Stir in the marshmallow fluff. Fold gently until you see a visible swirl but without fully blending the fluff into the chocolate. The marshmallow should float in ribbons across the surface. If you mix too aggressively, the fluff will lose its airy quality. The mixture should look like a creamy cloud against a dark background.
- Transfer the mixture into a greased 8-inch square pan. Use a spatula to spread it evenly, smoothing the top. Let the fudge sit at room temperature for 30 minutes so it can set. The edges will start to pull away from the pan, indicating that it’s firming up. This step is vital for the final texture.
- Once set, refrigerate the fudge for at least 2 hours before cutting. The cold will firm the mixture into bite‑size squares. The marshmallow swirl will be visible and slightly raised. The fudge will hold its shape when you lift it out of the pan. This step also enhances the flavor as the ingredients marry.
- Cut the fudge into squares using a hot knife for clean edges. Wipe the knife between cuts to prevent sticking. The squares should be firm but still slightly creamy when bitten. Serve at room temperature for the best experience. The texture will be a perfect blend of chewy and melt‑in‑your-mouth.
- Enjoy your masterpiece! Let the flavors bloom on your palate and savor the contrast between the rich chocolate and the airy marshmallow. Store any leftovers in an airtight container in the fridge for up to a week. For an extra touch, dust the squares with powdered sugar before serving. This final step adds a subtle sweetness and a touch of elegance.
Insider Tricks for Flawless Results
Even seasoned bakers can stumble over these subtle details. Below are the tricks that separate a good fudge from a legendary one.
The Temperature Rule Nobody Follows
Chocolate is a fickle friend; it loves to stay just below its melting point. The ideal temperature for melting semi‑sweet chips is around 110°F to 115°F. If you go above 120°F, the chocolate will seize, turning into a lumpy mess. Use a kitchen thermometer to monitor the heat. Keep the heat low and steady to avoid scorching.
Why Your Nose Knows Best
Smell is your most reliable gauge for doneness. When the mixture starts to emit a caramelized aroma, it’s ready to move to the next step. A sweet, buttery scent indicates that the chocolate has fully blended with the condensed milk. If you notice a burnt smell, stop the heat immediately and let the mixture cool.
The 5-Minute Rest That Changes Everything
After adding the vanilla and salt, let the mixture sit for exactly five minutes. This pause allows the chocolate’s fat to fully incorporate, creating a silky base. Skipping this rest can result in a grainy texture. The five‑minute window is the sweet spot between too thick and too thin.
Keep It Clean and Dry
Even a small splash of water in the pan can cause the chocolate to seize. Make sure the saucepan is completely dry before adding the butter. If you accidentally spill water, discard the mixture and start over. Clean utensils and bowls are essential for a smooth finish.
Marshmallow Placement Matters
When folding in the fluff, aim for a gentle swirl rather than full incorporation. The fluff should remain visible in ribbons to create that iconic look. Over‑mixing will cause the marshmallow to lose its airy texture. A light fold is the key to both flavor and aesthetics.
Refrigeration Timing Is Critical
Set the fudge for at least two hours, but not more than 24 hours. Over‑refrigeration can make the chocolate too hard, while under‑refrigeration leaves it too soft. The ideal texture is firm enough to hold shape but still creamy when bitten. Let it rest at room temperature for 10 minutes before cutting if it feels too rigid.
I’ve tried this recipe in a cast‑iron skillet, a stainless steel pan, and even a silicone baking mat. The results were consistent, proving that the key lies in the ingredients and technique, not the cookware. When I first made it, I was skeptical about the no‑bake claim, but the final product was so silky that I almost forgot it had never touched an oven. If you’re still unsure, give it a try—this recipe is a game‑changer for dessert lovers.
The next time you crave chocolate, remember that you can create a dessert that’s both indulgent and effortless. The combination of chocolate, condensed milk, butter, vanilla, and marshmallow creates a symphony of flavors that will leave you wanting more. And if you’re looking for a way to impress friends at a gathering, this fudge is the answer.
The best part? It’s so simple that even a novice can master it with a few minutes of focus. Just follow the steps, keep the heat low, and let the flavors mingle. Trust me, you’ll thank yourself later when the first bite melts on your tongue like a cloud of chocolatey bliss.
Creative Twists and Variations
This recipe is a playground. Here are some of my favorite ways to switch things up:
Dark Chocolate Delight
Swap the semi‑sweet chips for dark chocolate chips with 70% cocoa. The result is a richer, slightly bitter bite that balances the marshmallow’s sweetness. Pair it with a splash of espresso for an extra depth. This version is perfect for coffee lovers. The final texture remains silky with a hint of caramel.
Nutty Crunch
Add chopped toasted almonds or hazelnuts to the base before adding the marshmallow. The nuts give a satisfying crunch and a nutty aroma that complements the chocolate. Stir them in just before the final set to keep them from becoming soggy. The nuts also add protein and a subtle earthy note.
Minty Fresh
Incorporate a few drops of peppermint extract along with the vanilla. The mint gives a refreshing aftertaste that contrasts with the sweet marshmallow. Use a light hand—too much mint can overpower the chocolate. This variation is especially delightful during the holiday season.
Spiced Twist
Add a pinch of cinnamon or nutmeg to the chocolate base. The spices give a warm, cozy flavor that pairs well with the sweetness of the marshmallow. This version is great for autumn gatherings. The spice also enhances the chocolate’s depth.
Salted Caramel Swirl
Create a small pool of salted caramel sauce at the bottom of the pan before adding the chocolate. The caramel will mix in with the marshmallow, creating a decadent swirl. The salt will elevate the caramel’s flavor. This version is a decadent treat for special occasions.
Feel free to experiment with different types of marshmallow fluff, such as chocolate or strawberry flavors, to add an unexpected twist. The possibilities are endless, and each variation brings a new dimension to the same core recipe. Have fun, and enjoy the creative process.
Storing and Bringing It Back to Life
Once you’ve made your fudge, it’s essential to store it correctly to preserve its texture and flavor.
Fridge Storage
Place the fudge in an airtight container or wrap it tightly in plastic wrap. Store it in the refrigerator for up to one week. The cool temperature keeps the chocolate firm and prevents the marshmallow from becoming too soft. Make sure the container is sealed to avoid absorbing fridge odors.
Freezer Friendly
For longer storage, wrap the fudge in parchment paper and then in plastic wrap before freezing. It will stay good for up to three months. Thaw it at room temperature for about 30 minutes before serving. The texture will be slightly firmer after freezing, but it remains delicious.
Best Reheating Method
To bring the fudge back to its original silky texture, place a small portion in a microwave-safe bowl and heat on low for 10-15 seconds. Add a splash of water to create steam that helps rehydrate the chocolate. Stir gently until smooth. Alternatively, set the fudge on a heat‑proof plate over a pot of simmering water and stir until melted.
Add a tiny splash of water before reheating and let it steam back to perfection. This trick helps the chocolate regain its glossy sheen without becoming oily. The result is a melt‑in-your-mouth experience that rivals the freshly made fudge.