Picture this: it’s a rainy Tuesday afternoon, the kind where the clouds are so low you swear you can taste the humidity. I was rummaging through my pantry, half‑heartedly scrolling TikTok for snack ideas, when a sudden craving for pecan pie hit me like a thunderclap. I grabbed a can of condensed milk, a bag of pecans, and a jar of dates, thinking I’d just make a quick bite‑size dessert. The first attempt was a disaster—gooey, uneven, and about as satisfying as a soggy paper towel. I dared myself to keep tweaking until I finally cracked the code, and let me tell you, this is hands down the best version you’ll ever make at home.
The moment I tasted the finished bites, the caramel‑sweetness of the dates intertwined with the buttery crunch of toasted pecans, creating a flavor explosion that reminded me of grandma’s holiday pecan pie, but in a portable, no‑mess form. The aroma wafted through the kitchen like a warm hug, the scent of toasted nuts and a whisper of cinnamon dancing around the countertops. I could hear the faint crackle as the edges set in the oven, and the texture was a perfect balance—soft in the middle, with a satisfying crunch on the outside. The experience was so vivid I could almost feel the buttery melt on my tongue before the first bite even landed.
What makes this version truly stand out is a secret ingredient you won’t find in the typical energy‑bite recipes: a splash of real maple syrup paired with a pinch of sea salt. This combo amps up the depth of flavor, giving the bites that luxurious, caramel‑rich finish that most recipes completely miss. Most recipes get this completely wrong—either they’re too sweet, too dry, or lack that buttery snap that makes a pecan pie unforgettable. I’m about to reveal the technique that transforms a simple mix into a glossy, golden‑brown masterpiece.
Okay, ready for the game‑changer? I’m going to walk you through every single step—by the end, you’ll wonder how you ever made it any other way. I dare you to taste this and not go back for seconds. Stay with me here — this is worth it.
What Makes This Version Stand Out
- Flavor Fusion: The marriage of dates, maple syrup, and toasted pecans creates a sweet‑salty profile that mimics classic pecan pie without the heaviness.
- Texture Triumph: A crunchy exterior gives way to a moist, chewy center, delivering a contrast that keeps you reaching for more.
- Simplicity: Fewer than ten core ingredients mean you can throw this together in under an hour, even on a chaotic weekday.
- Ingredient Quality: Using raw, unsalted pecans and pure maple syrup elevates the taste from “good” to “legendary.”
- Crowd Reaction: These bites disappear at parties faster than you can say “one more,” making them perfect for potlucks or office snack runs.
- Make‑Ahead Potential: Store them in the fridge for up to a week, or freeze for a month—no loss in flavor or texture.
- Cooking Method: A brief bake in a muffin tin gives each bite a uniform shape and that coveted golden crust.
- Energy Boost: Packed with healthy fats, protein, and natural sugars, they fuel a mid‑day slump without the crash.
Inside the Ingredient List
The Flavor Base
Dates (1 cup): Dates are the natural sweetener that gives these bites their sticky, caramel‑like interior. They also provide a gentle fiber boost that keeps digestion smooth. If you skip them, you’ll end up with dry, crumbly bites that lack that signature chew. Swap: Medjool dates can be substituted with soaked figs for a slightly fruitier note.
Maple Syrup (¼ cup): Real maple syrup adds a deep, earthy sweetness that sugar alone can’t achieve. It also contributes a subtle moisture that keeps the bites from hardening. Using flavored syrups (like bourbon‑infused) can add a fun twist. Tip: Choose Grade A amber for a richer flavor profile.
The Texture Crew
Rolled Oats (1 cup): Oats give structure while keeping the bite light and chewy. They absorb the syrup, preventing excess stickiness. If you replace them with quick‑cooking oats, the texture becomes too soft and may fall apart.
Almond Flour (½ cup): This low‑carb flour adds buttery richness without gluten, contributing to the tender crumb. Over‑mixing can make the batter dense, so fold it in gently. Swap: Coconut flour works in a pinch but requires an extra egg to bind.
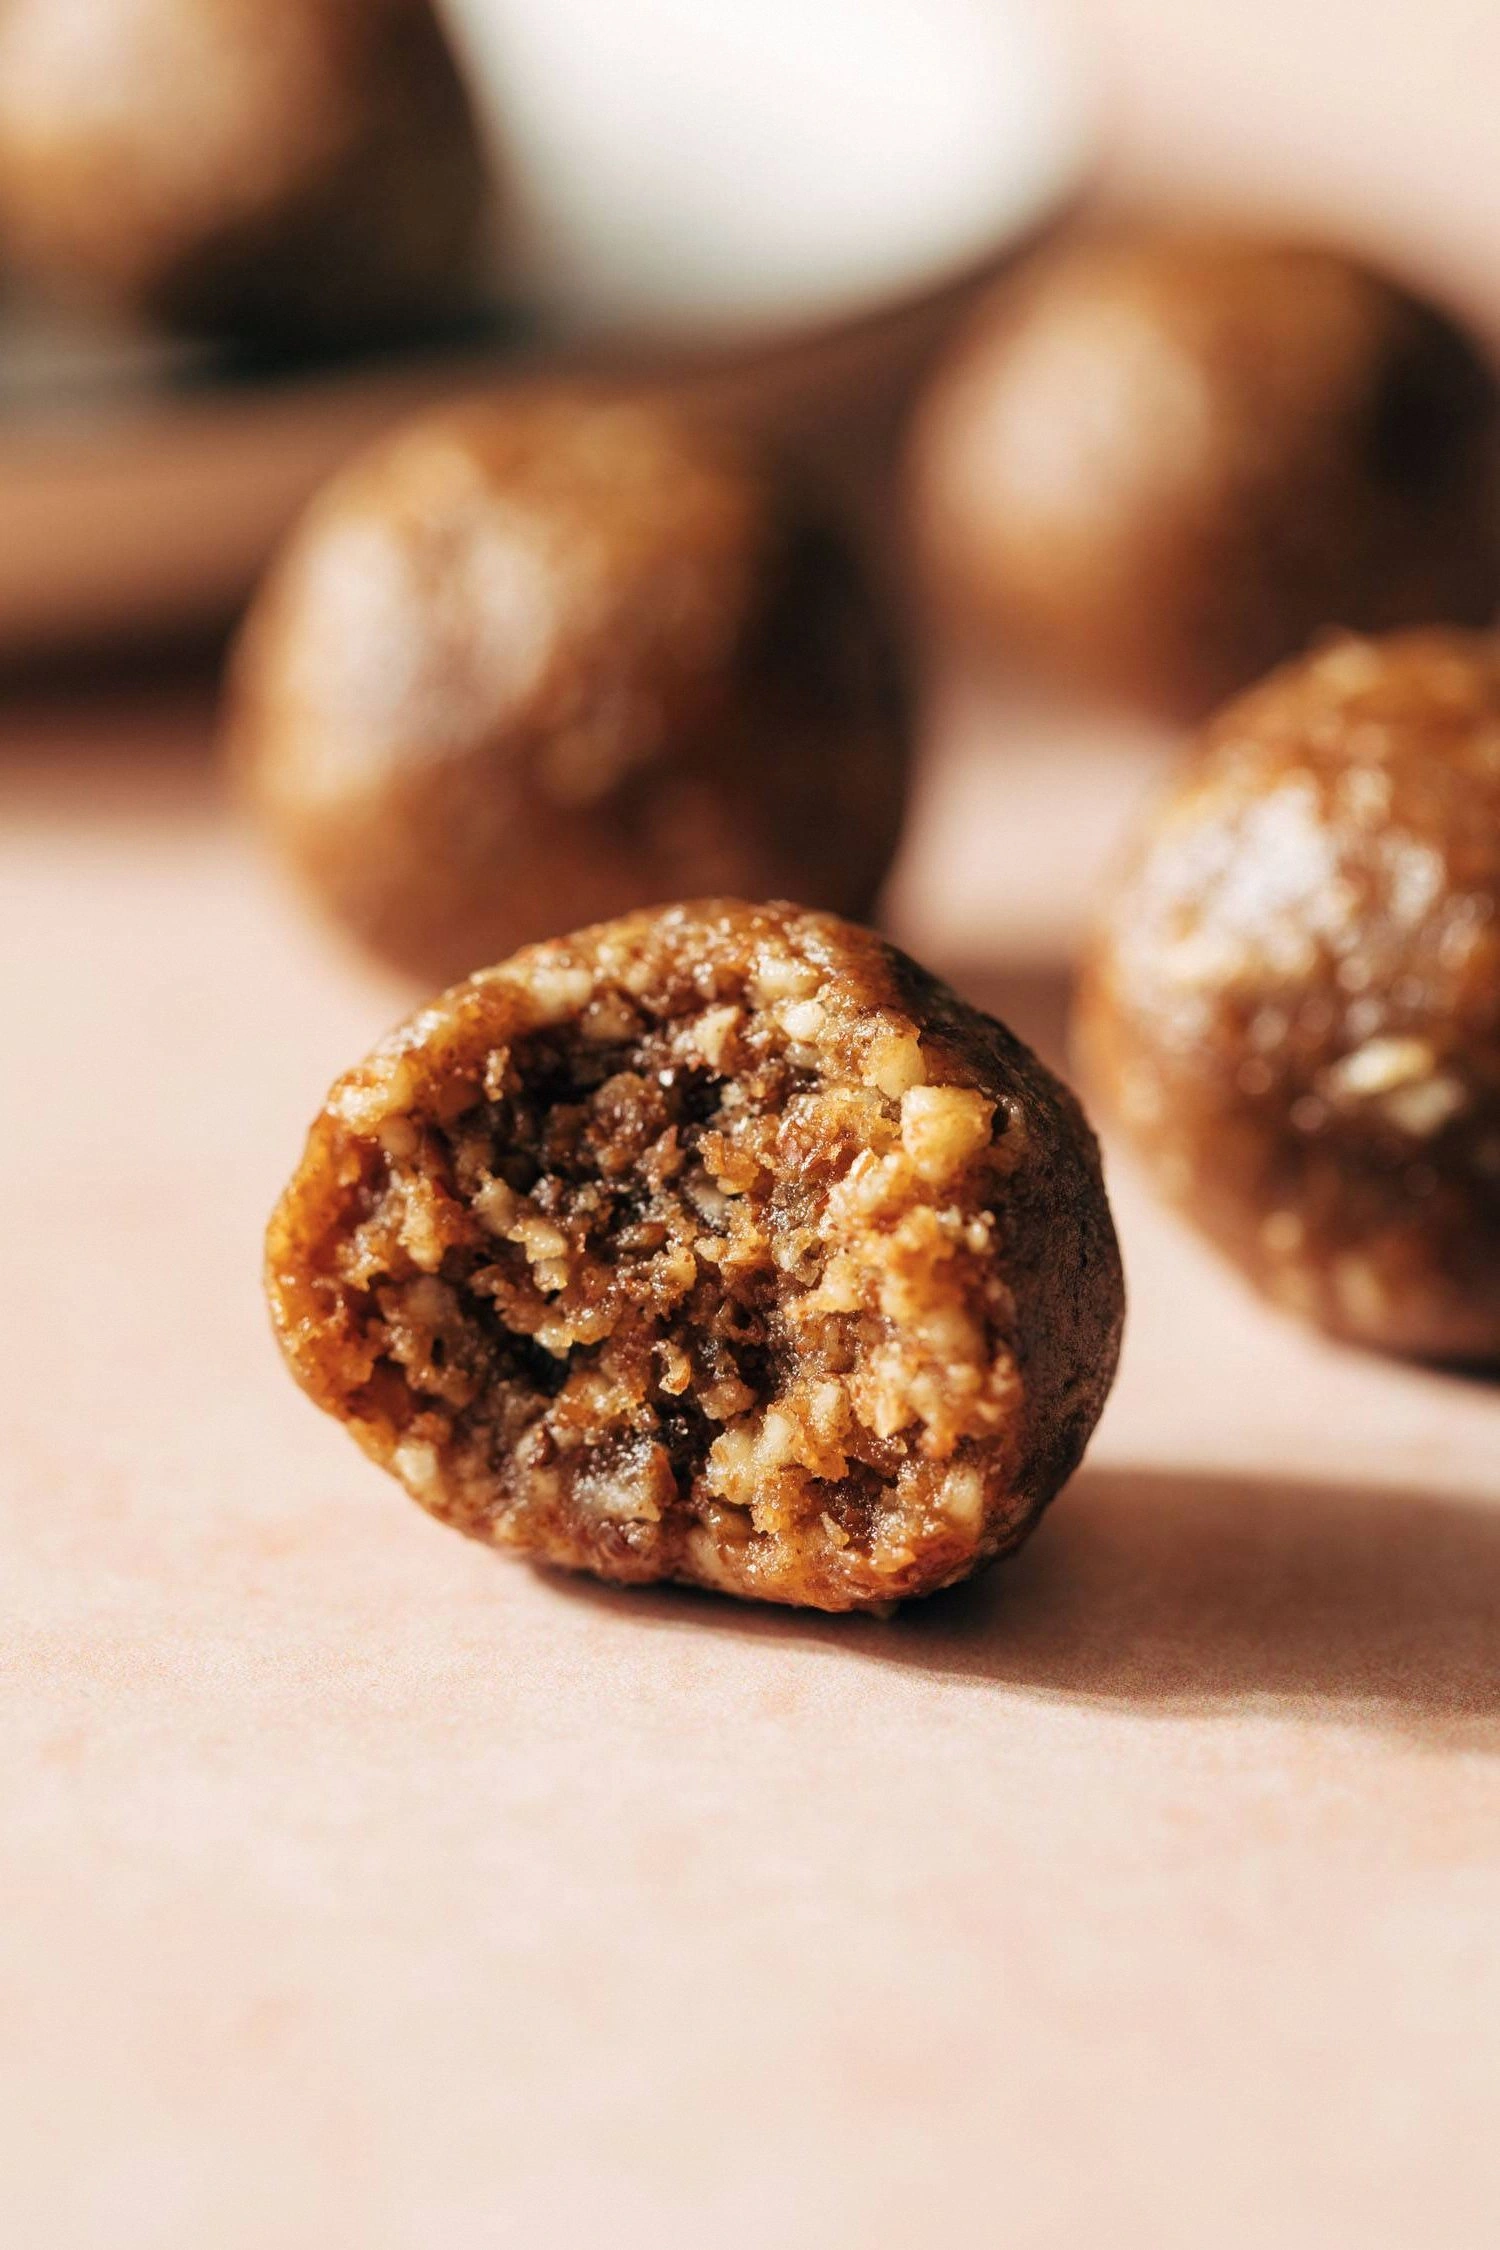
Chopped Pecans (1 cup): The star of the show—pecans bring crunch, buttery flavor, and a dose of healthy fats. Toast them first for maximum aroma. If you use raw nuts, the flavor will be muted, and the texture less satisfying.
The Unexpected Star
Sea Salt (¼ tsp): A pinch of salt amplifies all the sweet notes, creating that classic sweet‑salty balance you love in pecan pie. Too much, and it overwhelms; too little, and the flavors feel flat. Pro tip: Finish each bite with a tiny sprinkle of flaky sea salt for a gourmet touch.
Vanilla Extract (1 tsp): Vanilla adds depth and rounds out the flavors, making the bites taste more like a baked pie filling than a raw energy ball. Real vanilla beans can be used for an even richer aroma.
The Final Flourish
Ground Cinnamon (½ tsp): Cinnamon brings warmth and a hint of spice, echoing the classic pecan pie seasoning. It also helps balance the sweetness. If you love spice, add a pinch of nutmeg.
Unsalted Butter, Melted (2 tbsp): Butter creates that melt‑in‑your‑mouth richness and helps the bites hold together during baking. Use a high‑quality butter for the best flavor.
Brown Sugar (1 tbsp): Adds a caramel undertone that mimics the glaze on a pecan pie. It also assists in browning the exterior.
Mini Chocolate Chips (¼ cup, optional): For those who crave a chocolate‑kiss, these melt slightly during baking, creating pockets of gooey indulgence.
Everything's prepped? Good. Let's get into the real action...
The Method — Step by Step
First, preheat your oven to 350°F (175°C) and line a standard 12‑cup muffin tin with parchment or silicone liners. This temperature ensures a gentle bake that sets the exterior without drying out the interior. While the oven warms, you’ll hear the faint hum of the heating elements—a comforting kitchen soundtrack. Let the tin sit on the counter; the heat will radiate evenly once the batter is in.
In a food processor, combine the pitted dates and maple syrup. Pulse for about 30 seconds until the mixture forms a thick, sticky paste. You’ll notice the scent of caramel rising—this is the first sign you’re on the right track. Watch Out: Over‑processing can turn the dates into a puree that’s too liquid, making the batter wet.
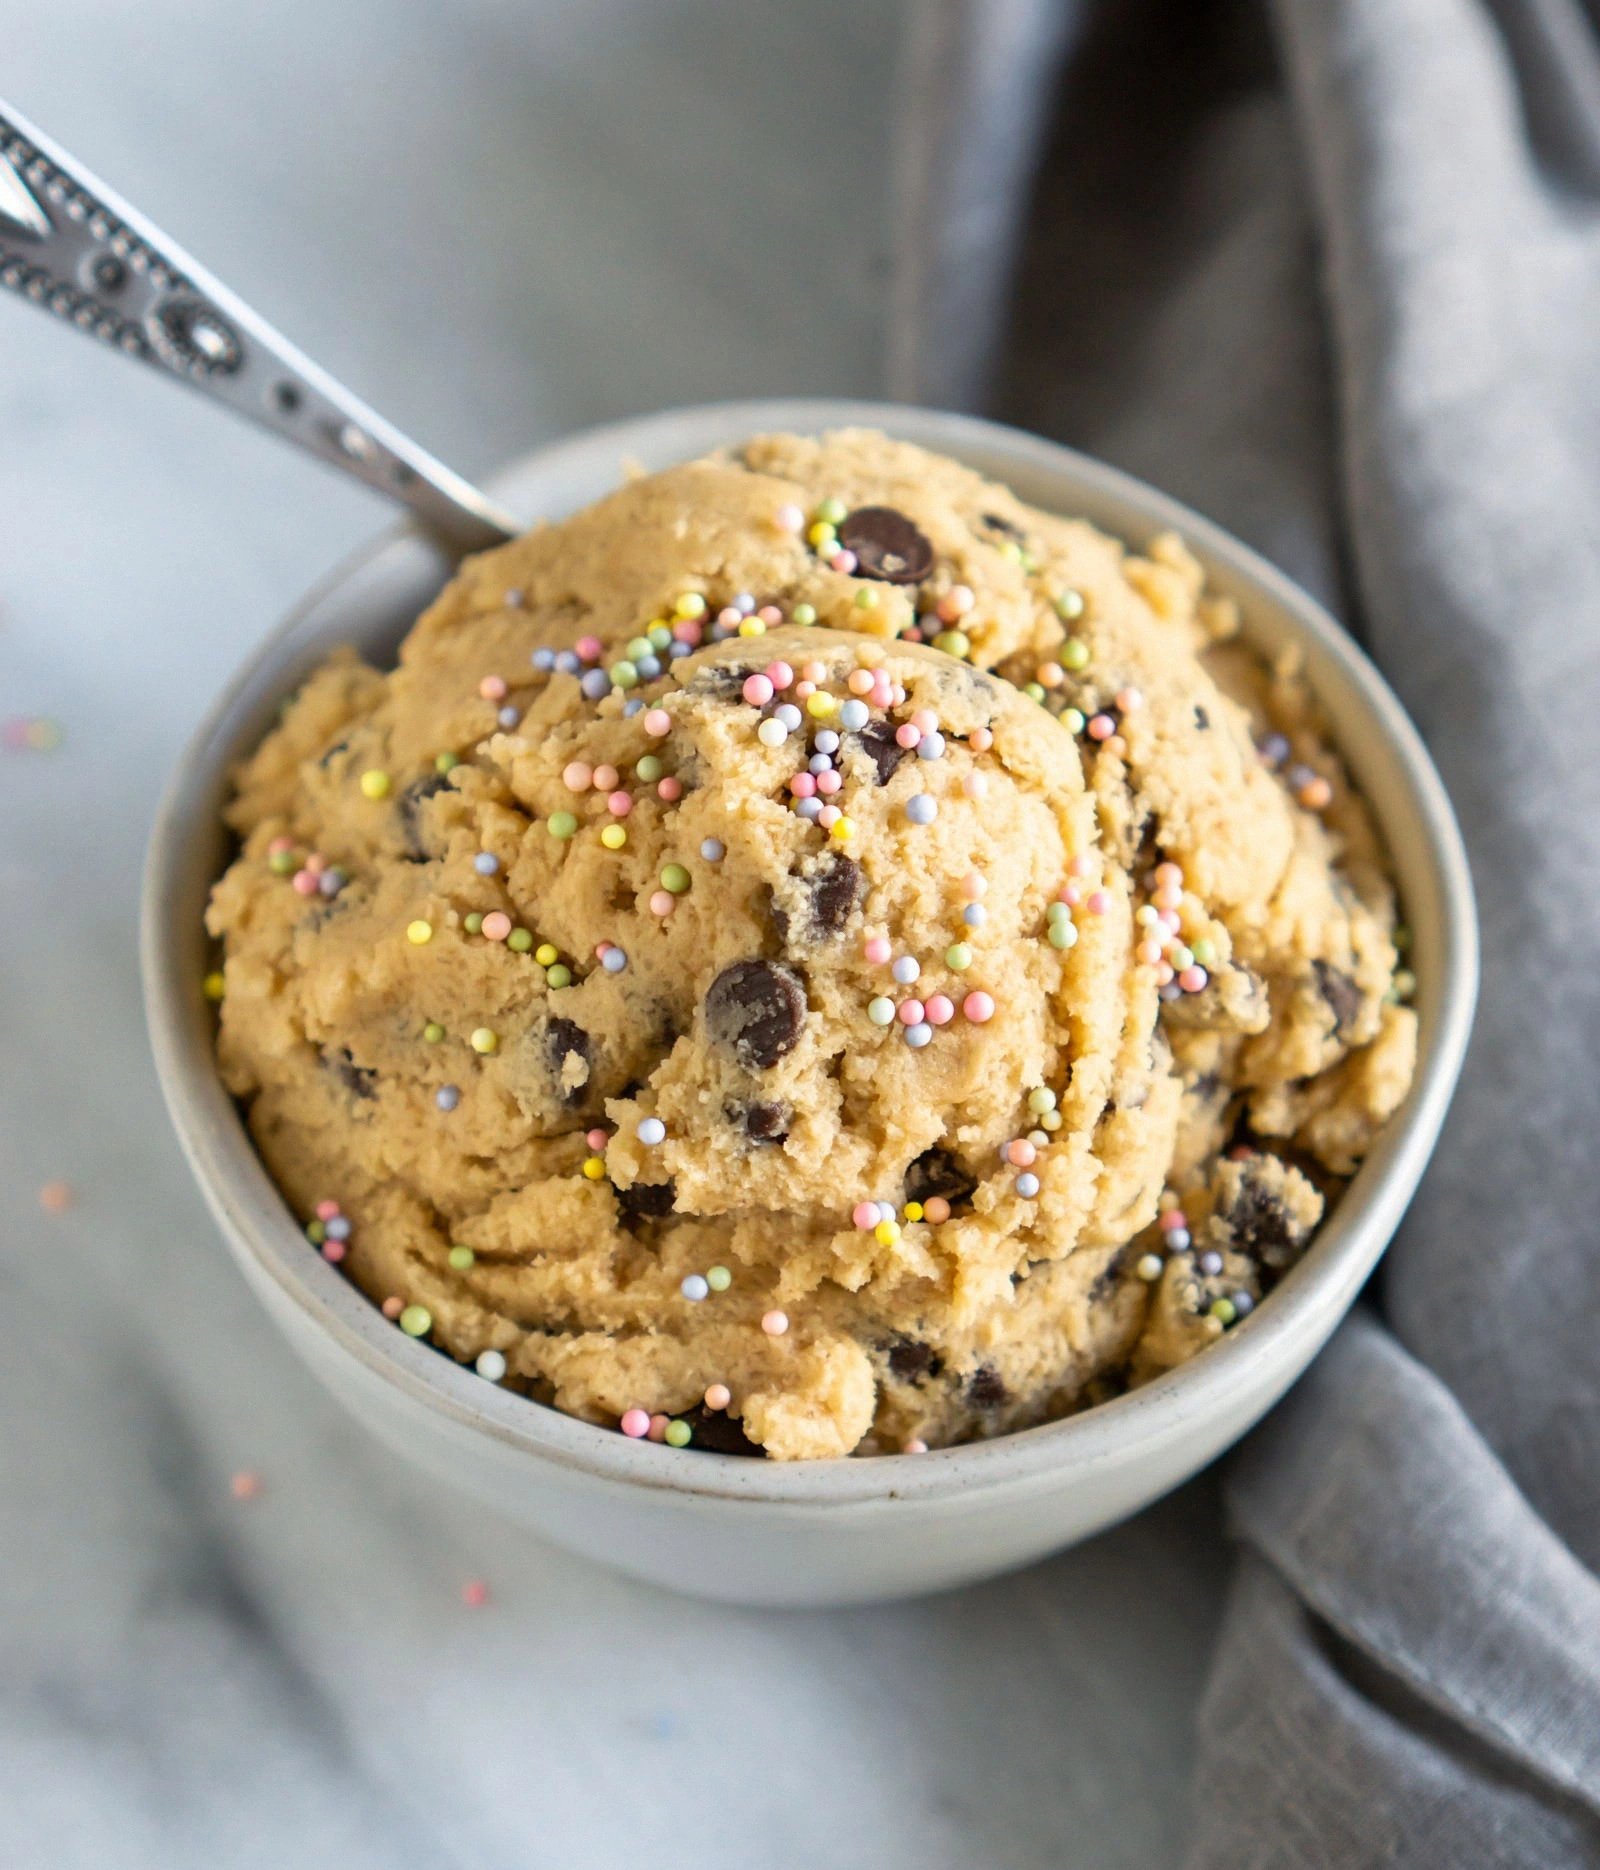
Transfer the date‑syrup paste to a large mixing bowl. Add the rolled oats, almond flour, toasted pecans, sea salt, cinnamon, brown sugar, and vanilla. Using a wooden spoon, fold everything together until just combined. The mixture should look coarse yet hold together when pressed.
Kitchen Hack: Lightly dampen your hands with water before shaping—this prevents the sticky mixture from clinging to your fingers.Now, melt the butter in a small saucepan over low heat, then stir in the brown sugar until dissolved. This glossy butter‑sugar blend should bubble gently, releasing a sweet aroma that hints at the caramelized finish you’ll see later. Remove from heat and let it cool for a minute before pouring it over the dry ingredients.
Pour the melted butter mixture into the bowl, and gently fold it in. You’ll notice the batter turning a richer, deeper hue—like a pecan pie filling ready to set. The texture should be sticky but manageable; if it feels too dry, drizzle in a teaspoon of extra maple syrup. This is the moment of truth: the mixture must hold together when you press it into the muffin cups.
Using a heaping tablespoon or a small ice‑cream scoop, portion the batter into each muffin cup, pressing down firmly with the back of a spoon or your fingertips. Aim for a uniform height—about ¾ full—so they bake evenly. The tops should be slightly domed; this will give you that classic “pie‑crust” look once baked.
Slide the tin into the preheated oven and bake for 15‑18 minutes. You’ll know they’re done when the edges turn a golden‑brown and you can smell that toasted nut fragrance filling the kitchen. The tops should be firm to the touch but still soft in the center. Watch Out: Over‑baking will dry them out, turning the chewy interior into a crumbly mess.
Remove the tin from the oven and let the bites cool in the pan for 5 minutes before transferring them to a wire rack. This brief rest lets the structure set, preventing them from falling apart when you lift them out. As they cool, the aroma intensifies, making the kitchen feel like a bakery on a quiet Sunday morning. Once fully cooled, sprinkle a pinch of flaky sea salt on each bite if you love that extra pop of flavor.
That's it — you did it. But hold on, I've got a few more tricks that'll take this to another level...
Insider Tricks for Flawless Results
The Temperature Rule Nobody Follows
Never bake these bites at a temperature higher than 350°F. Higher heat will brown the exterior too quickly, leaving the center undercooked. I once cranked the oven to 400°F trying to speed things up, and the result was a burnt crust with a raw, gummy center. Keep it steady, and you’ll get that perfect golden edge and a soft, chewy middle every time.
Why Your Nose Knows Best
The moment the kitchen fills with the scent of toasted pecans and caramel is your cue to check the bites. Trust that aromatic signal more than the clock—if the smell is strong and sweet, pull them out. I’ve learned to set the timer for 12 minutes, but I always rely on the nose; it’s the most reliable timer in the kitchen.
The 5‑Minute Rest That Changes Everything
After baking, let the bites rest on the rack for exactly five minutes before moving them to a storage container. This short pause allows the interior to finish setting, preventing them from crumbling when you handle them. Skipping this step is like trying to frost a cake while it’s still steamy—everything slides off.
Cold Butter, Warm Syrup—A Textural Secret
Using cold, cubed butter melted with warm syrup creates tiny pockets of air that expand during baking, giving the bites a light, airy texture. If you melt the butter separately and then combine, you lose that micro‑aeration, resulting in a denser bite. This trick is why professional bakers swear by “cold butter” methods.
Freeze for Future Fuel
These bites freeze like a charm. After they’ve cooled completely, pop them into a zip‑top bag, squeeze out the air, and store them in the freezer. When you need a quick energy boost, microwave for 15 seconds and add a splash of water to revive that fresh‑baked feel. I’ve saved a whole batch for marathon training, and they still taste like they just left the oven.
Creative Twists and Variations
This recipe is a playground. Here are some of my favorite ways to switch things up:
Chocolate‑Hazelnut Dream
Swap half the pecans for toasted hazelnuts and stir in ¼ cup of cocoa nibs. The result is a richer, chocolate‑forward bite that still carries the buttery pecan undertone. Perfect for anyone who loves a mocha‑like snack.
Spicy Maple Kick
Add ¼ tsp of cayenne pepper and replace regular maple syrup with a dark, robust bourbon‑infused maple. The heat pairs surprisingly well with the sweet caramel, creating a flavor profile that’s both comforting and thrilling.
Coconut‑Caramel Fusion
Replace almond flour with shredded coconut and drizzle a thin layer of caramel sauce over each bite after baking. The coconut adds tropical chew, while the caramel amplifies the sweet, buttery notes.
Apple‑Cinnamon Harvest
Fold in ½ cup of finely diced dried apples and increase the cinnamon to 1 tsp. This gives a subtle fruitiness reminiscent of an autumn apple pie, making it a great seasonal twist.
Protein‑Power Boost
Mix in a scoop of vanilla whey protein powder and swap the brown sugar for a natural sweetener like stevia. The bites stay just as indulgent but pack an extra 5‑10 grams of protein per serving, ideal for post‑workout recovery.
Storing and Bringing It Back to Life
Fridge Storage
Place the cooled bites in an airtight container lined with parchment paper. They’ll stay fresh for up to seven days, retaining their chewy interior and crisp exterior. If you notice any dryness, a light drizzle of maple syrup over the top will re‑moisturize them.
Freezer Friendly
Arrange the bites on a baking sheet, freeze until solid, then transfer to a zip‑lock bag. They keep for up to three months. When you’re ready to eat, let them sit at room temperature for five minutes, then pop them in the microwave for 15‑20 seconds.
Best Reheating Method
For the ultimate “just‑baked” experience, preheat a skillet over low heat, add a splash of water (just a teaspoon), and warm each bite for 30 seconds per side. The steam revives the interior, while the skillet re‑crispies the edges.