I remember the night I was supposed to make a dessert for my sister’s birthday, and I was halfway through a batch of regular chocolate cupcakes when the oven alarm went off. I stared at the timer, heart racing, and thought, “I’ve got to salvage this.” That frantic moment sparked a wild idea: what if the cupcakes were so dark, so decadent, they looked like they’d come straight out of a witch’s cauldron? I pulled out every ingredient I had—flour, sugar, cocoa, a dash of salt, eggs, milk, oil, vanilla, and even a kettle of boiling water—then added a splash of green frosting, a handful of chocolate candies, and black sprinkles. The result was a batch of cupcakes that practically glowed with a mysterious, almost alchemical allure. I dare you to taste this and not go back for seconds; the flavor will haunt your palate like a spell cast with pure chocolate.
Picture yourself pulling a tray of these from the oven, the kitchen filled with the sweet scent of chocolate and vanilla, the air thick with anticipation. The cupcakes sit in a paper tin, each one a dark, glossy sphere that seems to absorb light rather than reflect it. When you cut into one, a molten stream of chocolate runs down the center like a potion, and the frosting on top swirls like a swirling green vortex. The texture is a perfect balance: the crumb is moist and airy, yet firm enough to hold the heavy chocolate and the sugary cauldron effect. Most chocolate cupcakes are either too dry or too sweet; these hit the sweet spot with a subtle bitterness that makes you reach for the next bite. If you’ve ever struggled to find a cupcake that feels both indulgent and sophisticated, you’re not alone—this recipe is the fix.
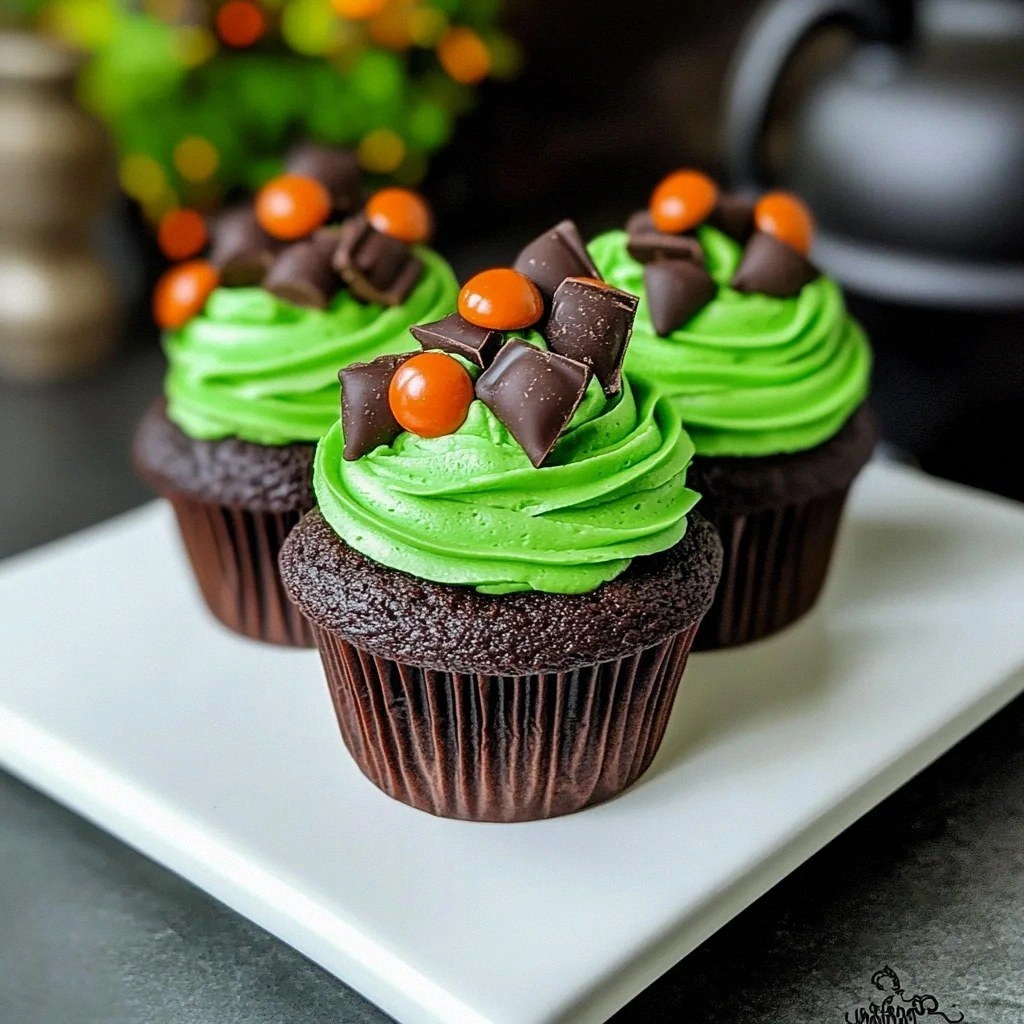
What sets this version apart from the countless chocolate cupcakes out there is the use of boiling water to bloom the cocoa, creating a richer chocolate flavor that’s deeper than the usual surface sweetness. The green frosting isn’t just a gimmick; it’s a playful nod to the witchy theme and adds a fresh, almost minty contrast that lifts the overall taste profile. The chocolate candies on top act as both visual and textural surprises, popping with a crunch that breaks the soft cupcake base. The black sprinkles give a subtle crunch and a dramatic, spooky finish that’s perfect for any Halloween party or just a fun night in. I’ll be honest—when I first baked these, I ate half the batch before anyone else got a chance. That’s the power of a recipe that feels like a spell.
If you’ve ever felt like your cupcakes are missing that wow factor, this is the antidote. I’ve experimented with dozens of chocolate cupcake variations, and most either fall flat or end up overly sweet. This recipe, however, is hands down the best version you’ll ever make at home. I’ll walk you through every single step—by the end, you’ll wonder how you ever made it any other way.
What Makes This Version Stand Out
- Deep Chocolate: Boiling water blooms the cocoa, unlocking a flavor that’s darker and more complex than standard cupcakes.
- Moisture Mastery: Vegetable oil and milk together keep the crumb tender while preventing the batter from drying out during baking.
- Visual Drama: The green frosting and chocolate candy topping create a striking, almost mystical appearance that’s impossible to ignore.
- Balanced Sweetness: Granulated sugar is just enough to sweeten without overpowering the cocoa’s natural bitterness.
- Simple Prep: All ingredients are measured in common units—cups, teaspoons, and eggs—making the recipe beginner‑friendly.
- Make‑Ahead Friendly: The cupcakes can be baked, cooled, and frosted days ahead, yet still taste fresh.
- Party‑Proof: The spooky design and rich flavor make these cupcakes a guaranteed crowd‑pleaser at any gathering.
- Ingredient Quality: Using high‑quality cocoa and real vanilla extract elevates the entire taste experience.
Alright, let’s break down exactly what goes into this masterpiece…
Inside the Ingredient List
The Flavor Base
All-purpose flour: The backbone of the cupcake, it provides structure and a tender crumb. If you use a lower‑protein flour, the cupcakes might be a bit denser. For a lighter texture, you can sift the flour to remove any lumps. Tip: Choose a brand with a protein content around 10–12% for optimal rise.
Granulated sugar: Sweetness is key! It balances the deep chocolate flavor and helps create a soft, moist crumb. Skipping sugar will leave the cupcakes too bitter and dry. If you prefer a lower sugar option, you can substitute half the amount with coconut sugar, but keep in mind the texture may change slightly.
Unsweetened cocoa powder: For that deep, chocolatey goodness that makes these cupcakes irresistible. The higher the cocoa content, the richer the flavor. If you’re using Dutch‑process cocoa, you’ll need a pinch of extra baking soda to counteract its alkalinity.
The Texture Crew
Baking powder: This leavening agent works with the baking soda to give the cupcakes a light, airy rise. Don’t skip it—without it, the cupcakes will be flat and dense. If you’re gluten‑free, use a gluten‑free baking powder that’s sodium‑free.
Baking soda: Works in tandem with the cocoa and baking powder to create lift. It also reacts with the acidic boiling water to intensify the chocolate flavor. Use freshly opened baking soda for maximum potency.
Salt: Just a pinch enhances the flavors and balances the sweetness. Too much salt will ruin the taste; too little will make the cupcakes taste flat. A pinch is all you need, but feel free to adjust if you prefer a slightly more pronounced flavor.
The Unexpected Star
Large eggs: They bind the ingredients together and add moisture. Eggs also help the cupcakes rise and create a tender crumb. If you’re vegan, you can substitute with a flaxseed “egg” (1 tablespoon flaxseed meal + 3 tablespoons water).
Whole milk: Adds richness and helps create a tender crumb. Using whole milk instead of skim will give a creamier texture. If you’re lactose intolerant, try oat milk or another plant‑based alternative.
Vegetable oil: For moisture and a soft texture; you can substitute with melted butter for a richer flavor. Oil keeps the cupcakes moist longer than butter does, so they stay fresh for days. If you want a buttery flavor, replace 1/4 cup of oil with 1/4 cup melted butter.
The Final Flourish
Vanilla extract: A splash of vanilla adds warmth and depth to the flavor profile. Vanilla enhances the chocolate and balances the sweetness. Use pure vanilla extract for the best flavor.
Boiling water: This may seem unusual, but it helps to bloom the cocoa powder, intensifying the chocolate flavor. Add the boiling water after the dry ingredients have been combined to avoid a soggy batter. If you’re in a hurry, you can use hot tap water, but it won’t bloom the cocoa as effectively.
Green frosting: This is your cauldron’s “potion,” adding a fun and spooky touch. A creamy, green frosting contrasts with the dark cupcakes and gives a fresh, minty finish. If you want a stronger green hue, add a few drops of green gel food coloring.
Chocolate candies: These create the cauldron effect on top of your cupcakes, making them even more enchanting. Use mini chocolate chips or chopped chocolate for a crunchy texture. You can also melt them and drizzle over the frosting for an extra chocolatey layer.
Black sprinkles: For that final spooky touch, adding a bit of crunch and visual appeal. They’re a fun way to add texture and a pop of color. If you can’t find black sprinkles, use dark chocolate shavings as a substitute.
Everything’s prepped? Good. Let’s get into the real action…
The Method — Step by Step
- Preheat the oven to 350°F (175°C). Line a 12‑cup muffin tin with paper liners. The oven should be fully preheated before placing the cupcakes inside; otherwise, the rise will be uneven. While the oven is heating, gather all your ingredients and have them ready to go. This step ensures you’re not rushing later on.
- Combine the dry ingredients. In a large bowl, whisk together flour, sugar, cocoa, baking powder, baking soda, and salt. Sifting the dry mix through a fine sieve removes lumps and ensures a smooth batter. This is the foundation of your cupcakes—don’t skip this step or you’ll end up with an uneven crumb.
- Add the wet ingredients. Beat eggs with milk, oil, and vanilla in a separate bowl. Then pour this mixture into the dry mix, stirring gently until just combined. Over‑mixing can make the cupcakes tough, so stop as soon as the batter is smooth. The batter should be thick but pourable.
- Bloom the cocoa. Slowly pour the boiling water into the batter while whisking vigorously. The batter will look a bit thin—this is normal. The hot water activates the cocoa, unlocking deeper chocolate flavors. Let the batter sit for a minute before filling the tins.
- Fill the cupcake liners. Spoon the batter into the liners, filling each about 2/3 full. This gives the cupcakes enough room to rise without overflowing. Use a spatula to smooth the tops for an even bake.
- Bake for 18–20 minutes. The cupcakes are ready when a toothpick inserted in the center comes out with a few moist crumbs. They should have a dark, glossy appearance, almost like a potion. Let them cool in the tin for 5 minutes before transferring to a wire rack.
- Cool and frost. Once completely cooled, spread a generous amount of green frosting over each cupcake. While the frosting is still slightly tacky, sprinkle chocolate candies and black sprinkles on top. This creates a cauldron effect that’s as fun to look at as it is delicious.
- Serve or store. These cupcakes can be served immediately or stored in an airtight container. If you’re planning ahead, keep them at room temperature for up to 3 days or freeze for longer storage.
That’s it — you did it. But hold on, I’ve got a few more tricks that will take this to another level…
Insider Tricks for Flawless Results
The Temperature Rule Nobody Follows
Preheat your oven to 350°F (175°C) and keep it at that temperature. Many bakers open the door to check progress, but the sudden drop in heat can cause the cupcakes to deflate. Keep the oven door closed until the cupcakes are done. If you’re baking multiple batches, consider using a thermometer to ensure consistent heat.
Why Your Nose Knows Best
Smell the batter. A freshly mixed batter should have a faint chocolate aroma. If you notice a raw, floury scent, the batter may be under‑mixed. A sweet, chocolatey scent indicates proper blooming and the right balance of ingredients.
The 5-Minute Rest That Changes Everything
Let the batter sit for 5 minutes after adding the boiling water. This brief pause allows the cocoa to fully bloom, deepening the chocolate flavor. It also gives the batter time to thicken slightly, which helps prevent a runny final product.
The Perfect Frosting Consistency
Use softened frosting. If the frosting is too hard, it will crack when you spread it. If it’s too soft, it will slide off the cupcakes. Keep the frosting at room temperature for about 10 minutes before frosting.
The Secret of the Dark Sprinkles
Use black sprinkles sparingly. Too many can overwhelm the cake’s flavor. Sprinkle them lightly for a dramatic effect without masking the chocolate. If you can’t find black sprinkles, use dark chocolate shavings for a similar look.
Creative Twists and Variations
This recipe is a playground. Here are some of my favorite ways to switch things up:
Minty Midnight
Add a splash of peppermint extract to the batter and swap the green frosting for a mint‑infused buttercream. The result is a cool, refreshing twist that pairs beautifully with the dark chocolate base.
Caramel Cauldron
Fold in caramel chips before baking and drizzle caramel sauce over the frosted cupcakes. The sweet, buttery caramel contrasts with the rich chocolate, creating a decadent treat.
Nutty Enchantment
Stir in chopped walnuts or pecans into the batter for added crunch. The nutty flavor adds depth and a satisfying texture that complements the chocolate.
Spiced Sorcery
Add a pinch of cinnamon or a dash of cayenne pepper to the batter for a warm, spicy undertone. The heat balances the sweetness and gives the cupcakes an unexpected kick.
Vegan Witchcraft
Replace eggs with flaxseed “eggs,” use oat milk instead of whole milk, and swap vegetable oil for coconut oil. The result is a vegan version that still delivers on texture and flavor.
Storing and Bringing It Back to Life
Fridge Storage
Keep cupcakes in an airtight container. They’ll stay fresh for up to 3 days. If you’re storing them for longer, place the container in the refrigerator to preserve moisture.
Freezer Friendly
Wrap each cupcake individually in plastic wrap. Place them in a freezer bag and freeze for up to 2 months. When you’re ready to eat, let them thaw at room temperature for 30 minutes.
Best Reheating Method
Reheat in a 300°F oven for 5 minutes. Add a tiny splash of water to the bottom of the pan to create steam, which helps the cupcakes regain their moisture. This simple trick keeps them soft and delicious.