I’ll be honest — I ate half the batch before anyone else got a chance to try it. It started as a late‑night experiment when I was craving something crunchy, sweet, and a little bit tropical, but my pantry was stubbornly empty of deep‑fried shrimp. I dug out a bag of frozen jumbo shrimp from the back of the freezer, a lone container of coconut flakes, and a half‑used box of panko. The kitchen was dark, the only light coming from the humming oven, and I could hear the faint hiss of the fan as I preheated it to a scorching 425°F. That moment, that combination of anticipation and desperation, became the spark for what is now my definitive “Baked Coconut Shrimp with Spri.”
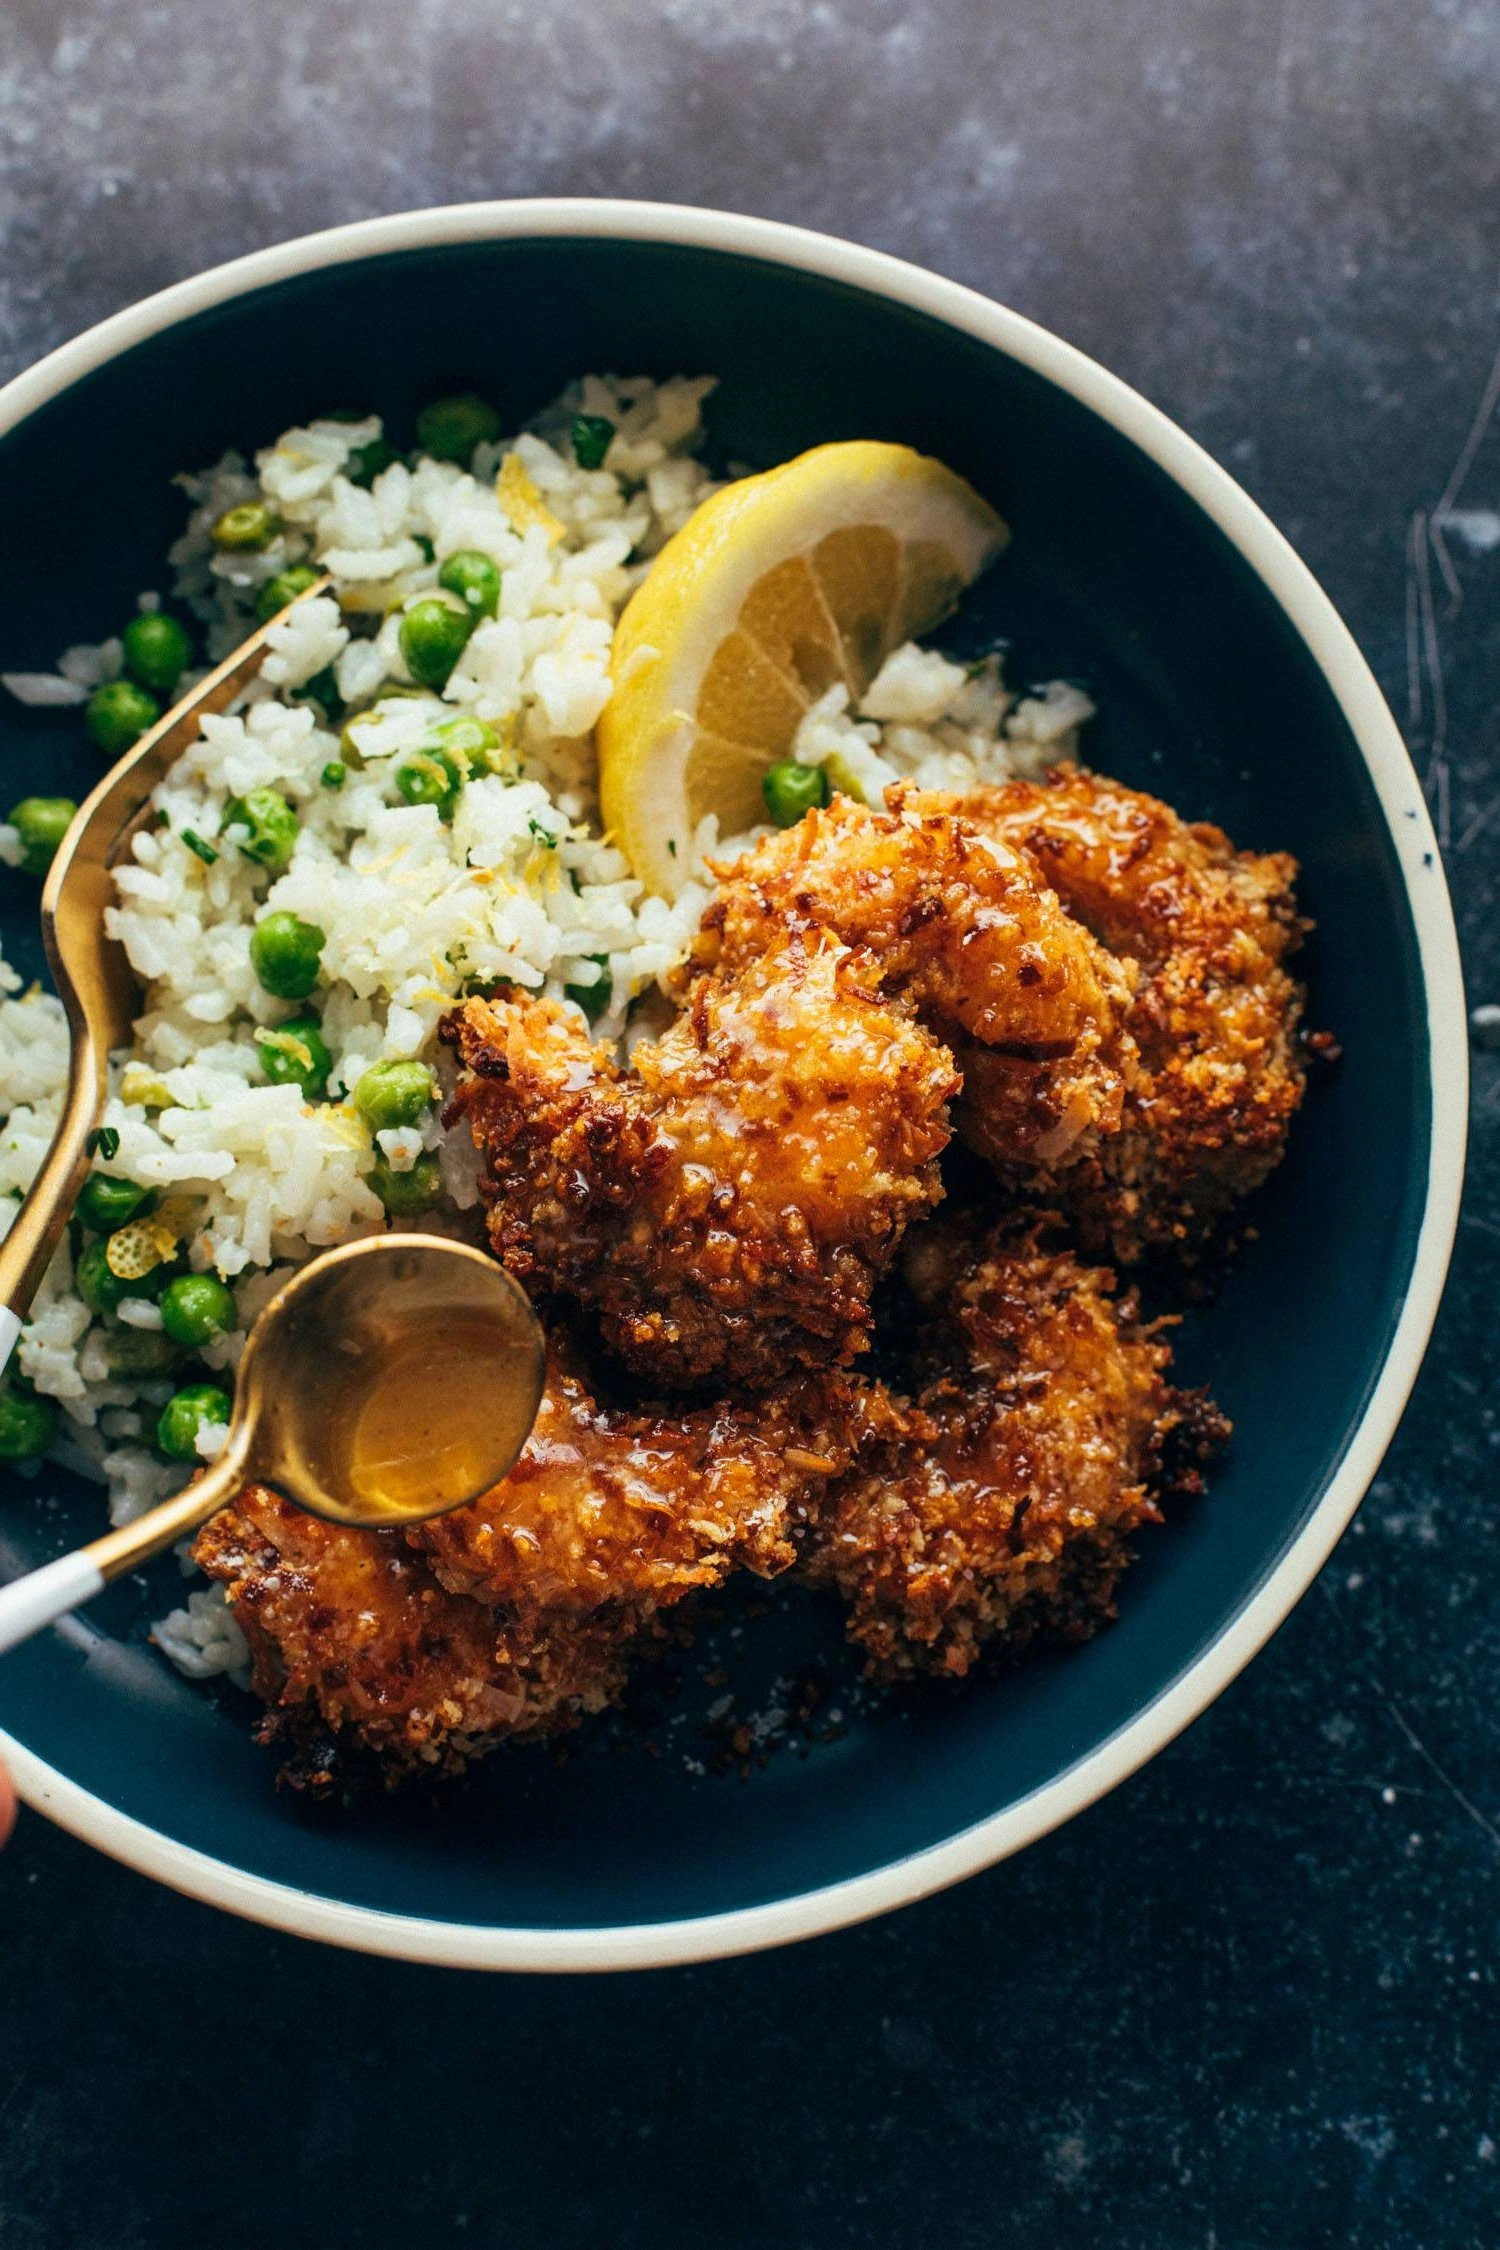
Picture yourself pulling this out of the oven, the whole kitchen smelling of toasted coconut and bright lemon, the crust glistening like a sun‑kissed beach. The shrimp themselves are pink and firm, their edges crinkling like the perfect sheet of parchment that shatters under a gentle tap. When you bite in, the first thing you notice is the sweet‑savory crunch that gives way to a juicy, buttery interior that practically melts on your tongue. The side dish—fluffy jasmine rice studded with sweet peas and a honey‑butter drizzle—acts like a gentle tide that carries the flavor waves without overwhelming them. It’s a dish that feels both indulgent and wholesome, a balance that most recipes simply can’t achieve.
Most recipes get this completely wrong. They either deep‑fry the shrimp, which drowns the delicate flavor in oil, or they bake them without any coating, resulting in a rubbery texture that no one wants. My version uses a clever three‑step coating process: a quick dip in a garlic‑butter mixture, a dusting of flour, then a generous roll in coconut‑infused panko. This creates a barrier that locks in moisture while delivering that coveted crispness. And the secret ingredient? A splash of lemon zest added to the coating right before it hits the oven – it’s the zing that makes the whole thing sing.
I dare you to taste this and not go back for seconds. The combination of sweet coconut, tangy lemon, and buttery richness is so addictive that you’ll find yourself planning the next dinner around it. Okay, ready for the game‑changer? Stick with me through each step, and by the end, you’ll wonder how you ever made shrimp any other way. Let me walk you through every single step — by the end, you’ll wonder how you ever made it any other way.
What Makes This Version Stand Out
- Texture: The triple‑layer coating creates a crunch that shatters like thin ice, yet stays tender inside. No soggy crumbs, just a consistent snap from the first bite to the last.
- Flavor Balance: Sweet coconut meets bright lemon and a subtle garlic‑butter undertone, while the honey‑mustard drizzle adds a sophisticated sweet‑savory finish.
- Healthier Baking: By baking at high heat we achieve the same golden crust as frying, but with a fraction of the oil, keeping the dish lighter without sacrificing taste.
- Ingredient Quality: Using Fremont Fish Market jumbo EZ peel raw shrimp guarantees plump, juicy meat that holds up to the coating.
- Simplicity: The method uses pantry staples—panko, coconut flakes, and a few herbs—so you don’t need a specialty store run.
- Crowd Reaction: This dish consistently clears the table in minutes; guests can’t stop reaching for the extra serving.
- Make‑Ahead Potential: The coated shrimp can sit on a tray for up to 30 minutes before baking, making it perfect for party prep.
- Versatility: Pair it with a springy rice pilaf, a fresh salad, or even as a taco filling—the possibilities are endless.
Inside the Ingredient List
The Flavor Base
The garlic‑butter mixture is the heart of this dish. We melt butter, crush two garlic cloves, and add a splash of lemon juice and zest. The butter carries the aromatics, while the lemon cuts through the richness, creating a bright, buttery base that clings to each shrimp. If you’re allergic to dairy, swap the butter for a high‑smoke‑point oil and a dash of vegan butter; the flavor will stay remarkably similar.
The Texture Crew
Chef’s Cupboard panko breadcrumbs give the coating its airy crunch, and Baker’s Corner coconut flakes add a sweet, tropical crunch that’s unmistakably crisp. The coconut’s natural sugars caramelize in the oven, producing that golden hue we all love. Should you run out of coconut flakes, toasted almond slivers work as a nutty alternative, though you’ll lose the signature coconut aroma.
The Unexpected Star
Specially Selected Jasmine Rice isn’t just a filler; its fragrant, slightly sticky texture pairs perfectly with the sweet peas and honey‑butter sauce. The peas bring a pop of color and a burst of natural sweetness that balances the savory shrimp. If you’re out of jasmine, basmati or even a short‑grain rice will still hold up, but jasmine’s floral notes are what make the dish sing.
The Final Flourish
A combination of lemon zest, fresh herbs (I love parsley or cilantro), Dijon mustard, and a drizzle of honey creates a sauce that coats the rice like velvet. The mustard adds a subtle heat, while the honey provides a glossy finish that makes the dish look restaurant‑ready. For a twist, try orange zest or a splash of lime juice; the acidity will still lift the flavors without losing the harmony.
Everything's prepped? Good. Let's get into the real action...
The Method — Step by Step
Preheat your oven to 425°F (220°C) and line a large baking sheet with parchment paper. Place a wire rack on top of the sheet; this little trick ensures air circulates around each shrimp, giving you an even crispness. While the oven heats, rinse the jumbo shrimp under cold water, pat them dry with paper towels, and set them aside. The moment the oven door clicks shut, you’ll hear a faint whirring that signals the start of magic.
In a small saucepan, melt three tablespoons of butter over medium heat. Add the minced garlic and sauté for about 30 seconds—just until fragrant, not browned. Stir in the lemon juice and zest, then remove from heat. This butter‑garlic‑lemon mixture will act as the glue for the coating, so make sure every shrimp gets a good coat. Power transition: Okay, ready for the game‑changer?
Kitchen Hack: Use a silicone brush to evenly spread the butter mixture over the shrimp; this prevents clumps and ensures a thin, uniform layer.Set up a three‑station coating line: a shallow bowl of flour, a second bowl of the butter‑garlic mixture (already prepared), and a third bowl combining panko breadcrumbs and coconut flakes in equal parts. Sprinkle a pinch of salt and pepper into the flour for seasoning. This assembly line mimics a professional kitchen, helping you stay organized and speed up the process.
Take each shrimp and give it a quick dip in the flour, shaking off any excess. Then, roll it through the butter‑garlic mixture, making sure every surface is slick. Finally, press it into the panko‑coconut blend, patting gently so the crumbs adhere. The coating should look golden and slightly fluffy before it even hits the oven.
Arrange the coated shrimp on the wire rack, leaving a small gap between each piece. This spacing lets hot air circulate, preventing steam from sogging the crust. Sprinkle a light dusting of extra coconut flakes on top for a deeper caramelization. Slide the sheet into the oven and bake for 12‑15 minutes, or until the edges turn a buttery amber and the shrimp turn opaque.
Kitchen Hack: Halfway through baking, flip the shrimp quickly with tongs. This ensures both sides develop that perfect, even crunch.While the shrimp bake, prepare the rice. Rinse 2 cups of jasmine rice under cold water until the water runs clear, then combine with 2 ¼ cups of water in a saucepan. Bring to a boil, then lower to a simmer, cover, and cook for 15 minutes. Once cooked, fluff with a fork and stir in a tablespoon of butter, the peas, and a drizzle of the honey‑mustard sauce.
Watch Out: Do not lift the lid during cooking, or the steam will escape and the rice may end up dry.To make the honey‑butter sauce, melt the remaining butter in a small pan, add two tablespoons of honey, and whisk in a tablespoon of Dijon mustard. Cook gently for 2 minutes until the sauce thickens and becomes glossy. Add a splash of lemon juice if you like extra brightness. This sauce will coat the rice and also serve as a dipping sauce for the shrimp.
When the shrimp are done, remove them from the oven and let them rest for 2 minutes. The residual heat will finish the cooking process and set the crust. Transfer the shrimp to a serving platter, drizzle a little of the honey‑butter sauce over the top, and sprinkle fresh chopped herbs for color.
Serve the shrimp alongside the fragrant jasmine rice, making sure each bite gets a spoonful of the sweet‑savory sauce. The contrast between the crunchy shrimp and the soft, buttery rice is what makes this dish unforgettable. And now the fun part: dig in, taste the tropical notes, and watch everyone beg for seconds.
That's it — you did it. But hold on, I've got a few more tricks that'll take this to another level...
Insider Tricks for Flawless Results
The Temperature Rule Nobody Follows
Most home cooks bake at 375°F, thinking it's a safe middle ground. In reality, 425°F is the sweet spot for a crisp coating without overcooking the shrimp. The high heat creates a rapid Maillard reaction, giving you that golden‑brown crust while the interior stays juicy. If you’re using a convection oven, you can lower the temperature by 25°F, but keep the timer the same.
Why Your Nose Knows Best
Trust the aroma. When the shrimp start to smell toasty and you hear a faint crackle, they’re nearing perfection. If you’re unsure, open the oven a crack and sniff; a sweet, nutty scent means the coconut is caramelizing. Over‑baking will turn that scent into a burnt warning, so keep the nose close.
The 5‑Minute Rest That Changes Everything
After removing the shrimp from the oven, let them sit for exactly five minutes on the rack. This rest allows the interior juices to redistribute, preventing a dry bite. It also lets the coating set, so you won’t lose any crumbs when you serve. Skipping this step is the fastest way to end up with a soggy mess.
Butter‑Boost for Extra Gloss
A final brush of melted butter right after baking adds a glossy sheen and an extra layer of flavor. It also helps the lemon zest stick to the coating, ensuring every bite has that bright citrus pop. This is the secret I use when I’m serving guests—makes the dish look restaurant‑polished.
Seasoning the Rice Like a Pro
Don’t just salt the rice; add a pinch of turmeric or a splash of coconut milk while it cooks. This subtle infusion adds depth without overpowering the shrimp. A friend tried skipping the butter in the rice and ended up with a bland side—lesson learned: the butter is essential for that buttery mouthfeel that ties the whole plate together.
Creative Twists and Variations
This recipe is a playground. Here are some of my favorite ways to switch things up:
Spicy Chili Coconut Shrimp
Add a teaspoon of crushed red pepper flakes to the panko‑coconut mix and a dash of sriracha to the honey‑butter sauce. The heat cuts through the sweetness, perfect for those who love a little fire.
Mango‑Infused Rice
Stir in diced fresh mango and a squeeze of lime into the jasmine rice after cooking. The tropical fruit adds a juicy burst that mirrors the coconut notes in the shrimp.
Herb‑Crusted Shrimp
Mix finely chopped rosemary, thyme, and basil into the breadcrumb mixture. The herbs give the crust an aromatic lift, turning the dish into a garden‑fresh experience.
Coconut‑Almond Crunch
Swap half of the coconut flakes for toasted almond slivers. The nutty flavor adds a new dimension while maintaining that satisfying crunch.
Vegan Swap
Replace the shrimp with large king oyster mushroom slices, use olive oil instead of butter, and choose a vegan honey alternative. The texture of the mushrooms mimics seafood, and the flavor profile stays true.
Storing and Bringing It Back to Life
Fridge Storage
Place cooled shrimp and rice in airtight containers. They’ll keep for up to three days. When reheating, spread the shrimp on a baking sheet and warm at 350°F for 8‑10 minutes, adding a tiny splash of water to the pan to create steam and revive the crunch.
Freezer Friendly
Freeze the coated, uncooked shrimp on a parchment sheet in a single layer. Once frozen, transfer to a zip‑lock bag. They’ll stay fresh for up to two months. When ready, bake straight from frozen at 425°F for 18‑20 minutes, watching for a deep golden crust.
Best Reheating Method
For the rice, add a tablespoon of water, cover loosely with foil, and microwave for 90 seconds, stirring halfway. For the shrimp, the oven method (as described above) is best; a microwave will make them rubbery, while a skillet will re‑crisp them if you add a drizzle of butter.