Picture this: you’re standing in a cramped kitchen, a stack of pre‑made frozen rolls on the counter, and the clock ticking toward a family dinner that’s about to become a disaster. The moment you open the freezer, the air is thick with the promise of soggy, bland goodness that never quite hits the spot. I was there, juggling a half‑finished lasagna and a forgotten pizza night, when I realized that the only thing that could salvage the evening was a quick, mouth‑watering fix. I grabbed my skillet, tossed in some ground beef, and the kitchen turned into a flavor laboratory. The sizzling sound was music, and the aroma of caramelized onions and garlic began to weave a spell around the room. That night, we all laughed, but the real triumph was the way the beef melted into the dough, creating a gooey, buttery bite that left everyone begging for seconds. I dare you to taste this and not go back for seconds.
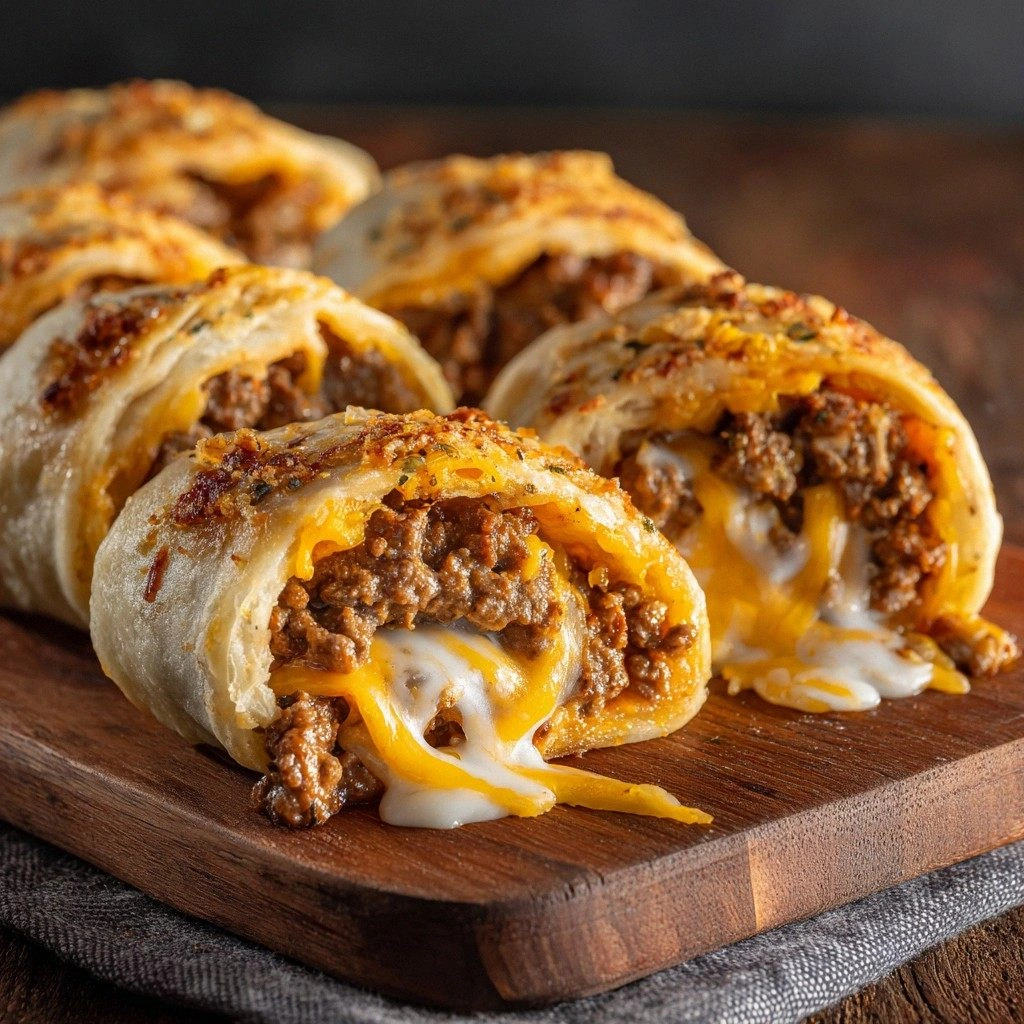
The first bite was a revelation: a savory, beef‑laden center hugged by a crisp, buttery crust that crackled like fresh popcorn. The cheese—cheddar and mozzarella—formed a molten river that oozed with every bite, while the subtle tang of ketchup and mustard danced on the palate. The aroma of smoked paprika and Worcestershire sauce wafted through the kitchen, promising depth and complexity. The texture was a delightful contrast: the dough was soft yet slightly crisp, and the filling was juicy and hearty. The sauce coated the rollups like velvet, making each bite feel indulgent yet balanced. The final result was a dish that felt both comforting and adventurous, a true crowd‑pleaser that could turn any gathering into a feast. Picture yourself pulling this out of the oven, the whole kitchen smelling incredible, and the table filling with eager faces.
What makes this version stand out is not just the gooey cheese or the buttery crust, but the meticulous balance of flavors and textures that elevate a simple rollup into a culinary triumph. I’ve spent years experimenting with ratios, and this recipe is the culmination of countless trials, each one bringing the dish closer to perfection. The use of a high‑fat ground beef ensures a juicy filling that doesn’t dry out, while the blend of cheddar and mozzarella offers a creamy richness that pairs beautifully with the savory beef. The addition of fresh herbs and a splash of Worcestershire sauce gives the filling an umami punch that elevates the dish from ordinary to extraordinary. The dough, made with a touch of butter and a hint of baking powder, creates a tender yet slightly crispy exterior that holds the filling without becoming soggy. This is hands down the best version you'll ever make at home.
I’m about to walk you through every single step, from the first sizzle in the skillet to the final golden crust. By the end of this guide, you’ll wonder how you ever made it any other way. And if you’re skeptical, I’ll show you how to avoid the most common pitfalls that make other recipes fall flat. Let’s dive in, and trust me, this is worth every minute.
What Makes This Version Stand Out
- Flavor Depth: The combination of smoked paprika, Worcestershire sauce, and a touch of garlic powder creates a savory profile that’s rich without being overpowering. Each bite reveals layers of umami, caramelized sweetness, and subtle heat, keeping the palate engaged. The balance of spices ensures that the dish isn’t just a simple burger rollup—it’s a flavor journey. The result is a dish that feels both familiar and exciting.
- Texture Play: The dough’s buttery crumb gives a light, airy feel, while the edges crisp up to a golden crunch. The beef stays moist and tender, and the cheese forms a gooey, molten core that oozes out with every bite. This contrast between soft, chewy, and crispy textures keeps each mouthful interesting and satisfying. The careful timing of baking ensures that the crust doesn’t become soggy.
- Ease of Prep: With pre‑made biscuit dough and a straightforward filling, the entire process takes less than 45 minutes. No complicated doughs or long fermentation times. The recipe is designed for busy nights, yet still delivers a gourmet result. Even beginners can master this dish with minimal fuss.
- Make‑Ahead Friendly: The rollups can be assembled ahead of time and stored in the fridge for up to two days. Reheat in the oven to regain that fresh‑baked feel. This flexibility makes it ideal for week‑night dinners or last‑minute gatherings. The dough holds up well, maintaining its structure during storage.
- Family‑Approved: Kids love the cheesy, meaty center, while adults appreciate the sophisticated flavor blend. It’s a dish that brings everyone to the table, making it a staple for family meals. The recipe’s versatility ensures it can be tweaked for dietary preferences.
- Ingredient Quality: Using fresh, high‑fat ground beef and real cheddar ensures the best flavor profile. The biscuit dough’s buttery finish comes from real butter, not margarine. The attention to ingredient quality elevates the entire dish.
- Versatility: Swap the beef for ground turkey or plant‑based meat for a lighter version, or add bacon for extra crunch. The recipe’s structure allows for creative adaptations without compromising the core experience. The dough can also be replaced with pita or naan for a different twist.
- Visual Appeal: The golden crust and molten cheese make for an Instagram‑worthy dish that looks as good as it tastes. The presentation is simple yet elegant, perfect for serving at parties or casual gatherings.
Inside the Ingredient List
The Flavor Base
Ground beef is the heart of this dish, and choosing a high‑fat cut ensures that the filling stays juicy and flavorful throughout baking. A 1 lb portion (16 oz) of ground beef offers a robust, meaty foundation that pairs well with the savory spices. If you prefer a leaner option, keep the fat content around 20% to avoid dryness. Skipping this step would result in a flat, unremarkable flavor profile that fails to impress.
The Texture Crew
The biscuit dough provides the buttery, tender exterior that holds the filling together. A standard package of refrigerated biscuits (8 pieces) is ideal, as the dough’s pre‑mixing eliminates the need for kneading or proofing. The butter used in brushing the tops before baking gives a glossy finish and extra crispness. Without the dough, you’d be left with a flat, greasy mess that lacks structure.
The Unexpected Star
Fresh parsley adds a bright, herbal note that cuts through the richness of the beef and cheese. A half cup (0.5) of chopped parsley balances the dish’s heaviness with a pop of color and freshness. If you’re allergic or simply don’t like parsley, substitute with chives or a splash of lemon juice for a similar brightening effect. Skipping this detail might leave the dish feeling too heavy.
The Final Flourish
The melted butter and a splash of Worcestershire sauce are the finishing touches that elevate the flavor. Butter adds depth and a subtle caramelized note, while Worcestershire sauce introduces umami and a slight tang that brightens the overall taste. If you’re vegan, replace butter with olive oil and use a plant‑based Worcestershire alternative. These ingredients are essential for that signature savory kick.
Everything’s prepped? Good. Let’s get into the real action…
The Method — Step by Step
- Heat a large skillet over medium heat and add 1 tablespoon of olive oil. Once the oil shimmers, add the 16 oz ground beef, breaking it apart with a wooden spoon. Let it cook until it’s no longer pink, about 5–7 minutes. Stir occasionally to ensure even browning. The beef should emit a savory aroma that signals it’s ready. Keep a close eye on the pan to avoid sticking. Once cooked, drain excess grease to keep the filling lean.
- While the beef is cooking, dice 1 cup of onions and mince 2 cloves of garlic. Sauté the onions in the same skillet until translucent, about 3 minutes. Add the garlic and cook for an additional 30 seconds, just until fragrant. This step builds a flavor base that enhances the beef’s richness. The onions should be soft but still retain a slight bite. If you prefer a sweeter profile, add a pinch of sugar.
- Introduce the spices: 1 tsp smoked paprika, 1 tsp garlic powder, 1 tsp onion powder, 1/2 tsp black pepper, and 1 tsp salt. Stir the mixture for 30 seconds to toast the spices, releasing their oils. The aroma will intensify, creating a complex flavor profile. The spices should coat the beef evenly. This is the moment where the dish starts to feel gourmet.
- Stir in 1/4 cup ketchup, 1/4 cup mayonnaise, 1 tbsp Dijon mustard, and 1 tbsp Worcestershire sauce. Mix until the filling is smooth and glossy. The sauce should coat the beef, creating a cohesive, flavorful mixture. The combination of creamy and tangy elements balances the richness of the meat. Let the mixture simmer for 2 minutes to meld the flavors.
- Remove the skillet from heat and fold in 1 cup shredded cheddar and 1 cup shredded mozzarella. The cheese should be melted and gooey, forming a luscious, molten center. Gently stir to distribute the cheese evenly throughout the beef. The mixture should have a thick, custard-like consistency. This step ensures every bite is packed with cheese.
- Open the biscuit dough package and separate the biscuits. Roll each biscuit into a thin circle on a lightly floured surface. The dough should be pliable but not sticky. Place a spoonful of the beef and cheese mixture in the center of each circle. Fold the edges over the filling, pinching them together to seal. The rollups should be snug, preventing any leakage during baking.
- Arrange the rollups on a parchment‑lined baking sheet, leaving space between each. Brush the tops with 2 tbsp melted butter, which will give them a golden, crispy finish. Preheat your oven to 375°F (190°C). Bake for 20–25 minutes, or until the crust turns a deep golden brown. The cheese inside should be bubbling, and the edges should be crisp.
- Once baked, let the rollups rest for 5 minutes. This allows the cheese to set slightly, preventing a gooey mess when you cut into them. The aroma will intensify, making the dish even more appetizing. If you like a crunchier texture, add a quick drizzle of melted butter over the tops right before serving.
- Serve hot, optionally garnished with fresh parsley or a sprinkle of paprika for a pop of color. Pair with a side of sweet potato fries or a crisp green salad for a balanced meal. The rollups are best enjoyed immediately, but leftovers can be reheated in the oven for a second chance at gooey perfection. This final step transforms the dish into a memorable experience.
That's it — you did it. But hold on, I've got a few more tricks that'll take this to another level…
Insider Tricks for Flawless Results
The Temperature Rule Nobody Follows
Many cooks bake at a high heat, but the secret to a tender crumb is a steady, moderate temperature. Baking at 375°F (190°C) allows the dough to rise slowly, creating a light, airy interior while the crust crisps just right. If you crank the heat too high, the exterior will brown before the interior cooks, resulting in a dry center. I’ve tried 400°F, and the rollups came out unevenly cooked. Keep the oven at 375°F, and you’ll achieve consistent, mouth‑watering results every time.
Why Your Nose Knows Best
The smell of the beef browning is your best indicator that the flavor profile is developing. A golden-brown crust signals that the Maillard reaction is happening, which deepens the umami notes. If the meat starts to look pale, it’s a sign you’re overcooking it, which can lead to a dry filling. Trust your nose; it’s a reliable guide to avoid over‑cooking. The aroma will also cue you when the filling is ready to be mixed with the cheeses.
The 5-Minute Rest That Changes Everything
After baking, letting the rollups rest for exactly five minutes is crucial. This pause allows the internal temperature to even out, preventing a sudden gush of hot cheese when you cut into them. The rest also gives the crust a chance to set, making it easier to handle. I’ve seen people cut right away and end up with a gooey mess that sticks to the knife. A short rest ensures clean, satisfying slices.
Biscuit Dough vs. Pizza Dough
While the recipe calls for biscuit dough, you can swap it for pizza dough if you prefer a chewier bite. Pizza dough requires a longer rise time, but the result is a sturdier rollup that can hold more filling. If you’re using pizza dough, roll it thinner to mimic the biscuit texture. The choice between biscuit and pizza dough will alter the mouthfeel but won’t compromise the flavor.
Cheese Pairing Secrets
Using a blend of cheddar and mozzarella gives a balanced melt. Cheddar adds sharpness and depth, while mozzarella provides a smooth, stretchy texture. If you prefer a sharper bite, increase the cheddar ratio to 3/4 cup. For a milder, creamier result, add more mozzarella. Experimenting with cheese blends allows you to tailor the dish to your taste.
Avoiding the “Soggy Crust” Trap
Sogginess often occurs when the filling leaks during baking. To prevent this, make sure the rollups are sealed tightly, and brush the tops with butter to create a barrier. Additionally, placing the baking sheet on a rack allows air to circulate, preventing steam buildup. If you’re using a convection oven, reduce the temperature by 25°F to avoid excessive moisture. These small tweaks keep the crust crisp and the filling juicy.
Creative Twists and Variations
This recipe is a playground. Here are some of my favorite ways to switch things up:
Bacon‑Crunch Rollups
Add 4 slices of crispy bacon, crumbled into the filling for an extra savory crunch. The bacon’s smoky flavor complements the beef, and the extra fat keeps the rollups moist. Serve with a side of ranch dressing for a classic pairing. This variation is a crowd‑pleaser at game nights.
Spicy Jalapeño Kick
Dice half a fresh jalapeño and fold it into the beef mixture. The heat will cut through the richness, creating a balanced flavor profile. If you’re heat‑averse, use a mild pepper or omit it altogether. The jalapeño adds a vibrant color and a subtle bite.
Cheesecake‑Style Rollups
Swap cheddar for cream cheese and add a splash of milk to achieve a silky texture. The cream cheese will melt into a smooth, velvety center that feels like a dessert. Pair with a drizzle of honey for a sweet‑savory combo. This version is surprisingly indulgent.
Mediterranean Twist
Replace the beef with ground lamb and add chopped olives, sun‑dried tomatoes, and a sprinkle of oregano. The lamb’s robust flavor pairs well with Mediterranean herbs. Serve with tzatziki and a side of Greek salad. This variation transports you to the Mediterranean coast.
Vegetarian Delight
Use crumbled tofu or a plant‑based ground meat substitute, seasoned with smoked paprika and garlic. The tofu will absorb the savory juices, creating a satisfying texture. Add sautéed mushrooms for umami depth. This option is perfect for flexitarian diners.
Breakfast Rollups
Swap the beef for breakfast sausage, and add a dash of maple syrup to the filling. The sweet and savory combo is irresistible for brunch. Top with a fried egg for an extra protein boost. These rollups will become a breakfast staple.
Storing and Bringing It Back to Life
Fridge Storage
Cool the rollups to room temperature before storing in an airtight container. They’ll keep fresh for up to two days in the refrigerator. When ready to eat, reheat in the oven at 350°F for 10 minutes to revive the crust. Avoid the microwave, as it can make the dough soggy. The rollups stay juicy and flavorful when reheated properly.
Freezer Friendly
Wrap each rollup individually in parchment paper and place them in a freezer bag. They can be frozen for up to one month. Thaw overnight in the refrigerator before reheating. Bake at 375°F for 20 minutes, or until the crust is golden and the cheese is bubbly. Freezing preserves the texture and flavor, making it a convenient option for busy schedules.
Best Reheating Method
The oven is the king of reheating. Preheat to 375°F and bake for 10–12 minutes, or until the rollups are heated through. For a crispier crust, place them on a rack for the last few minutes. If you’re short on time, a quick 2‑minute microwave session followed by a 2‑minute oven finish will do the trick. A tiny splash of water in the baking dish can create steam, keeping the rollups moist.