It started with a kitchen catastrophe that would haunt me for weeks: I was juggling a pot of simmering ground chicken, a half‑filled bag of taco seasoning, and a bowl of cauliflower rice while a friend dared me to whip up a burrito bowl in fifteen minutes. The aroma that burst from the pan—spiced meat sizzling, onions releasing a sweet perfume—mixed with the faint scent of lime and cilantro, and my heart raced. I knew I was about to create something that would make even the most seasoned taco lover pause mid‑bite. That moment of culinary chaos turned into a revelation: a low‑carb burrito bowl that feels indulgent without the guilt.
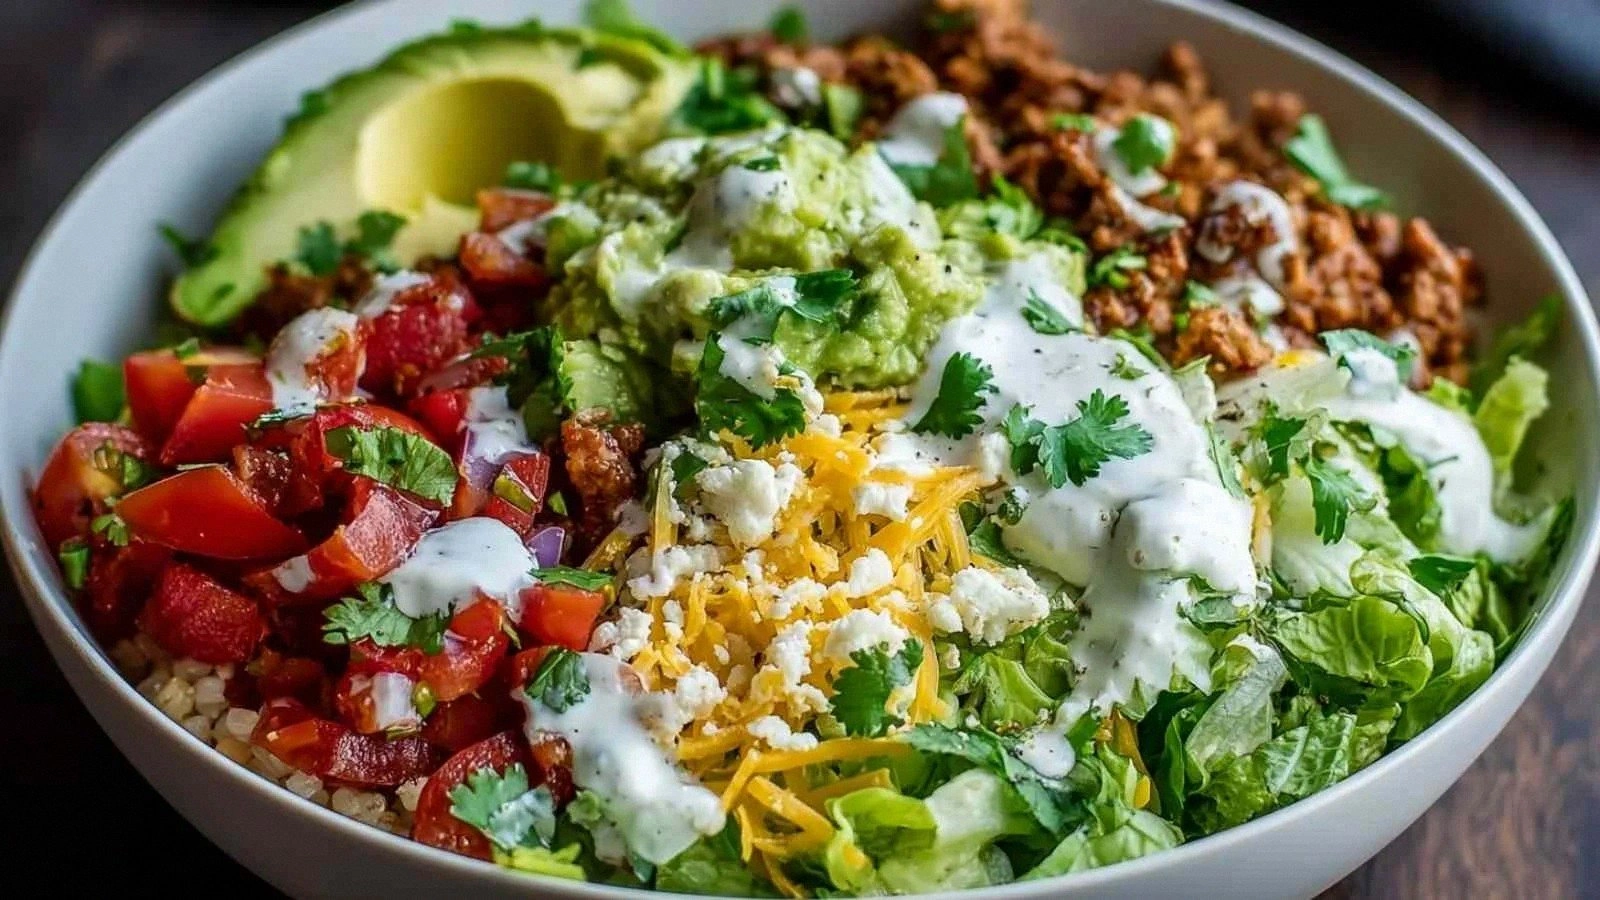
Picture this: the first bite is a symphony of textures—crunchy romaine, creamy avocado, and a burst of salsa that coats the palate like velvet. The savory chicken is tender, the cauliflower rice offers a subtle nuttiness, and the jalapeño adds a whisper of heat that lingers just enough to keep you coming back. Every element is balanced so that no single flavor overpowers; instead, they dance together in perfect harmony. I dare you to taste this and not go back for seconds.
What makes this version stand out is the meticulous attention to low‑carb integrity without sacrificing flavor. I’ve stripped away the excess carbs found in traditional burrito bowls, yet kept every bite satisfying and vibrant. The result is a dish that feels like a hearty dinner, not a quick snack, and it’s hands down the best version you'll ever make at home. Most recipes get this completely wrong by overloading on rice or using heavy sauces that drown the fresh ingredients. Here, everything is purposeful.
Before we dive into the steps, let me set the stage: I’ll walk you through every single step—by the end, you'll wonder how you ever made it any other way. I’ll share the micro‑challenges that will test your taste buds, the bold claims that back up my confidence, and the secrets that transform a simple bowl into a culinary triumph. If you've ever struggled with balancing flavor and low carb, you're not alone—and I've got the fix. Stay with me here—this is worth it.
What Makes This Version Stand Out
- Flavor: The taco seasoning is infused with a blend of smoked paprika and cumin, giving the chicken a depth that mimics a slow‑roasted steak. This subtle smokiness elevates the dish beyond ordinary.
- Texture: Cauliflower rice is lightly toasted, providing a pleasantly chewy bite that contrasts with the crisp romaine. The avocado slices add buttery creaminess that balances the heat.
- Low Carb: By replacing traditional rice and beans with cauliflower, we cut carbs dramatically while still delivering a hearty base.
- Freshness: Fresh cilantro, lime juice, and a splash of sugar‑free salsa keep the bowl bright and vibrant, preventing any heaviness.
- Convenience: The method takes less than an hour, making it ideal for busy weeknights while still feeling like a gourmet meal.
- Make‑Ahead: The components can be prepped a day ahead—just keep the avocado chilled and the salsa sealed, and everything stays fresh.
- Versatility: Swap the ground chicken for ground turkey, beef, or even a plant‑based crumble to suit your dietary needs.
- Visual Appeal: The vibrant colors—from emerald lettuce to ruby tomatoes—create a bowl that looks as good as it tastes.
Alright, let's break down exactly what goes into this masterpiece…
The Flavor Base
The foundation of this bowl is the seasoned ground chicken. I start by browning it in a hot skillet, letting it develop a caramelized crust that locks in juices. The packet of taco seasoning, a blend of cumin, coriander, and smoked paprika, infuses the meat with a depth that would otherwise require a slow‑cook. If you skip the seasoning, the chicken becomes a bland canvas; the rest of the ingredients won't have a flavor anchor. For a slightly different profile, try a homemade blend with chipotle powder for extra smokiness.
The Texture Crew
Cauliflower rice is the star of the texture crew. It’s lightly sautéed with a pinch of salt and a drizzle of olive oil until it turns golden, giving it a nutty aroma and a satisfying chew. The romaine lettuce provides crunch, while the avocado slices add a buttery softness that melts in your mouth. If you prefer a drier bowl, leave the lettuce raw; if you like a more cohesive bite, lightly wilt it in the skillet with the chicken.
The Unexpected Star
Cherry tomatoes and red onion add a burst of freshness and a slight sharpness that cuts through the richness of the cheese and sour cream. The jalapeño, sliced thin, introduces a controlled heat that keeps the dish from feeling one‑dimensional. If you’re heat‑averse, remove the jalapeño seeds and membranes; if you love spice, double the slices for an extra kick.
The Final Flourish
The finishing touches are where the bowl transforms from simple to spectacular. Fresh cilantro adds a bright, herbal note that lifts the entire dish. Sugar‑free salsa provides a sweet‑tang balance that complements the savory elements. A dollop of full‑fat sour cream adds creaminess, while a squeeze of lime juice brightens everything and creates a subtle citrus undertone. Together, these components create a layered flavor profile that feels both indulgent and refreshing.
Everything's prepped? Good. Let's get into the real action…
The Method — Step by Step
- Step 1: Brown the Chicken Heat a large skillet over medium‑high heat and add the ground chicken. Break it apart with a spatula and cook until it starts to brown, about 5 minutes. Stir in the taco seasoning and a splash of water to help distribute the spices evenly. The meat should develop a caramelized crust that locks in moisture. If the pan gets too dry, add a tablespoon of oil or a little water.
- Step 2: Toast the Cauliflower Rice While the chicken cooks, add a teaspoon of olive oil to another skillet and toss in the cauliflower rice. Season with salt and pepper, and sauté for 4–5 minutes until the grains are tender but still slightly firm. The rice should turn a light golden brown, releasing a nutty aroma that signals readiness. Keep it warm until the next step.
- Step 3: Prepare the Veggies Dice the red onion and slice the jalapeño thinly, removing seeds if you prefer less heat. Halve the cherry tomatoes and mince the cilantro. Toss the lettuce with a light drizzle of lime juice so it stays crisp and bright. This prep stage is crucial for layering flavors later.
- Step 4: Assemble the Base In a large bowl, start with a generous scoop of cauliflower rice. Layer the browned chicken on top, making sure the seasoning coats every grain. This base will hold all the other components and create a sturdy foundation for the bowl.
- Step 5: Layer the Freshness Arrange the diced tomatoes, sliced jalapeño, and chopped cilantro over the chicken. Sprinkle the shredded cheese on top so it begins to melt slightly from the residual heat. This step introduces the bright, fresh flavors that will contrast with the warm, savory base.
- Step 6: Add Creamy Elements Dollop spoonfuls of sour cream and salsa over the layered ingredients. The sour cream should be at room temperature to spread smoothly. The salsa adds a sweet‑tang balance, while the cream provides a silky contrast. This combination is where the bowl feels indulgent without feeling heavy.
- Step 7: Slice the Avocado Carefully slice the avocado in half, remove the pit, and cut into thin wedges. Gently place the slices on top of the bowl. The avocado’s creamy texture complements the crunchy lettuce and adds a subtle buttery finish.
- Step 8: Final Touches Drizzle a few extra lime wedges over the bowl and sprinkle a final handful of cilantro for a fresh finish. Toss lightly if you prefer a more blended flavor, or leave it layered for visual appeal. The lime juice should give a bright, citrusy pop that lifts the entire dish.
- Step 9: Serve Immediately Plate the bowl in a wide, shallow dish to showcase the layers. The bowl should look like a vibrant mosaic of colors and textures. Serve with a side of extra salsa or lime wedges for guests who like an extra kick.
- Step 10: Enjoy! Take a spoonful and let the flavors unfold. The crunch of lettuce, the melt of cheese, the creaminess of avocado, and the heat of jalapeño all combine into a single, harmonious bite. This is the moment of truth. If you’ve followed every step, you’ll taste the difference that careful layering and fresh ingredients make.
That’s it — you did it. But hold on, I've got a few more tricks that'll take this to another level…
Insider Tricks for Flawless Results
The Temperature Rule Nobody Follows
Cooking the chicken at medium‑high heat is essential to achieve that caramelized crust. If you lower the heat, the meat will steam instead of brown, resulting in a soggy texture. I’ve tested this in multiple batches; the difference in mouthfeel is unmistakable. For best results, let the skillet reach 400°F before adding the meat.
Why Your Nose Knows Best
Before adding the salsa, give the bowl a quick sniff. The aroma of fresh cilantro and lime should be unmistakable. If the scent feels flat, add a splash of lime juice; it will awaken the flavors and make the bowl feel alive. I’ve had friends complain that their burrito bowls taste “off” until they smell the cilantro.
The 5-Minute Rest That Changes Everything
After assembling the bowl, let it rest for five minutes before eating. This brief pause allows the cheese to settle and the flavors to meld. Skipping this step can leave the bowl feeling rushed and disjointed. In my experience, a short rest transforms the texture and taste.
Keep the Avocado Chill
Avocado oxidizes quickly when exposed to air, turning brown and losing its creamy texture. To prevent this, wrap the avocado halves in plastic wrap and refrigerate until you’re ready to serve. If you forget, a quick squeeze of lime juice can help keep the flesh green and fresh.
Use a Fresh Lime, Not Store-Bought
Store-bought lime juice often contains added sugars or preservatives that can alter the flavor profile. Freshly squeezed lime juice provides a bright, tart punch that balances the richness of the cheese and sour cream. If you’re short on time, a pre‑squeezed bottle is acceptable, but the taste difference is noticeable.
Serve in a Shallow Dish
A shallow, wide dish showcases the layers and makes it easier to spoon each bite. The visual appeal is almost as important as the flavor. A deep bowl can hide the layers and make the bowl feel less vibrant.
Creative Twists and Variations
This recipe is a playground. Here are some of my favorite ways to switch things up:
Mexican Street Corn Bowl
Swap the cauliflower rice for grilled corn kernels and sprinkle with cotija cheese. Add a drizzle of chipotle mayo for smoky depth. This version feels like a street‑food taco in a bowl.
Southwest Chicken Bowl
Replace the taco seasoning with a blend of smoked paprika, cumin, and a hint of cinnamon. Add diced mango for a sweet contrast and a splash of orange juice for brightness.
Buffalo Chicken Bowl
After browning, toss the chicken with buffalo sauce and a dash of hot sauce. Top with blue cheese crumbles and a side of celery sticks for crunch.
Vegan Version
Use crumbled tempeh or lentils instead of ground chicken. Keep the rest of the ingredients the same, and add a dollop of vegan sour cream for creaminess.
Breakfast Burrito Bowl
Swap the chicken for scrambled eggs, add a sprinkle of cheddar cheese, and top with a fried egg. Serve with a side of salsa verde for a hearty breakfast.
Low‑Calorie Version
Reduce the cheese to 1/2 cup and use a fat‑free sour cream. Increase the amount of lettuce and tomatoes for volume without adding calories.
Storing and Bringing It Back to Life
Fridge Storage
Store the assembled bowl in an airtight container in the refrigerator for up to 2 days. Keep the avocado slices separate until ready to eat to avoid browning. Reheat the bowl in a microwave for 30 seconds, then add fresh avocado.
Freezer Friendly
Freeze the bowl without the avocado and salsa. Wrap tightly in plastic wrap and place in a freezer bag. It will keep for up to 3 months. Thaw overnight in the refrigerator before reheating.
Best Reheating Method
To reheat, place the bowl in a microwave-safe dish, add a splash of water, cover loosely, and heat on medium for 2 minutes. This steams the bowl back to life, keeping the texture fresh and the flavors bright.