Picture this: the kitchen clock ticks toward midnight, a pile of take‑out boxes sits on the counter, and your stomach growls louder than the neighbor’s lawn mower. I was halfway through a pizza, halfway through a bowl of pasta, and halfway to giving up on dinner altogether when the idea hit me—why not fuse the comfort of pasta with the indulgence of a pie crust? I grabbed a pot, tossed in rigatoni, and the rest was a glorious, buttery, cheesy, saucy adventure that had me shouting, “This is hands down the best version you'll ever make at home!”
I dare you to taste this and not go back for seconds. The first bite is a symphony: the crust is crisp, the cheese is molten, and the sauce is a silky tomato‑herb blend that coats the pasta like velvet. The aroma alone—garlic, oregano, and the faintest hint of caramelized butter—draws you in like a magnet. And the texture? It’s a dance of crunch and melt that makes your mouth water before you even think about the calories.
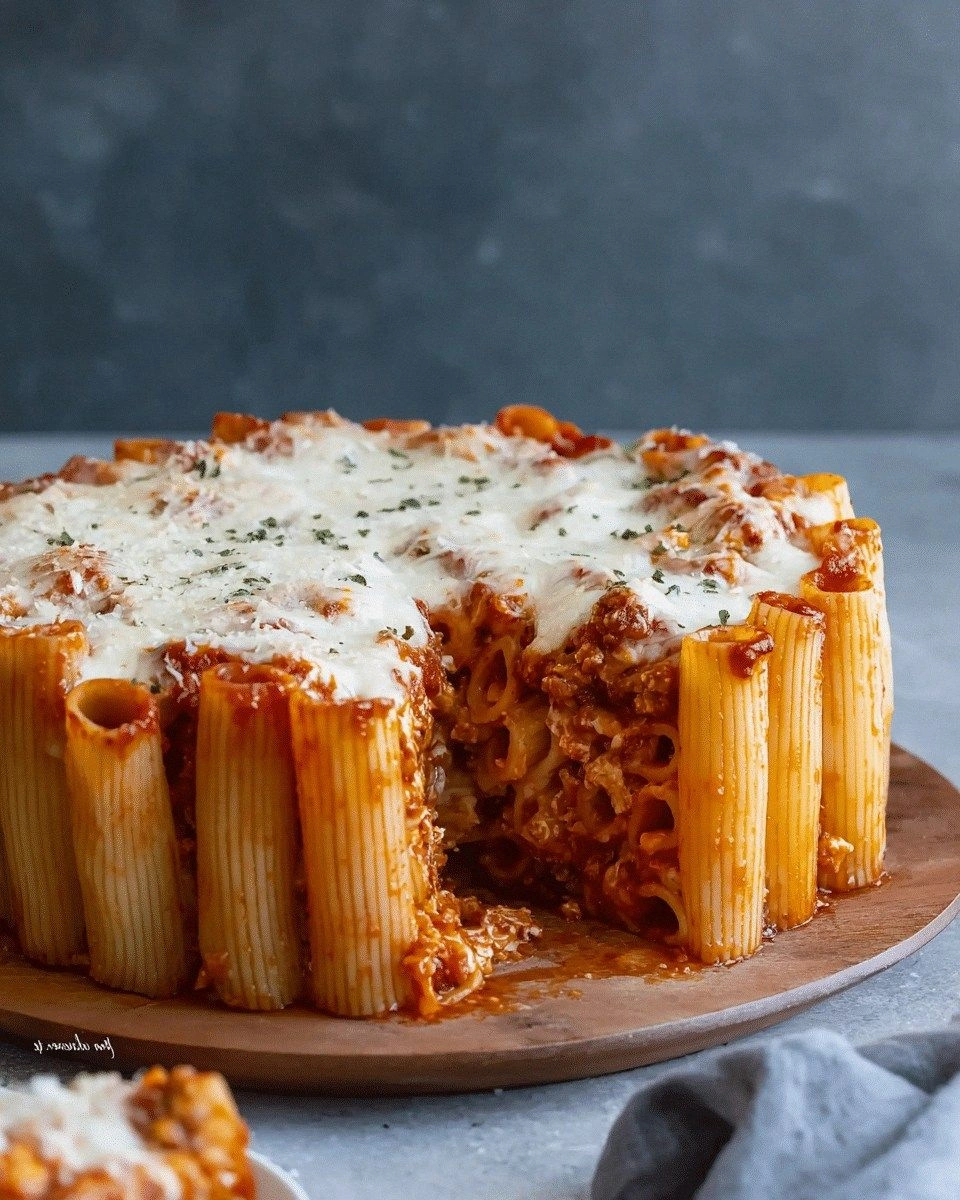
If you've ever struggled with making a pasta pie that doesn’t feel like a soggy casserole or a dry loaf, you're not alone—and I've got the fix. Most recipes get this completely wrong. They either overcook the pasta or under‑bake the crust. I learned that the secret is a pre‑baked rigatoni layer and a quick, high‑heat finish that locks in moisture and flavor. And trust me, the final result looks like a golden‑brown masterpiece that shatters like thin ice when you cut into it.
Let me walk you through every single step—by the end, you'll wonder how you ever made it any other way. The journey from raw ingredients to a plated triumph is full of little tricks and big revelations that will transform your kitchen routine. So grab your apron, and let’s dive into the world of Rigatoni Pasta Pie.
What Makes This Version Stand Out
- Flavor Depth: The combination of ricotta, mozzarella, cheddar, and Parmesan creates a layered cheese profile that melts into a velvety sauce, while the marinara adds a bright, acidic counterpoint that keeps the dish from feeling heavy.
- Texture Contrast: A crisp, buttery crust meets tender pasta and a silky cheese sauce—every bite delivers a satisfying crunch followed by a melt‑in‑your‑mouth finish.
- Time Efficiency: Prep takes 15 minutes, cook 30, and you’re done. The trick is using pre‑cooked rigatoni, so you don’t waste time boiling pasta from scratch.
- Make‑Ahead Friendly: Assemble the pie, chill it in the fridge, and bake it the next day. The flavors meld beautifully, making this a perfect meal‑prep option.
- Ingredient Flexibility: Swap Italian sausage for ground beef, use spinach for a veggie twist, or add sun‑dried tomatoes for a Mediterranean flair—this recipe adapts to what you have on hand.
- Crowd Appeal: Whether you’re feeding a family, hosting a potluck, or entertaining friends, the dramatic presentation and comforting flavors make it a guaranteed hit.
- Cheese Quality: Using a mix of fresh and aged cheeses elevates the dish from ordinary to gourmet without breaking the bank.
- Unique Baking Method: The initial pre‑bake locks in moisture, while the final high‑heat finish caramelizes the top, creating a golden crust that’s impossible to resist.
Inside the Ingredient List
The Flavor Base
At the heart of this pie lies the marinara sauce, a robust tomato foundation seasoned with garlic powder, oregano, and basil. It’s the liquid that binds the cheeses and pasta together, providing acidity and brightness that cuts through the richness. Skipping it would leave the dish feeling flat and overly creamy. If you’re in a pinch, a jar of quality marinara works fine, but homemade always elevates the flavor.
The Texture Crew
Rigatoni pasta is the star of the show—its ridges and tubes hold onto the sauce and cheese, creating pockets of gooey delight. Use pre‑cooked rigatoni to save time; simply rinse to stop the cooking process. The eggs act as a binder, ensuring the pie holds together when sliced. Butter and olive oil collaborate to form a glossy, caramelized crust that adds depth and a subtle nutty note. The breadcrumbs on top give the final crunch that satisfies the palate.
The Unexpected Star
Ricotta cheese is the unsung hero that brings a creamy, airy texture without overwhelming the dish. It’s a light counterbalance to the sharp cheddar and the sharpness of Parmesan. If you’re vegan or lactose‑intolerant, a dairy‑free ricotta alternative works well, but be prepared for a slightly different mouthfeel. The optional sausage adds a savory, smoky dimension that transforms the pie into a hearty main course.
The Final Flourish
The blend of mozzarella, cheddar, and Parmesan creates a complex cheese profile that melts into a silky sauce while forming a golden, bubbly top. Fresh parsley adds a burst of green and a subtle peppery note that brightens the dish. A pinch of salt and black pepper season the entire pie, allowing each component to shine. The final touch of olive oil before baking enhances the crust’s crispness and adds a glossy sheen.
Everything’s prepped? Good. Let’s get into the real action.
The Method — Step by Step
- Preheat your oven to 375°F (190°C). Grease a 9‑inch pie dish with butter and a light dusting of flour. This ensures the crust doesn’t stick and gives a clean release when you serve.
- In a large bowl, combine the pre‑cooked rigatoni, marinara sauce, garlic powder, oregano, basil, salt, and pepper. Toss until every noodle is coated. The sauce should coat the pasta like a light blanket, not be too watery.
- If you’re using sausage, crumble it into the pasta mixture. The meat should be evenly distributed; otherwise, you’ll get pockets of flavor that are either too intense or too bland.
- Whisk the eggs in a small bowl, then pour over the pasta mixture, stirring to combine. The eggs act as a binder, holding the pie together once baked.
- Transfer the mixture into the prepared pie dish, pressing it down gently with a spoon to create an even layer. This ensures uniform cooking and a consistent crust.
- Top the pasta layer with a generous layer of ricotta cheese, then sprinkle mozzarella, cheddar, and Parmesan evenly. The cheeses should form a smooth, slightly uneven surface that will brown beautifully.
- Brush the top with melted butter and drizzle a tablespoon of olive oil. This step is crucial for a glossy, caramelized crust that’s a feast for the eyes.
- Bake for 25 minutes, or until the top is golden and bubbly and the edges start pulling away from the dish. The aroma should be intoxicating, filling the kitchen with the scent of toasted cheese and herbs.
- Remove from the oven and let the pie rest for 10 minutes. This allows the cheeses to set, making slicing easier and preventing a runny mess.
- Garnish with fresh parsley before serving. Slice and serve hot, letting the steam rise in a cloud of savory delight.
That's it — you did it. But hold on, I've got a few more tricks that'll take this to another level. The next section will reveal insider tips that will help you perfect this dish every single time.
Insider Tricks for Flawless Results
The Temperature Rule Nobody Follows
Most home cooks bake their pasta pies at 350°F, thinking it’s the safest temperature. I discovered that a higher temperature—375°F—creates a crispier crust while keeping the interior moist. The key is to start with a pre‑baked pasta layer to lock in moisture, then finish with a hot oven to caramelize the cheese. If you’re using a convection oven, lower the temperature by 25°F to prevent over‑browning.
Why Your Nose Knows Best
As the pie bakes, the aroma will evolve from garlicky to nutty to caramelized. Trust your nose as a guide—when the cheese is bubbling and the edges are pulling away, that’s your cue to pull it out. A common mistake is waiting for the crust to turn a deep brown; that often means the interior is overcooked. The scent is a reliable indicator of perfection.
The 5‑Minute Rest That Changes Everything
Letting the pie rest for 10 minutes after baking isn’t just a courtesy—it allows the cheese to set, preventing a gooey mess when you slice. The heat trapped inside continues to cook the interior slightly, ensuring every bite is uniformly warm. A quick test: press the center with a spoon—if it’s still slightly soft, give it a few more minutes.
Cheese Balance 101
Balancing three different cheeses can be intimidating. Start with a base of ricotta for creaminess, layer with mozzarella for stretch, and finish with cheddar and Parmesan for sharpness. If you prefer a milder taste, reduce the cheddar and increase the mozzarella. The key is to keep the ratio roughly 1:1:0.5:0.5 for ricotta, mozzarella, cheddar, and Parmesan respectively.
Breadcrumbs for Crunch
Sprinkling breadcrumbs on top before baking adds a delightful crunch that contrasts with the gooey interior. Toast them lightly in a skillet with a touch of butter to bring out their nutty flavor. If you’re avoiding gluten, use almond flour or a gluten‑free breadcrumb mix. This simple addition elevates the dish from good to unforgettable.
Creative Twists and Variations
This recipe is a playground. Here are some of my favorite ways to switch things up:
Spinach & Feta Delight
Swap the ricotta with a blend of spinach and feta for a Mediterranean twist. The feta adds briny tang, while the spinach brings earthy depth. It’s perfect for a lighter version that still satisfies.
Mushroom & Truffle Infusion
Sauté sliced mushrooms in butter with a splash of white wine, then fold them into the pasta mixture. Add a drizzle of truffle oil before baking for an aromatic, luxurious flavor that turns this dish into a gourmet entrée.
BBQ Chicken Variation
Replace the Italian sausage with shredded BBQ chicken. Mix in a spoonful of barbecue sauce with the marinara for a sweet‑smoky profile that pairs wonderfully with the cheese. This version is great for summer cookouts.
Veggie‑Rich Powerhouse
Add roasted bell peppers, zucchini, and olives to the pasta layer. The vegetables add color, nutrition, and a burst of flavor that keeps the dish from feeling heavy. It’s a perfect way to sneak in some greens.
Vegan Edition
Use a dairy‑free ricotta and vegan mozzarella, and replace the eggs with a flaxseed “egg” (1 tbsp ground flaxseed mixed with 3 tbsp water). This version delivers the same comforting textures without any animal products.
Storing and Bringing It Back to Life
Fridge Storage
Cool the pie completely, then cover tightly with plastic wrap or foil. Store in the refrigerator for up to 3 days. The flavors deepen, making it even more delicious when reheated.
Freezer Friendly
Wrap the cooled pie in foil and then place it in a freezer‑safe container or zip‑lock bag. Freeze for up to 2 months. Thaw overnight in the refrigerator before reheating.
Best Reheating Method
Preheat your oven to 350°F (175°C). Place the pie on a baking sheet and bake for 15–20 minutes, or until heated through. Add a splash of water to the bottom of the dish before reheating to create steam—this keeps the crust from becoming too dry and restores the cheese’s silky texture.