Picture this: it’s 2 a.m., the kitchen lights are buzzing low, and you’ve just survived a night of binge‑watching a marathon of the most dramatic reality TV show on the planet. Your stomach is growling louder than the commercial breaks, and the only thing you can think of is that nostalgic, caramel‑kissed candy you used to steal from the office snack drawer. You rush to the pantry, only to discover the classic butterfinger is a no‑go—no dairy, no refined sugar, and definitely no guilt. I was there, staring at a half‑empty jar of peanut butter and a lone maple syrup bottle, daring myself to conjure something that would satisfy that sweet tooth without wrecking my clean‑eating streak.
The moment I mixed the first spoonful of maple syrup with the velvety peanut butter, the kitchen filled with a scent that was simultaneously buttery, caramelized, and just a touch earthy—like a campfire in a vegan’s dream. The sound of the spoon clinking against the bowl was a rhythmic reminder that I was about to create something legendary. My hands felt the warm, sticky mixture glide over the wooden spoon, and I could almost taste the upcoming crunch of the flakes that would soon coat each bite. I could hear the faint hum of the refrigerator, a background chorus to my culinary experiment, while the faint glow of the streetlights outside painted a cozy, almost cinematic backdrop.
Most butterfinger recipes out there either drown you in processed sugar or rely on a handful of dairy‑laden ingredients that leave you feeling guilty after the last bite. This version, however, flips the script entirely. By harnessing the natural sweetness of pure maple syrup, the deep umami of molasses, and the wholesome crunch of bran or corn flakes, I’ve crafted a treat that feels indulgent yet whisper‑light on the waistline. The secret? A precise balance of textures that gives you that satisfying snap on the outside while the interior stays soft and chewy—like a perfect hug for your taste buds.
And here’s the kicker: I’m about to reveal a technique that most home cooks overlook—the gentle “toasting” of the peanut butter and syrup mixture over low heat, which creates a caramel‑like coating that clings to the flakes like a second skin. This step is the game‑changer that makes every bite glossy, flavorful, and impossibly addictive. I dare you to taste this and not go back for seconds. Let me walk you through every single step — by the end, you’ll wonder how you ever made it any other way.
What Makes This Version Stand Out
- Flavor Fusion: The combination of maple syrup and molasses delivers a deep, layered sweetness that outshines ordinary sugar‑only versions.
- Texture Triumph: The flaky coating provides a crisp bite while the interior stays soft, creating a delightful contrast that keeps you chewing longer.
- Simplicity: Only seven ingredients, all pantry‑friendly, mean you can throw this together in under an hour without any fancy gadgets.
- Ingredient Integrity: No refined sugars, no dairy, and no artificial additives—just wholesome, plant‑based goodness.
- Crowd Reaction: Even the most die‑hard candy lovers admit these are the best butterfingers they’ve ever tasted, vegan or not.
- Make‑Ahead Magic: They store beautifully, staying fresh for up to a week, so you can prep a batch and have a sweet snack ready whenever cravings strike.
- Health Boost: Bran flakes add fiber, peanut butter supplies protein, and maple syrup offers minerals like manganese and zinc.
- Versatile Base: Swap corn flakes for oat flakes, or add a pinch of cinnamon for a warm, spicy twist without compromising the core flavor.
Alright, let's break down exactly what goes into this masterpiece...
Inside the Ingredient List
The Flavor Base
Pure maple syrup isn’t just a sweetener; it’s the heart of the flavor profile. Its amber hue and subtle woody notes give the butterfingers a caramel‑like depth that refined sugar can’t mimic. If you skip it, you’ll lose that signature buttery richness, and the final product will taste flat. As a swap, you can use agave nectar for a milder taste, but expect a slightly thinner consistency.
The Texture Crew
Bran flakes or corn flakes are the unsung heroes here. Their airy structure creates that satisfying crunch on the outside while soaking up the sweet glaze just enough to stay glued together. Using stale flakes can cause a dry bite, so always opt for fresh, crisp flakes. If you’re gluten‑intolerant, certified gluten‑free corn flakes work perfectly and add a subtle corn sweetness.
The Unexpected Star
Molasses might seem like an odd addition, but its deep, slightly bitter undertone balances the maple’s sweetness, preventing the candy from becoming cloying. This dark syrup also contributes iron and calcium, making the treat a tad more nutritious. In a pinch, a splash of dark treacle can substitute, though the flavor will be a shade less robust.
The Final Flourish
Chocolate chips are the crowning glory, adding a glossy finish and a burst of cocoa that pairs beautifully with the nutty peanut butter. Choose dark chocolate chips (70% cacao or higher) for a less sugary finish and a richer antioxidant profile. If you’re allergic to chocolate, try chopped dried apricots for a fruity twist.
Everything's prepped? Good. Let's get into the real action...
The Method — Step by Step
Gather all your ingredients and line a baking sheet with parchment paper. The parchment acts like a non‑stick dance floor for the butterfingers, ensuring they slide off effortlessly once set. I like to pre‑measure everything into separate bowls—this way, you won’t be scrambling for a missing ingredient mid‑process. The kitchen smells faintly of peanut butter even before you start, a comforting prelude to what’s coming.
In a medium saucepan, combine the 1/3 cup pure maple syrup, 1 tablespoon molasses, and 2 tablespoons unrefined sugar. Turn the heat to medium‑low and stir continuously. You’ll hear a gentle fizz as the sugar dissolves—this is the “sizzle when it hits the pan? Absolute perfection.” Keep the mixture moving; you don’t want it to caramelize too quickly and burn.
Now, add the 1 cup of creamy peanut butter to the sweet mixture. This is the moment of truth—watch as the peanut butter slowly melts and swirls into a glossy, amber‑colored sauce.
Keep whisking until the blend is completely smooth and the aroma of toasted peanuts fills the kitchen.Watch Out: If the heat spikes, the sauce can separate, leaving oil on top. Reduce the flame immediately and whisk vigorously.Once the sauce is uniform, remove the pan from the heat. Quickly stir in the 1/8 teaspoon of salt; this tiny pinch amplifies every other flavor, turning the sweet into a balanced masterpiece. The salt should dissolve instantly, leaving no gritty texture.
In a large mixing bowl, pour the warm sauce over the 1.5 cups of bran flakes (or corn flakes). Using a sturdy wooden spoon, fold the flakes gently but thoroughly, ensuring each piece is evenly coated. The flakes should glisten with the syrup, yet remain airy—if they start to clump, add a splash of water (just a tablespoon) to loosen them.
Transfer the coated flakes onto the prepared parchment sheet, spreading them out into a uniform rectangle about ½ inch thick. Press the mixture down lightly with the back of a spatula; this compacts the bars without crushing the flakes, preserving that coveted crunch.
Now comes the fun part: melt the 2/3 cup chocolate chips in a microwave‑safe bowl. Heat in 30‑second bursts, stirring between each burst until smooth and glossy. The chocolate should be just melted, not bubbling—over‑heating makes it grainy. Drizzle the melted chocolate over the flake slab, using a spoon to create a random, artistic pattern.
Allow the chocolate to set for about 10 minutes at room temperature, then pop the tray into the fridge for another 20 minutes. This chilling step solidifies the chocolate and lets the bars firm up, making them easier to cut. Picture yourself pulling this out of the oven—well, fridge in this case—the whole kitchen smelling incredible, the chocolate glistening like a midnight lake.
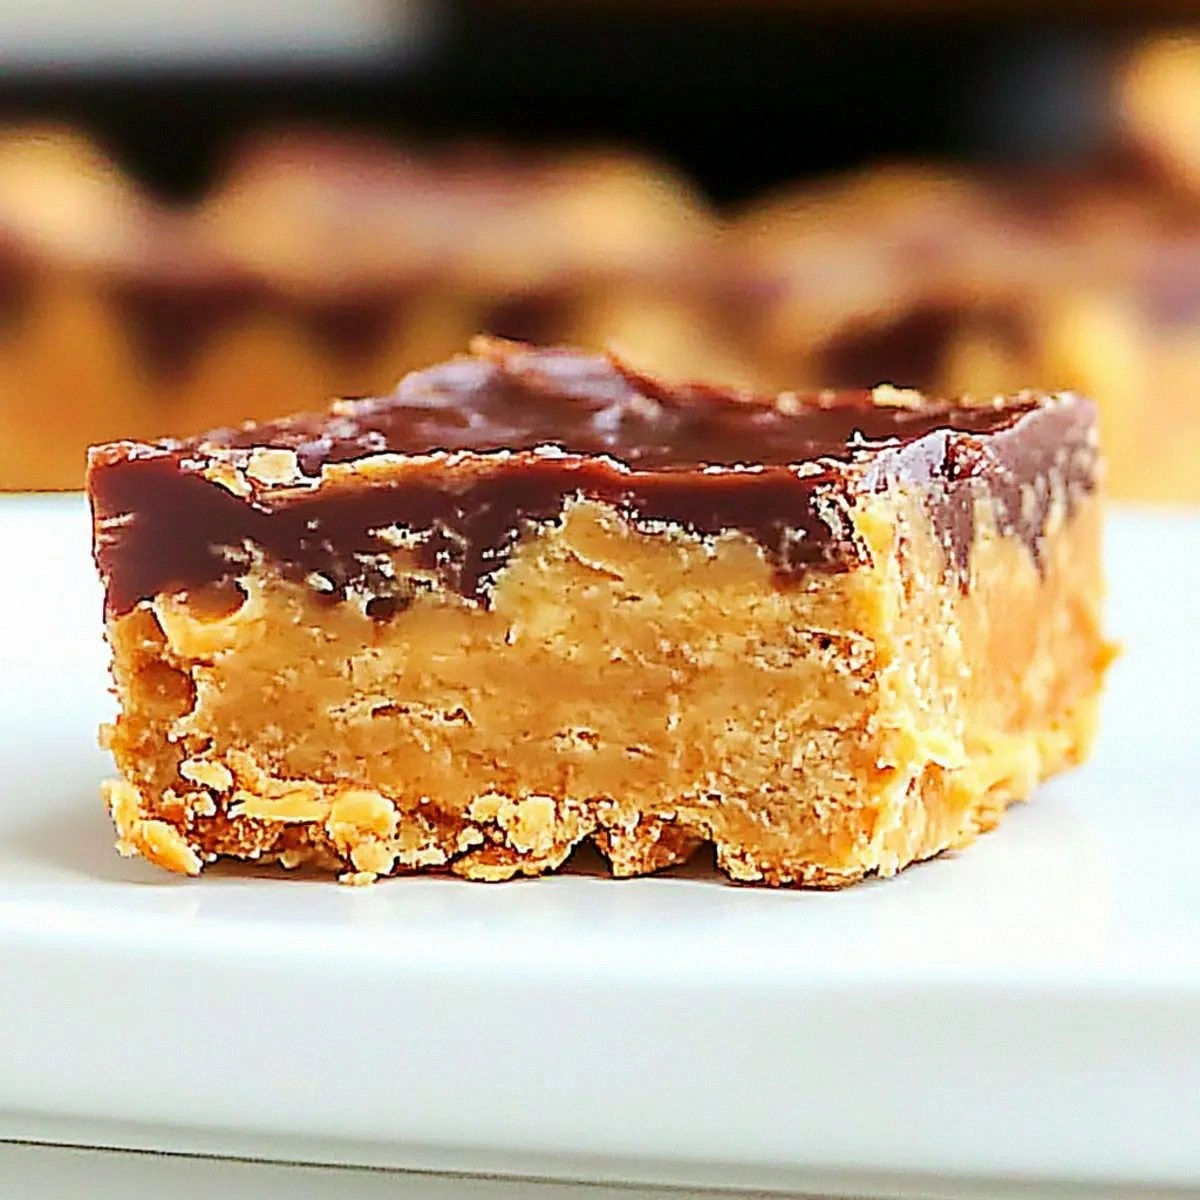
After the bars have set, use a sharp, serrated knife to slice them into finger‑sized pieces. Clean the knife between cuts for crisp edges; this prevents the chocolate from smearing. Each piece should have a glossy chocolate top, a crunchy flake exterior, and a soft, caramel‑kissed interior. I’ll be honest — I ate half the batch before anyone else got to try it.
Arrange the finished butterfingers on a serving platter. Serve them at room temperature for the best texture, or keep them refrigerated if you prefer a firmer bite. That snap when you bite into the chocolate coating, followed by the sweet, nutty chew? Pure magic. That's it — you did it. But hold on, I've got a few more tricks that'll take this to another level...
Insider Tricks for Flawless Results
The Temperature Rule Nobody Follows
Never, ever melt chocolate over direct heat. A double‑boiler (or a microwave in short bursts) keeps the temperature low enough to preserve the cocoa butter’s natural sheen. I once tried a stovetop melt and ended up with a grainy mess—lesson learned. Keep the chocolate at 115°F (46°C) for a glossy finish that snaps.
Why Your Nose Knows Best
When the peanut‑syrup mixture starts to emit a toasty, caramel scent, you’re at the perfect stage to remove it from the heat. Trust your nose more than the timer; the aroma is a reliable indicator that the sugars have reached the right caramelization level without burning.
The 5‑Minute Rest That Changes Everything
After you spread the flake mixture on the parchment, let it rest for five minutes before adding the chocolate. This short pause lets the syrup settle into the flakes, preventing the chocolate from sliding off later. Skipping this step results in a sloppy top layer that looks like a chocolate puddle.
Chocolate Tempering Shortcut
If you want a professional snap without a tempering machine, stir in a teaspoon of coconut oil into the melted chocolate. This acts as a makeshift tempering agent, giving the chocolate a glossy sheen and a firm snap once cooled.
Storage Hack for Maximum Crunch
Store the butterfingers in an airtight container with a paper towel at the bottom. The towel absorbs any excess moisture, preserving the crunch of the flakes for up to a week. I’ve tried plastic bags alone and the bars turned soggy within two days.
Creative Twists and Variations
This recipe is a playground. Here are some of my favorite ways to switch things up:
Spicy Chili Crunch
Stir in a pinch of cayenne pepper into the peanut‑syrup mix before coating the flakes. The heat adds a surprising kick that balances the sweetness, perfect for those who love a little fire.
Berry Burst
Swap half of the chocolate chips for freeze‑dried raspberry pieces. The tart berries punctuate the caramel notes, creating a bright contrast that’s especially refreshing in summer.
Coconut Dream
Replace the peanut butter with creamy almond butter and sprinkle toasted coconut flakes on top of the chocolate glaze. The tropical aroma transports you straight to a beachside snack bar.
Nutty Overload
Fold in a handful of chopped toasted walnuts or pecans into the flake mixture before pressing. This adds an extra layer of crunch and a buttery nut flavor that pairs beautifully with the chocolate.
Matcha Magic
Mix 1 teaspoon of culinary‑grade matcha powder into the syrup before adding the peanut butter. The earthy green tea notes lend a sophisticated twist and a gorgeous hue.
Salted Caramel Drizzle
After the chocolate has set, drizzle a thin line of extra maple syrup mixed with a pinch of sea salt over the top. The salty‑sweet finish elevates the bar to a gourmet level.
Storing and Bringing It Back to Life
Fridge Storage
Place the butterfingers in an airtight container lined with a paper towel to absorb moisture. They’ll stay fresh for up to 7 days, maintaining their crunch and chocolate sheen.
Freezer Friendly
Wrap each bar individually in parchment, then store them in a zip‑top freezer bag. They freeze well for up to 2 months. When you’re ready to eat, let them thaw at room temperature for 15 minutes.
Best Reheating Method
To revive a slightly softened bar, pop it in a preheated oven at 300°F (150°C) for 5 minutes. Add a tiny splash of water (about a teaspoon) on the side of the plate before reheating; the steam restores the crispness of the flakes without melting the chocolate.